Activations: managing participants
During an activation cycle, you will be able to see new participant sessions as they join the experiment. You will then be able to manually approve or reject these participant sessions, and download their data.
Before continuing with this section, it is useful to understand the different types of experiment states (Draft, Collection), and the different activation states (Active, Inactive, Paused). For more details on these states, see the Activations: overview section.
Additionally, it is important to understand how to activate an experiment and reserve tokens for participant sessions. For more details on this process, see the Activations: activating your experiment & payments section.
Monitoring participant sessions
Once you have activated your experiment, you will be able to see new participant sessions as they join the experiment.
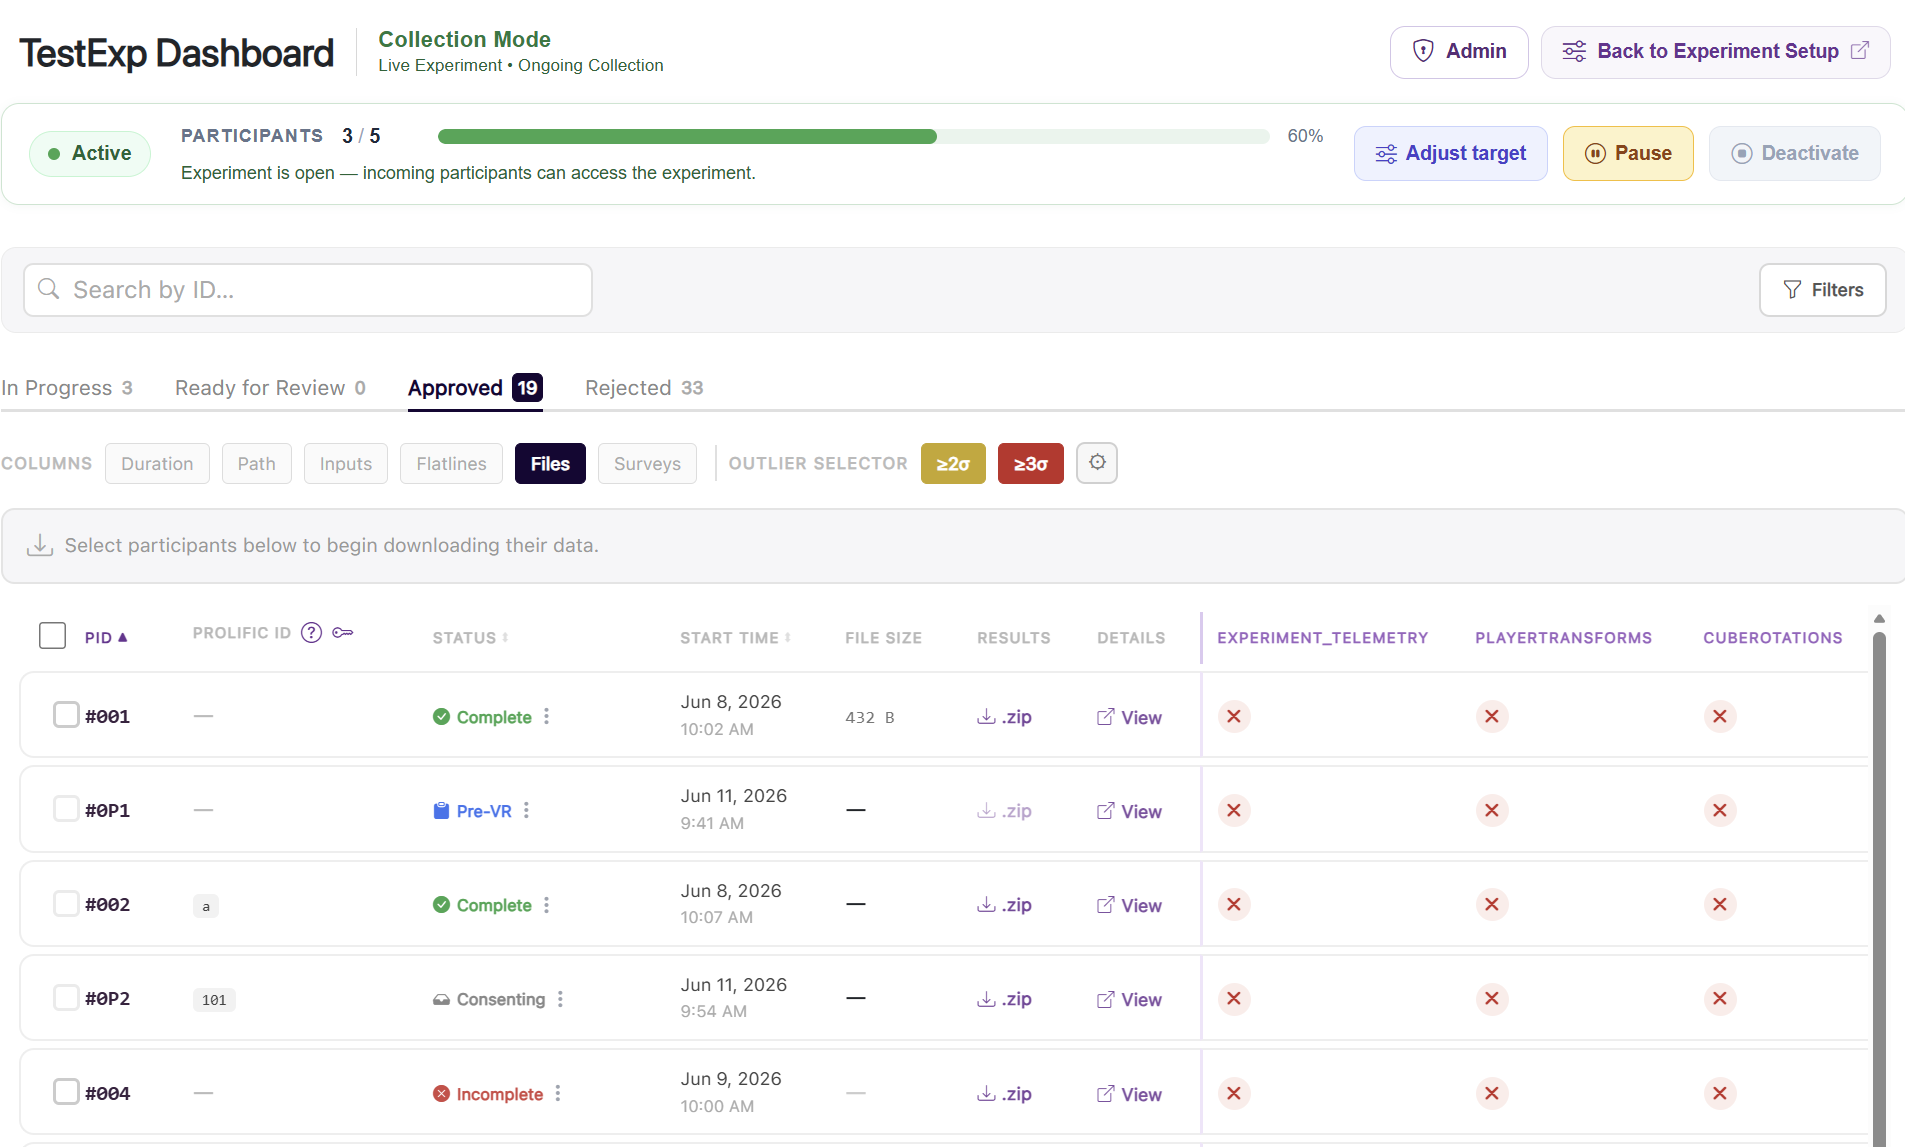
Every participant who has ever entered your experiment will be marked as being in one of the following states:
In Progress: This participant has joined the experiment and is currently in progress. They are not yet ready to be approved or rejected.
Ready for Review: This participant has completed the experiment, withdrawn, or has otherwise reached a “conclusive” terminal state. They are now ready to be approved or rejected, and require manual review.
Approved: This participant has been approved, a single token has been spent to pay for their dataset, and their dataset is available to view or download.
Rejected: This participant has been rejected and their dataset is not available for download.
All participants will be listed on the Experiment Results page of the experiment in tabular format. Swap to the desired state tab to see all participants in that state.
Reviewing a participant session
You will not be able to view or download the data of participants who have not been approved. To approve a participant session, you must spend a single token from your activation budget. In other words, 1 approval = 1 token spent = 1 dataset available for download.
Participants awaiting your review will be listed in the Ready for Review tab. From this tab, you will be able to see every participant who has reached a terminal state. For each row, various preview metrics will be included to help you decide whether to approve or reject the participant. These metrics include:
Status: The participant’s current state in the experiment - did they complete the experiment, withdraw, or reach a different terminal state?
Start time: The time at which the participant joined the experiment.
File size: Total summative size of all participant data files.
Duration information: Includes “Session Duration” (total time spent in the experiment, from arrival to conclusion) and “VR Duration” (total time spent in the VR environment, from start to end).
Path information: Includes “Path Length” (total distance traveled by the participant during the experiment, summed along the full movement path) and “Overall Distance” (straight-line (Euclidean) distance between the participant’s start and end positions in the VR environment).
Input information: Includes “Button Presses” (total number of controller button presses recorded during the VR session).
Flatline information: Includes “Flatline Count” (number of times the participant’s headset flatlined during the session - i.e. an extended period where a device was completely stationary) and “Flatline Time” (total summative time the participant’s device flatlined during the session).
File upload information: Includes information on each individual file type defined for the experiment, and whether the participant has uploaded any data to those file types.
Questionnaire upload information: Includes information on each individual questionnaire type defined for the experiment, and whether the participant has completed and uploaded any questionnaires of that type.
Use the “Columns” selectors to choose which preview metrics you would like to see in the table.
Additionally, there is a “Outlier Selector” section you can use to highlight any participants who have outlier metrics in the table. This can be useful to identify any participants who may have experienced technical issues during the experiment. You can tweak the thresholds for what constitutes an outlier in this section; each participant preview metric will be highlighted in a different color if it is an outlier.
Once you have made a decision on whether to approve or reject a participant session, click the “Approve” or “Reject” button for a particular participant. This WILL NOT immediately approve or reject the participant session - it will simply mark the participant as ready for acceptance or rejection. Click the Finalize Decisions button to confirm your decisions and spend tokens accordingly.
Warning
EVERY APPROVAL YOU MAKE WILL SPEND A SINGLE TOKEN. Only approve a participant session if you are confident in the quality of the data and are willing to pay for it.
Rejecting a participant session WILL NOT spend a token.
Filling your activation budget
When you activate your experiment, you will define a target number of participants you plan to record during this activation cycle. Every participant who arrives to your experiment will count towards your target - even if they have not yet been approved.
The only time a slot is “freed up” is when you manually reject a participant session. Upon doing so, the slot will open back up and be available for a new participant to join. No token will be spent, and no tokens will be released back to your allocation - a new slot is simply opened up for a new participant to join.
If you have reached your target number of participants, new participant sessions will be blocked from joining the experiment. You will be able to see a progress bar at the top of the page to indicate how close you are to reaching your target.
Pausing & deactivating your experiment
At any point, you may Pause your experiment to block new participant sessions from joining, but allow existing participant sessions to continue until completion. Pausing your experiment will not end the current activation cycle or clear your activation budget - it will simply block new participant sessions from joining.
At any time, you may additionally Adjust your target number of participants you plan to record during this activation cycle. This will allow you to increase or decrease your target, and will adjust the progress bar accordingly. Adjusting your target will change your activation budget accordingly.
At any time, you may manually Deactivate your experiment to clear the current activation cycle. Upon deactivating your experiment, all tokens held for the current activation cycle will be released back to your allocation. These tokens will be available for use in future activation cycles, and are no longer reserved in any way.
You cannot deactivate your experiment until all pending unreviewed participant sessions have been reviewed as approved or rejected - i.e., no “In Progress” or “Ready for Review” participants remain.
Viewing & downloading participant data
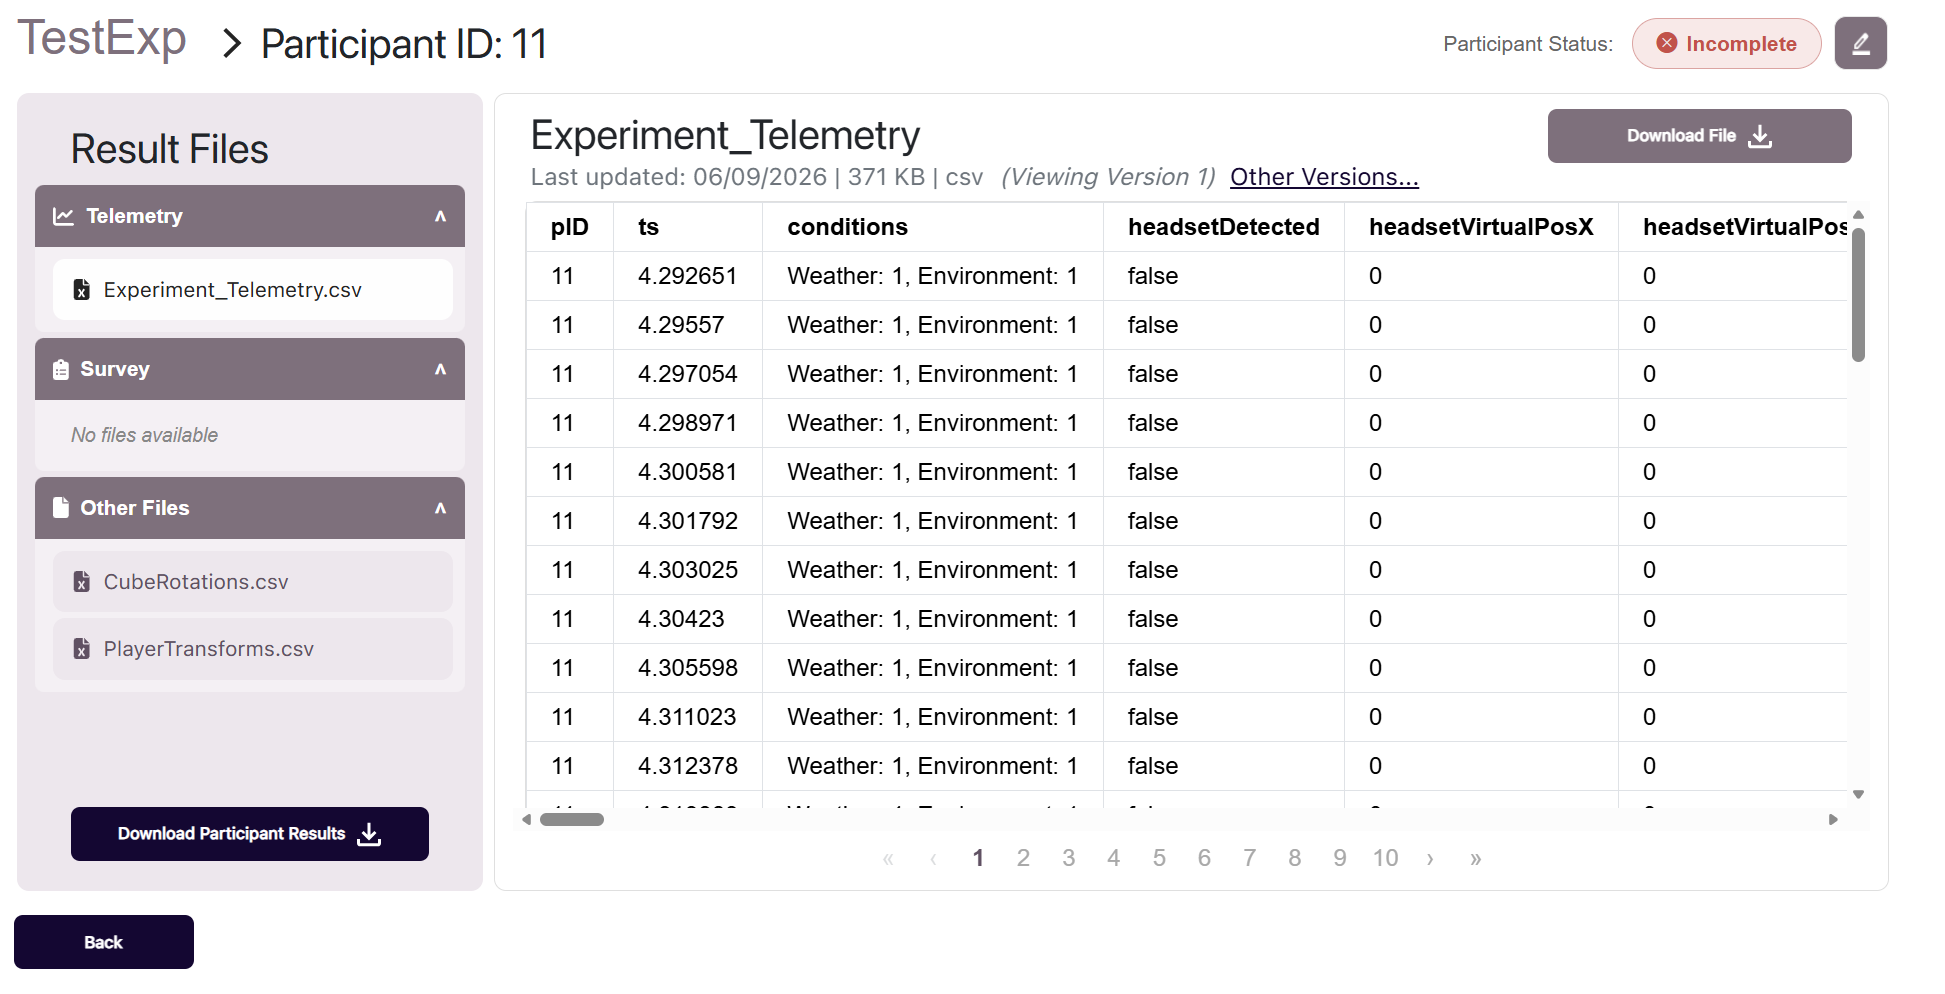
Once a participant session has been approved, it is available for download and analysis. From the Experiment Results page, click the “View” button for a particular participant session to open the participant results page.