Web interface: creating and managing experiments
This section provides an in-depth guide on creating and managing experiments in the VERA web interface.
Before continuing, it may be useful to review the Web interface: overview section to understand the general layout and features of the VERA web interface.
Creating a new experiment
Below are the steps to create a new experiment in the VERA web interface. As a reminder, a single experiment represents a single research study or project, and can have multiple participant sessions, file types, and conditions associated with it.
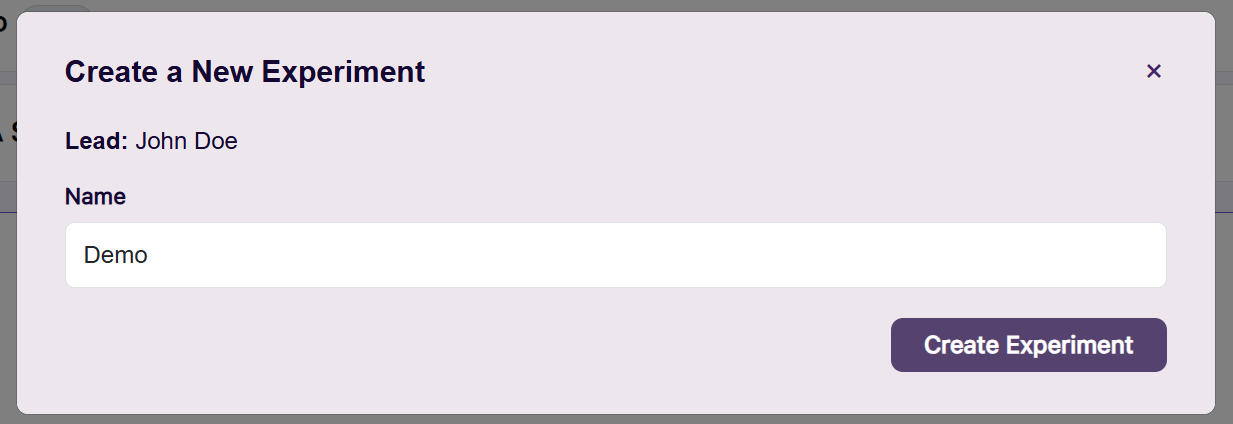
To create a new experiment, click the + New Experiment button on the dashboard. You will then be prompted to enter a name for your experiment.
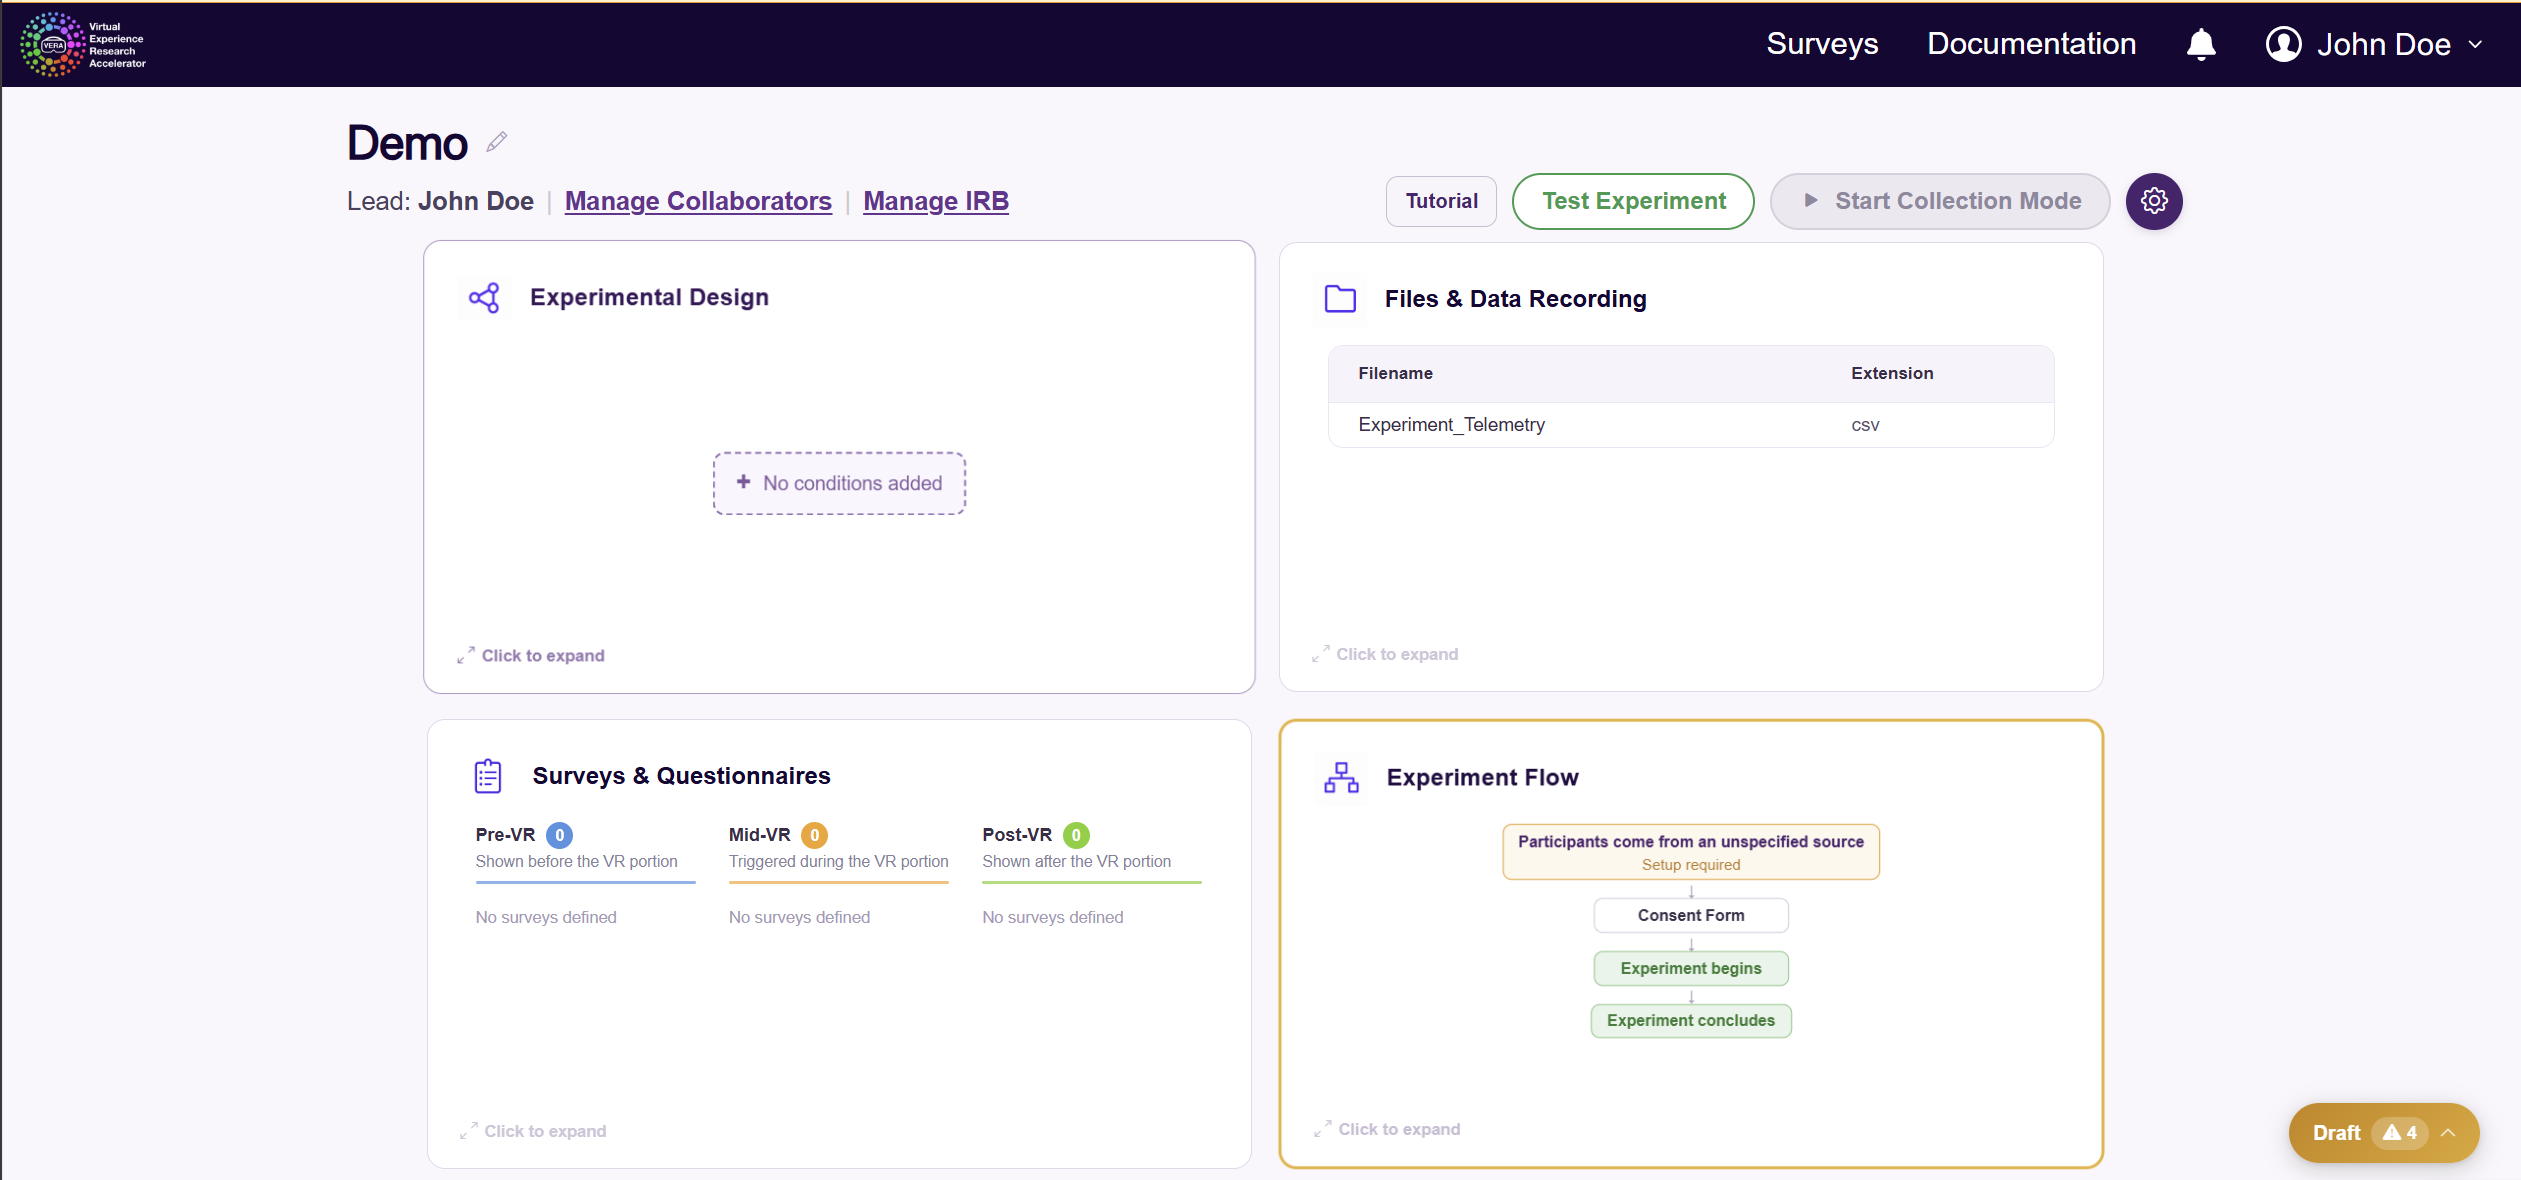
After you provide a name, you will be taken to the Experiment Setup page, where you can begin to configure your experiment. Each section of this page is optional - open only the cards and links you need. They are outlined below.
Manage Collaborators
Click the Manage Collaborators text to open the collaborator & permissions management section. Here, you can assign any collaborators to your experiment. Collaborators are other VERA users who will have access to manage and view data for this experiment.
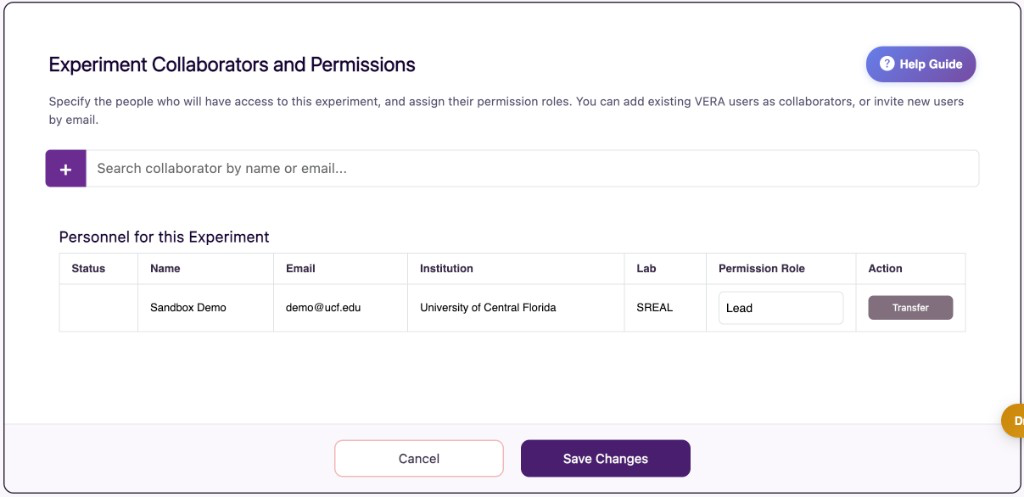
To add a collaborator, input their name or email address in the search bar and click on their entry. You can invite a new user to VERA if they do not already have an account; only the experiment Lead can send invitations to new users. If a Read/Write collaborator requests to add or remove someone, the change is submitted for lead approval and will apply once the lead approves.
You can also assign a permission role to each collaborator. This role determines what actions they can take on the experiment. In general, “Read-Only” collaborators can view the experiment and its data, but cannot make any changes to the experiment or its settings. “Read/Write” collaborators can view and edit the experiment and its settings, as well as view and record new participant data. The “Lead” role is assigned to the experiment lead, who has full control, including transferring leadership to another collaborator.
For more details on managing collaborators, lead approval, and transferring leadership, see the Collaboration section.
Manage IRB
Click the Manage IRB text to open the IRB management section. Here, you can input your accredited institution’s Institutional Review Board (IRB) information. This includes the IRB protocol number, email address, and approval letter.
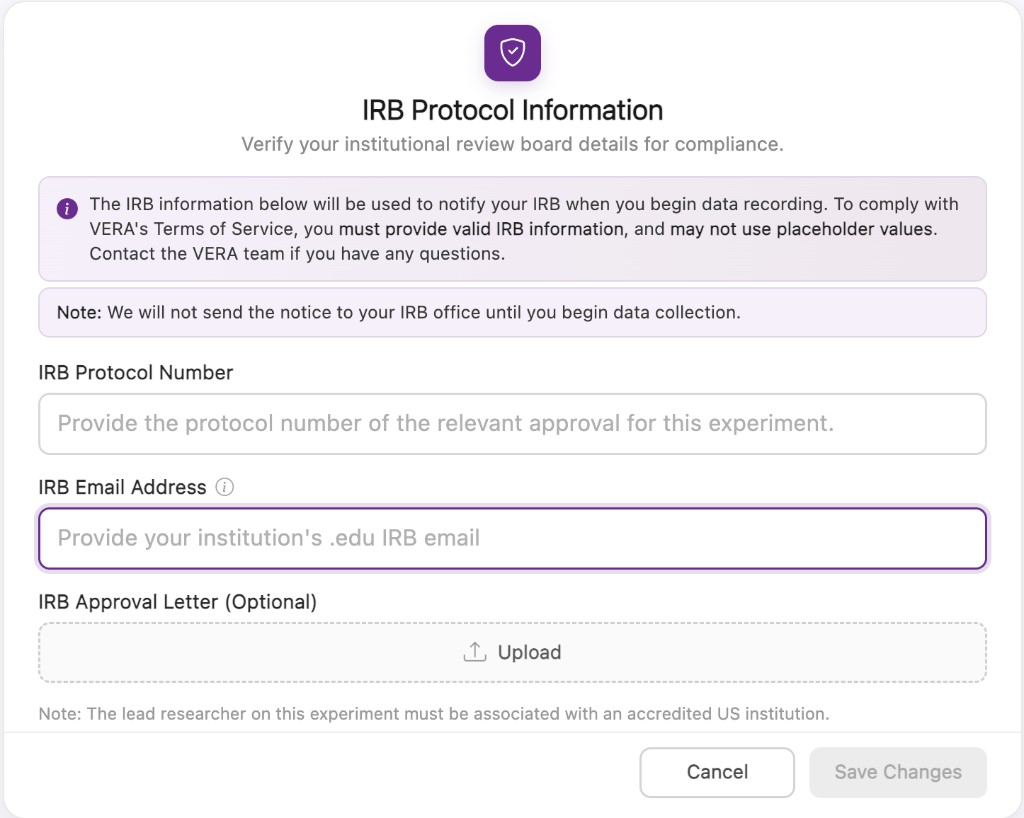
Enter your real IRB protocol number and your institution’s real IRB office email address. Do not enter placeholder values. VERA uses this information to notify your IRB when you begin data collection.
Experimental Design
Click the Experimental Design card to open the independent variable and condition management section. Here, you can define the independent variables and conditions that will be used in your experiment.
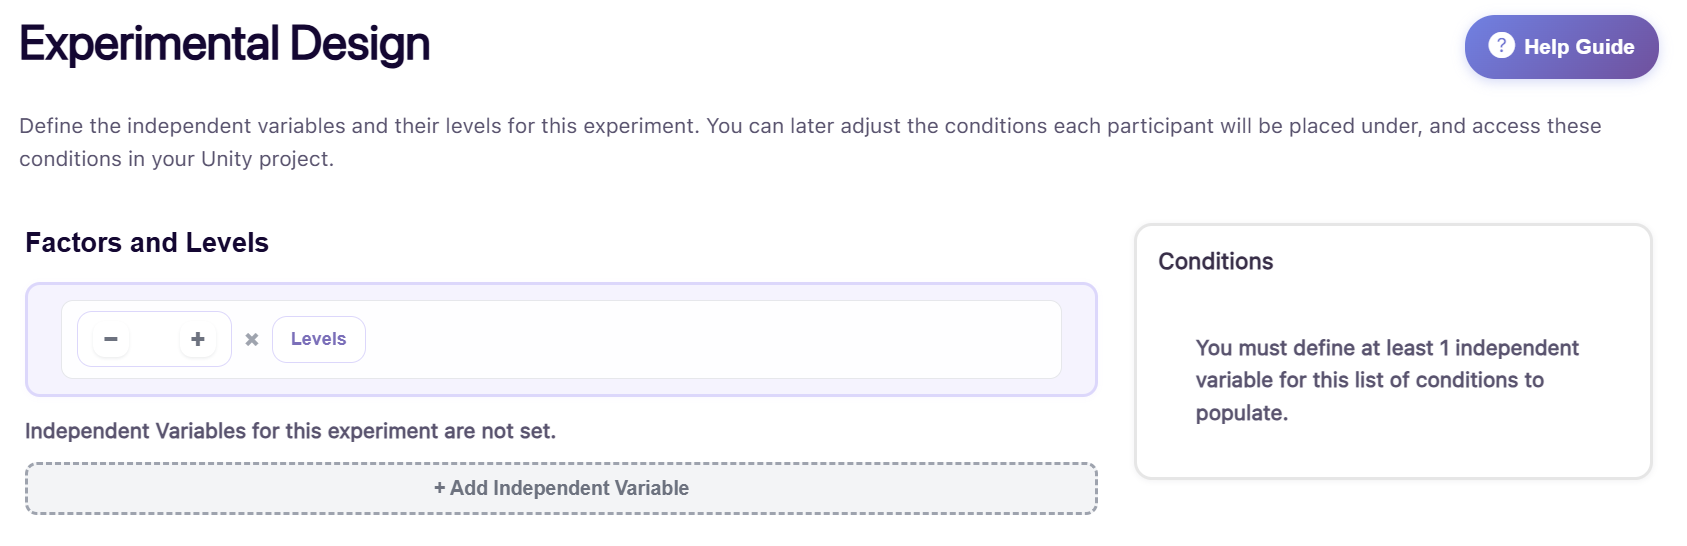
It is not required to define any independent variables or conditions for your experiment; but, by providing this information, VERA will be able to provide you with tools to more easily manage conditions and independent variables during data collection, including automatically associating all logged data with the associated conditions at time of log.
To add a new independent variable, use the Factors and Levels steppers or click the “+ Add Independent Variable” button. This will add a new independent variable, which you can name according to your experimental needs. Under each independent variable, add as many levels as you’d like and name them accordingly.
A very simple 3x2 experimental design is shown in the example below, with two independent variables: “WeatherType” with three possible values (Sunny, Rainy, Snowy), and “TimeOfDay” with two possible values (Day, Night).
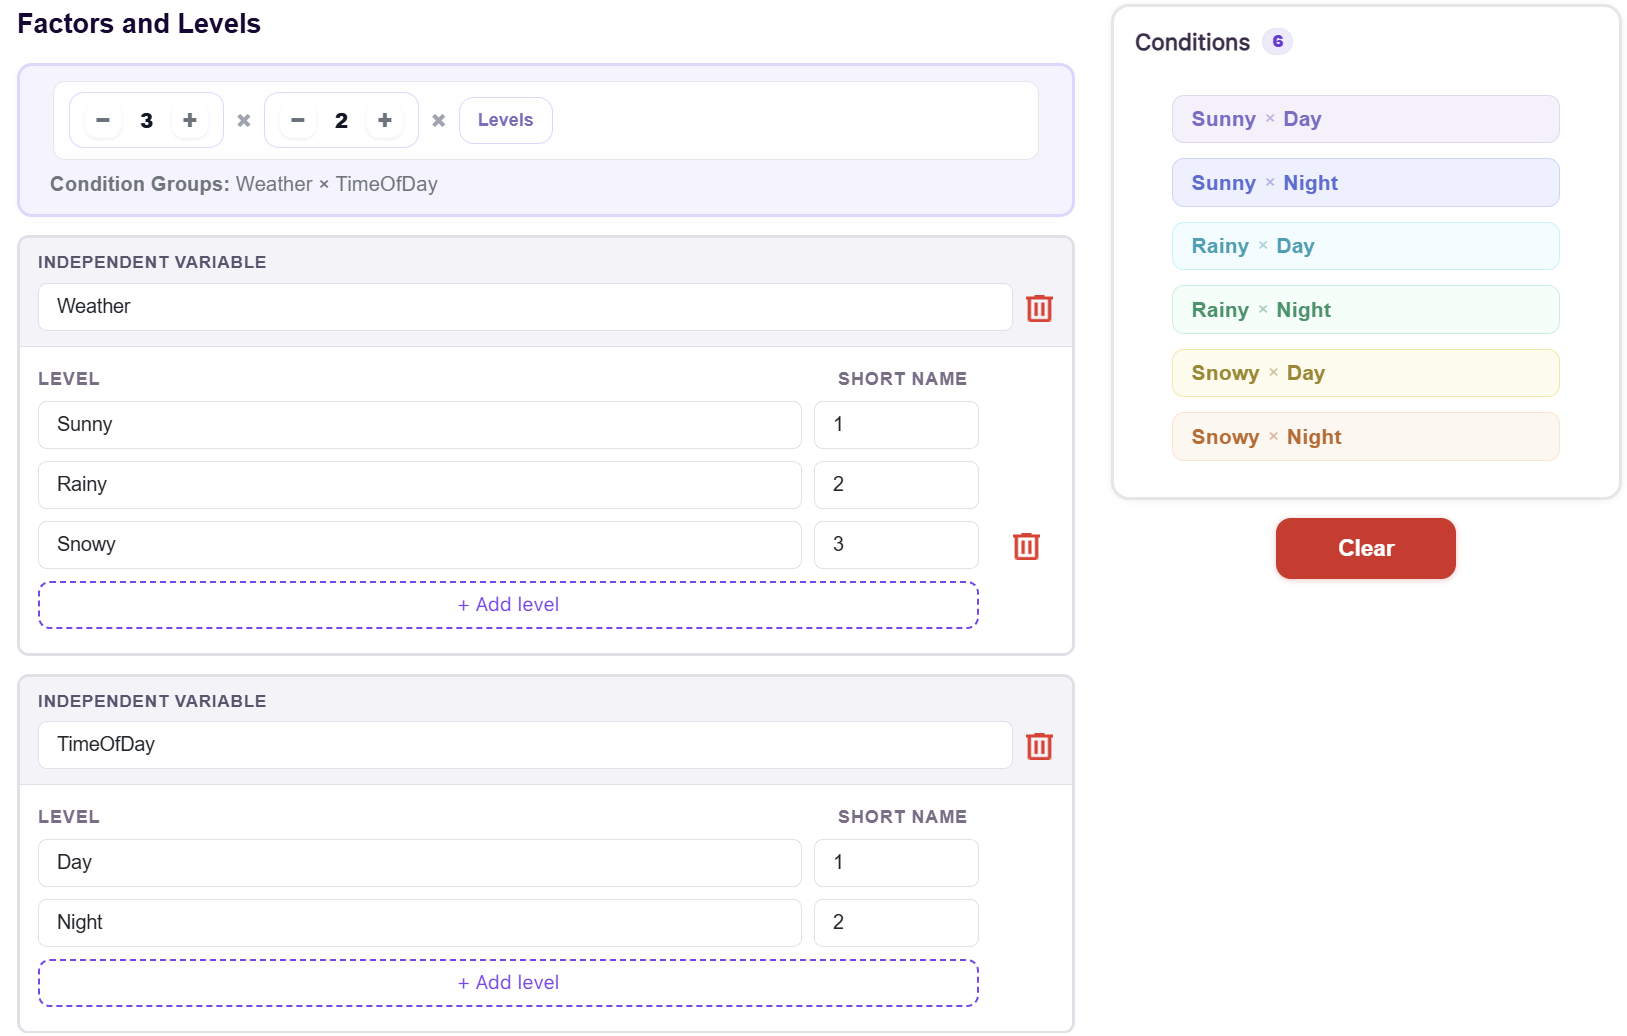
After defining your independent variables and their levels, click the “Save Changes” button to save your changes. These independent variables and levels will later be available to you for use in your Unity experiment.
For more details on managing independent variables and conditions from Unity, see the Unity plugin: managing conditions section.
Files & Data Recording
Click the Files & Data Recording card to open the file type and data recording management section. Here, you can define what types of files and what types of data you will be recording during data collection.
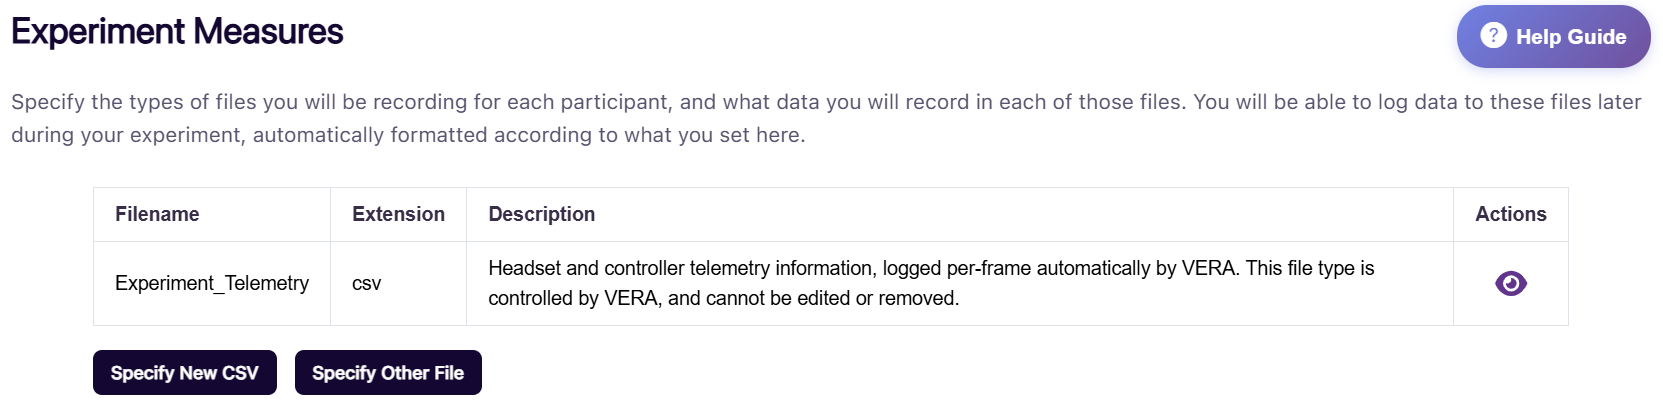
In VERA, a File Type represents a single specific file that you will record data to for every participant. For example, you might define a CSV file type for logging positional data, or a PNG image to store a screenshot of the participant’s environment.
You will define your file types here on the web interface, and later when you are developing your experiment in Unity, you will have a variety of tools at your disposal to log data to these file types during data collection.
To create a new file type, click on either the Specify New CSV or Specify Other File button. This will open a dialog where you can configure the settings for that file type.
Note
Click to Specify New CSV if you want to create a comma-separated value file type. These file types are commonly used for logging tabular data, and can be easily opened in spreadsheet software like Microsoft Excel or Google Sheets. Click to Specify Other File if you want to create a different type of file, such as PNG, JSON, TXT, or custom file types.
VERA provides special tools for managing CSV file types, including automatic column management and data logging.
Once you click to add a new file type, fill out the required fields in the dialog.
If you choose to create a new CSV file, you will be presented with additional options pertaining specifically to CSV files. Notably, you can define the exact columns that will be present in the CSV file during data collection. VERA handles some columns by default, which you will see listed in the dialog.
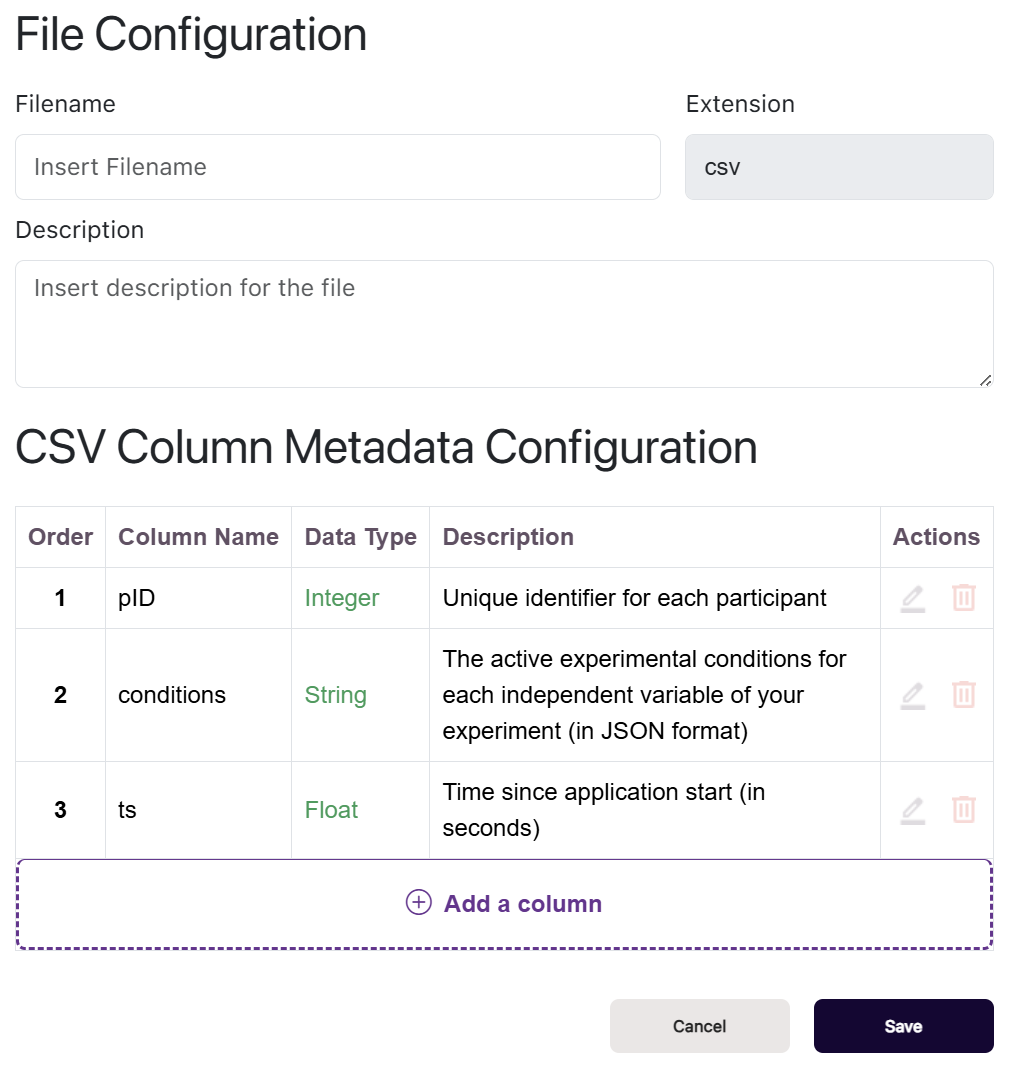
VERA additionally will always automatically record one file type by default, the Experiment_Telemetry file. This CSV file type automatically logs for every participant during the experiment, recording various information such as the participant’s headset position and rotation, controller positions and rotations, and other relevant telemetry data.
You cannot choose to remove or disable this file type, but will be given the option later to exclude it from your dataset when downloading. Feel free to ignore it if it does not fit your experiment’s needs.
For more information on how to use these file types from Unity, and more information on how CSV file types work / info on the Experiment_Telemetry file, see the Unity plugin: logging data section.
Questionnaires
Click the Questionnaires card to open the questionnaires management section. Here, you can define what types of questionnaires you will run throughout the experiment, and when they should be run.
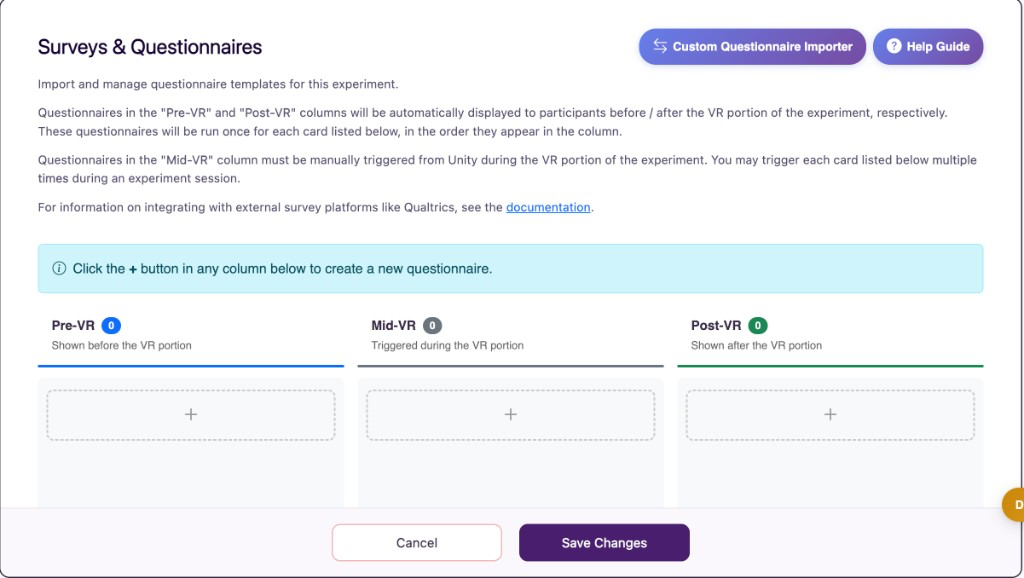
Questionnaires can be run during three primary phases of the experiment:
Pre-VR: Shown automatically in the web browser before the participant enters the VR environment.
Mid-VR: Triggered from Unity during the VR portion of the experiment; can be run in immersive VR or in the web browser.
Post-VR: Shown automatically in the web browser after the participant has exited the VR environment.
You can create a new questionnaire by clicking the + button in any column. This will open a dialog where you can configure the settings for that questionnaire, including the questionnaire’s name and description, as well as the questions and possible responses for that questionnaire. VERA has included a variety of pre-made questionnaires that you can choose from, including commonly used questionnaires from the XR research community. You can also create your own custom questionnaires from scratch if desired.
All questionnaires you define in this step will be available to be triggered and displayed to participants during data collection in Unity using the VERA Unity plugin. See the Unity plugin: running questionnaires section for more information on how to trigger questionnaires during data collection in Unity.
Experiment Flow (consent form and distributions)
Click the Experiment Flow card to open the consent form and distribution management section. Here, you can define the following:
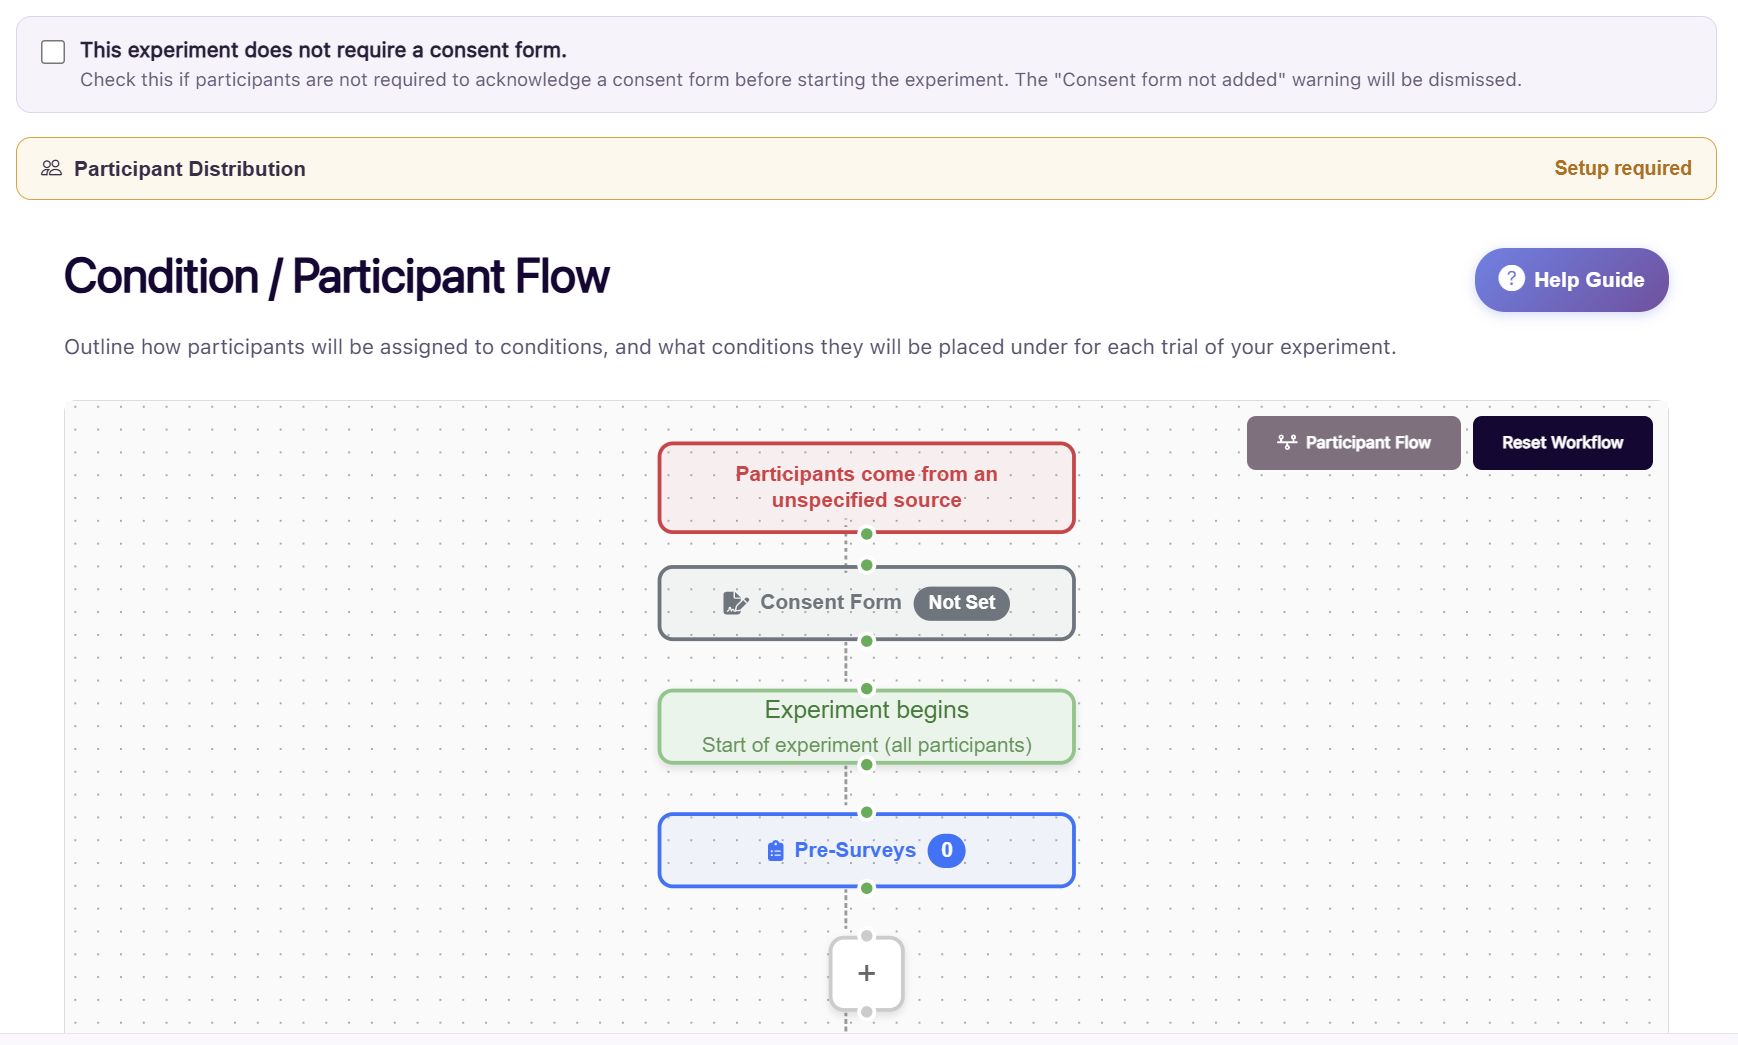
Consent Form: A form that participants will need to sign before they can participate in the experiment. If your experiment does not require a consent form, make sure to check as such - if it does require a consent form, click the first step of the participant flow to add one.
Distribution Method: The method by which participants will be distributed to the experiment. Click the participant distribution section to configure. For more details, see the Web interface: experiment distributions section.
Trial Flow: A visual representation of when trials will run during data collection in Unity, and when participants will be assigned to different conditions.
Testing & Next Steps
In the bottom-right corner of the page, a Draft indicator shows if there are any unresolved issues with your experiment configuration. Click the indicator to open a list of items that still need attention; click any individual alert to go to that specific issue in your configuration.
At any point, you can click the Test Experiment button to open the test results page. For more information on testing your experiment, see the Activations: testing your experiment section.
Finally, when you are ready to finalize your experiment and begin data collection, click the Start Collection Mode button. For more information on managing participants during data collection, see the Activations: managing participants section.
You will need to have a Unity project linked to your experiment before you can start data collection. See the Unity plugin: overview section for more information on how to link a Unity project to your experiment.