VERA Sandbox Demo: Web Setup
The VERA Sandbox Demo is a sample “mock experiment” designed to demonstrate the core features of VERA. This page walks you through the process of setting up the VERA Sandbox Demo on the VERA web interface.
If you have not yet already done so, read through the intro to the VERA Sandbox Demo on the previous page, VERA Sandbox Demo: Intro, to get an overview of the demo, and to set up the demo on your local machine.
For a “cheat-sheet” quick-reference guide to the VERA Sandbox Demo, see VERA Sandbox Demo: “Cheat-Sheet” Quick Reference Guide.
What’s in this section
Create a new experiment on the VERA web interface.
Optionally configure experiment setup cards (collaborators, IRB, design, files, questionnaires, flow, and consent) as needed for the demo.
Set up experimental conditions on the web interface.
Set up data logging on the web interface.
Set up questionnaires on the web interface.
Set up consent (or mark that this demo does not require a consent form).
Optionally review experiment notification preferences.
Note
New researcher accounts on the VERA web interface will automatically have a demo experiment created for them, named “VERA Sandbox Demo”. If you have a “VERA Sandbox Demo” experiment already created in your account, you can either use that existing experiment for this demo, or create a new one by following the instructions in this section.
Logging in and creating an experiment
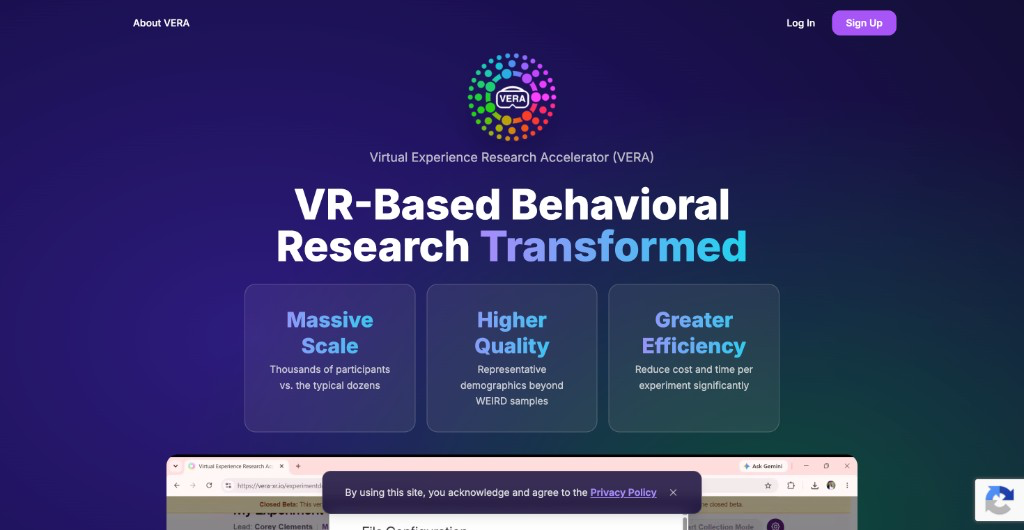
To get started, sign up or log in to the VERA web interface at vera-xr.io.
Once logged in, you will see the dashboard, which lists the experiments you have created or are collaborating on.
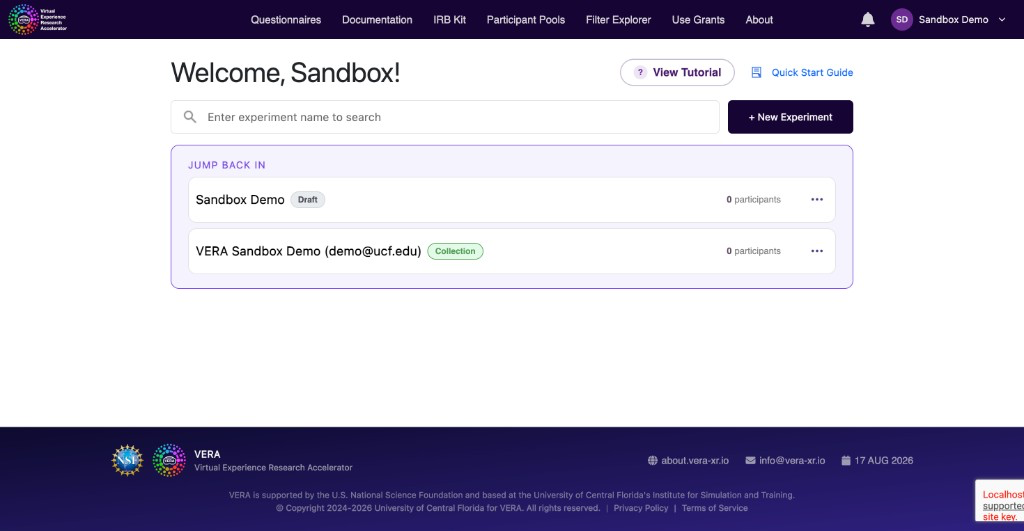
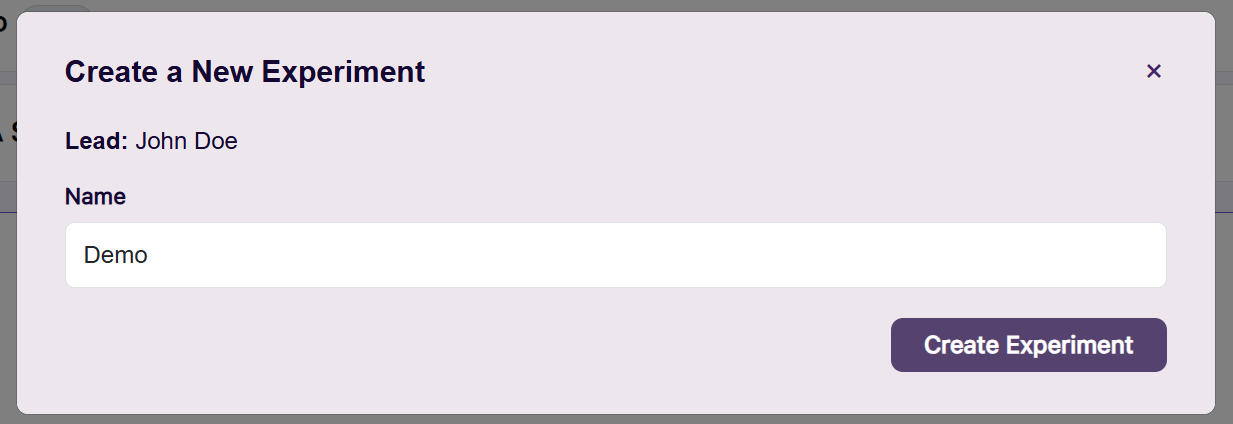
Click the + New Experiment button to create a new experiment. You will be prompted to enter a name for your experiment. Enter Sandbox Demo (or a similar name), then create the experiment.
After you provide a name, you will be taken to the Experiment Setup page for that experiment. This page is the home for configuring your experiment. It shows optional setup areas as cards and header links — Experimental Design, Files & Data Recording, Questionnaires, and Experiment Flow, along with Manage Collaborators and Manage IRB.
You do not need to configure every card in order. Open only the sections you need. For this sandbox demo, we will focus on experimental conditions, data logging, questionnaires, and consent; collaborators are optional and can be skipped.
For a general overview of each setup section, see Web interface: creating and managing experiments. The rest of this page walks through the same screens using the Sandbox Demo values.
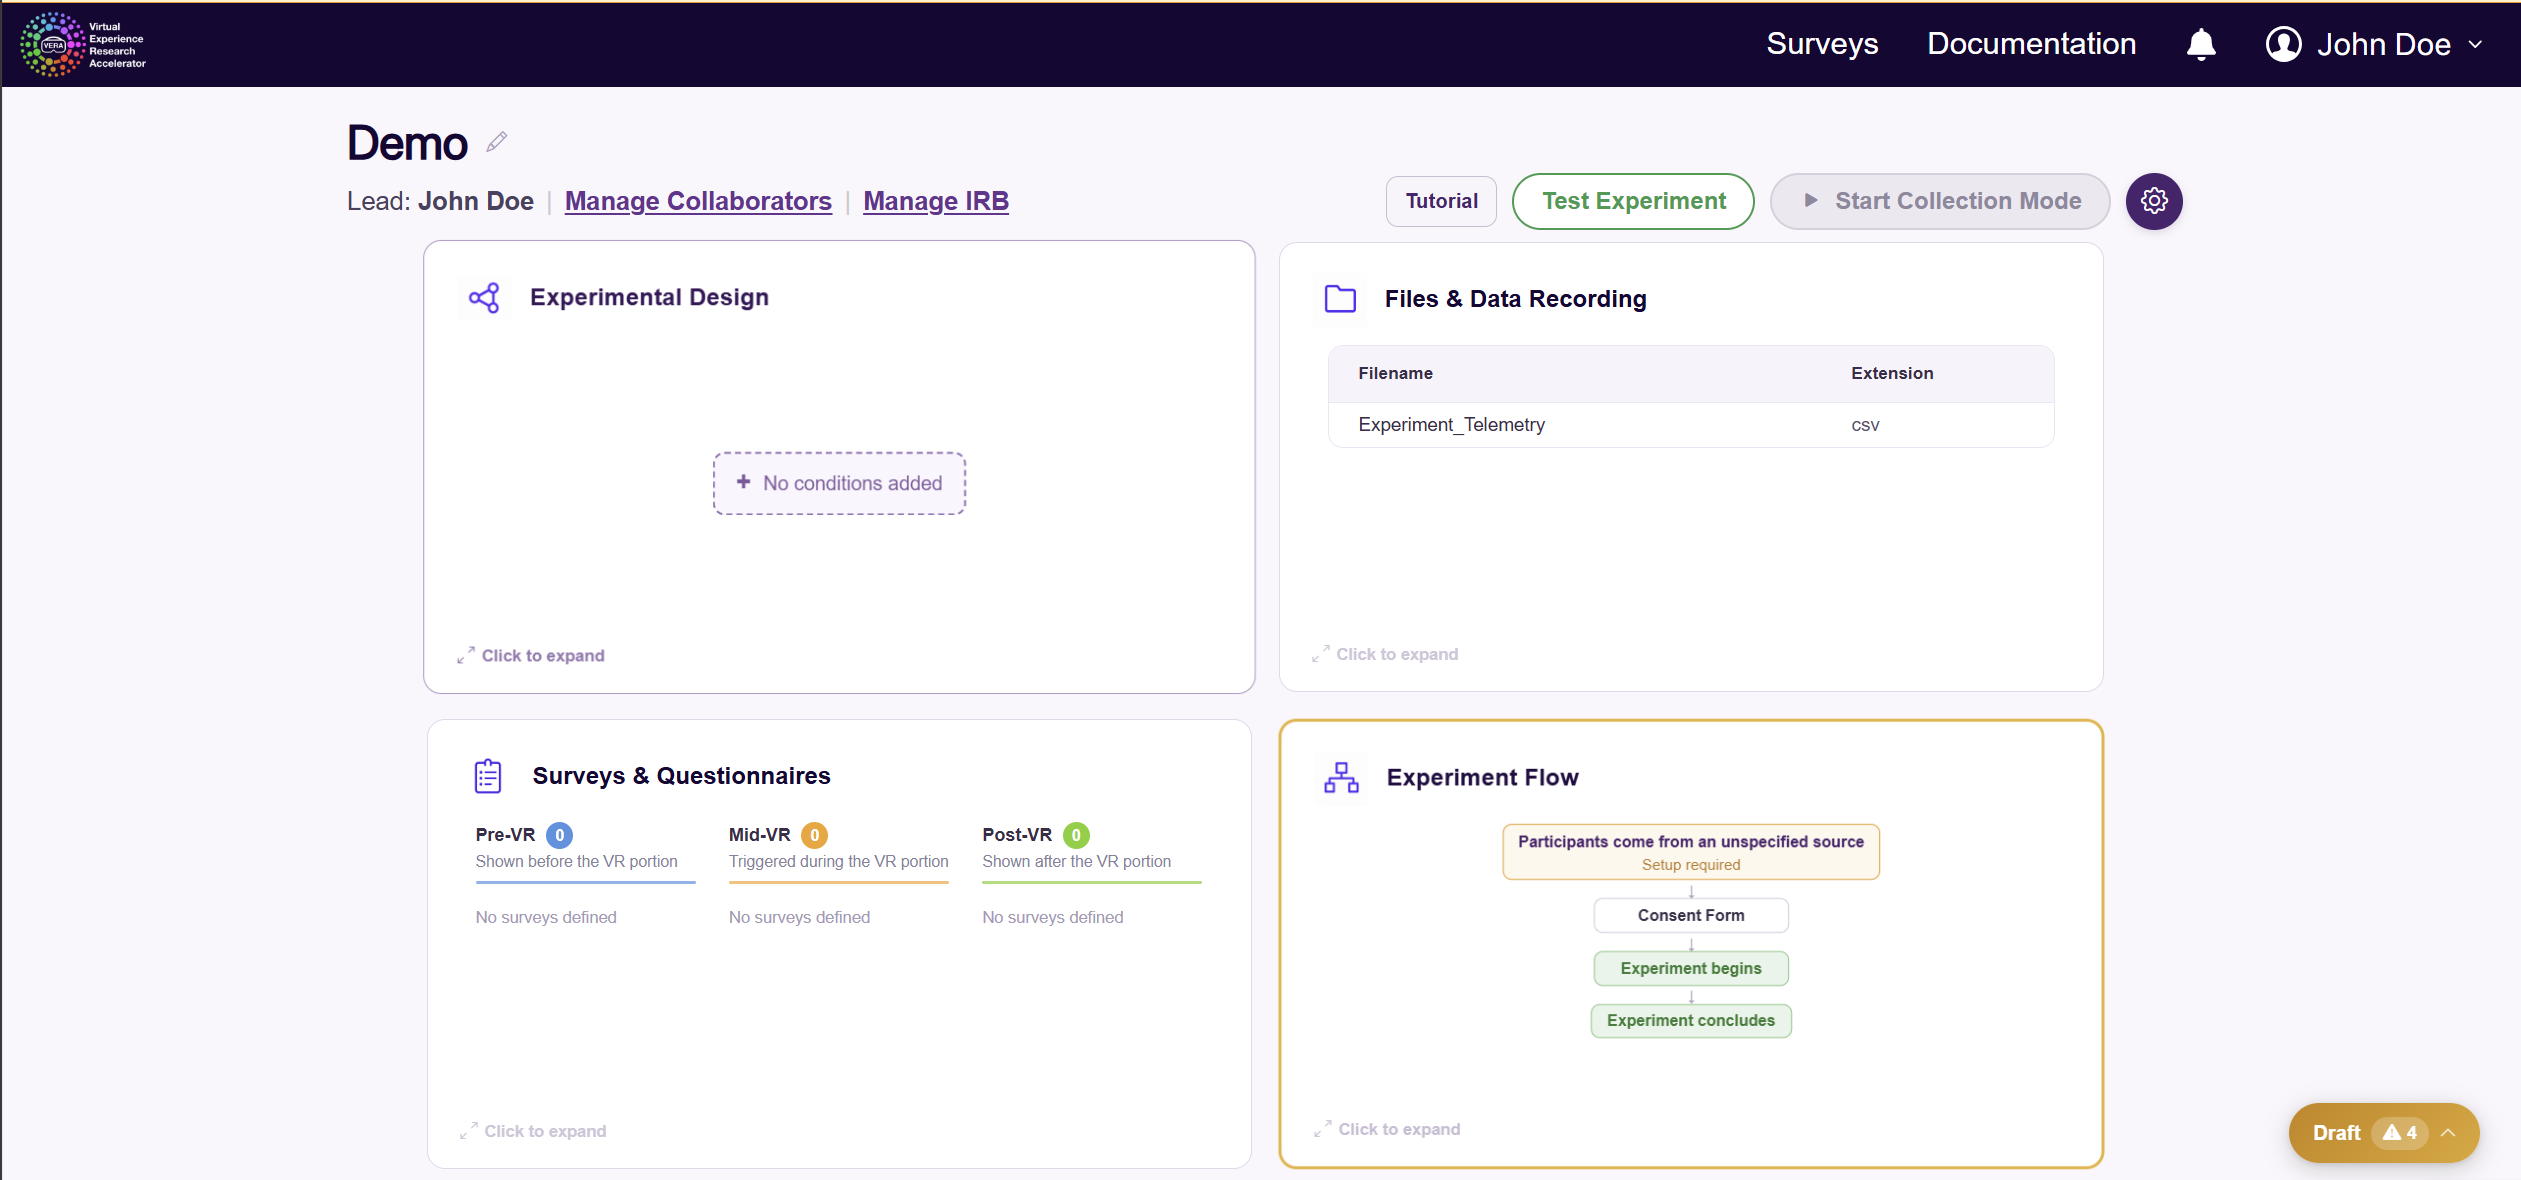
Along the top of the page, you can edit the experiment name, open Manage Collaborators and Manage IRB, replay the View Tutorial, open Experiment Settings, Test Experiment, or Start Collection Mode (Start Collection Mode stays disabled until required setup items are complete).

Managing collaborators (optional)
Click Manage Collaborators if you want to invite other researchers to this experiment. Here you can search for existing VERA users (or invite someone by email), assign permission roles, and transfer leadership. Inviting a brand-new VERA user can only be done by the Lead. Other collaborator changes requested by Read/Write users wait for lead approval.
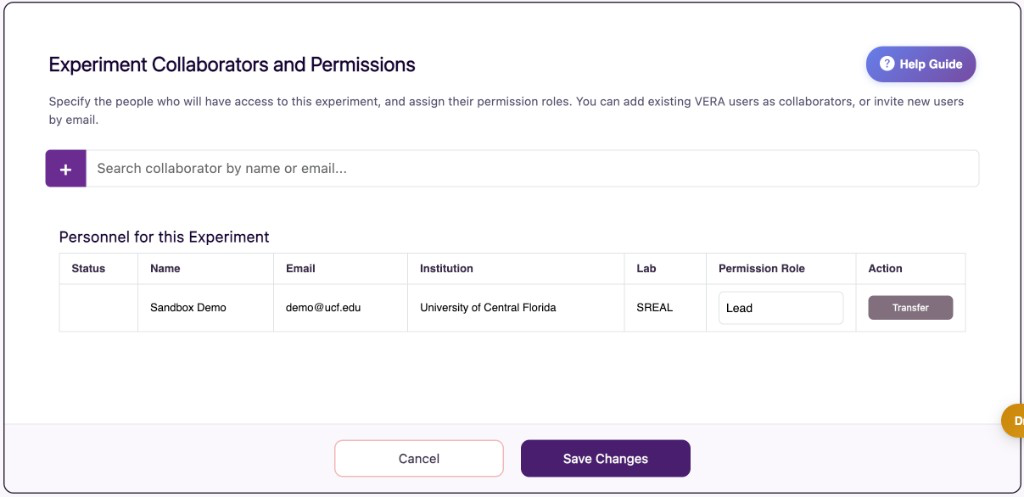
For this demo, you can skip this step and continue without adding any collaborators. You will remain the Lead on the experiment by default. For more details on collaborators, including transferring leadership, see Collaboration.
Managing IRB information
Click Manage IRB if you want to add your institutional review board details.
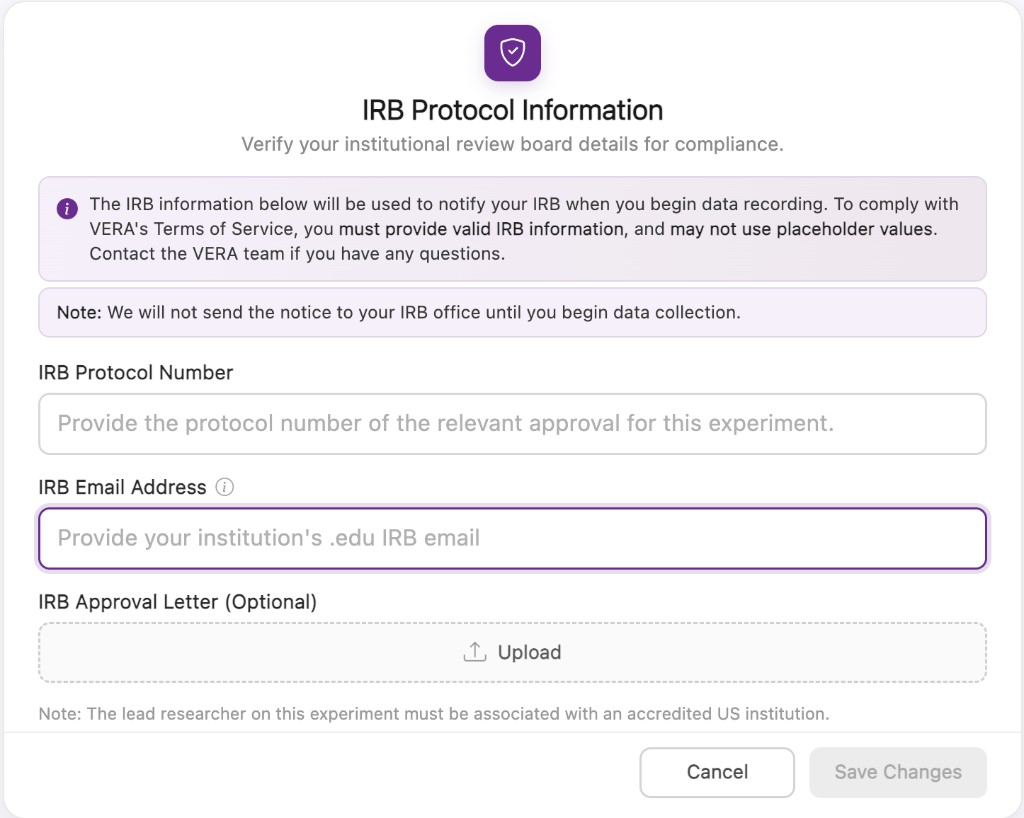
Enter your real IRB protocol number and your institution’s real IRB office email address. You may optionally upload your IRB approval letter as a PDF.
Important
Do not enter placeholder values (for example, fake protocol numbers or made-up email addresses). VERA uses this information to notify your IRB when you begin data collection, and placeholder values are not allowed.
For following along with this sandbox walkthrough, you can leave IRB blank for now and continue setting up the rest of the experiment. VERA will remind you that IRB information is needed before you start real data collection. When you are ready to collect data for real, return to Manage IRB and enter your actual IRB details.
Notification preferences (optional)
Click Experiment Settings in the header if you want to control how you are notified about this experiment. Under Notification preferences, you can keep your profile defaults, or customize email and in-app alerts for this experiment only.

For this demo, you can leave Use account defaults selected and continue. Profile-wide notification settings can be edited later in Profile Settings.
Setting up experimental conditions
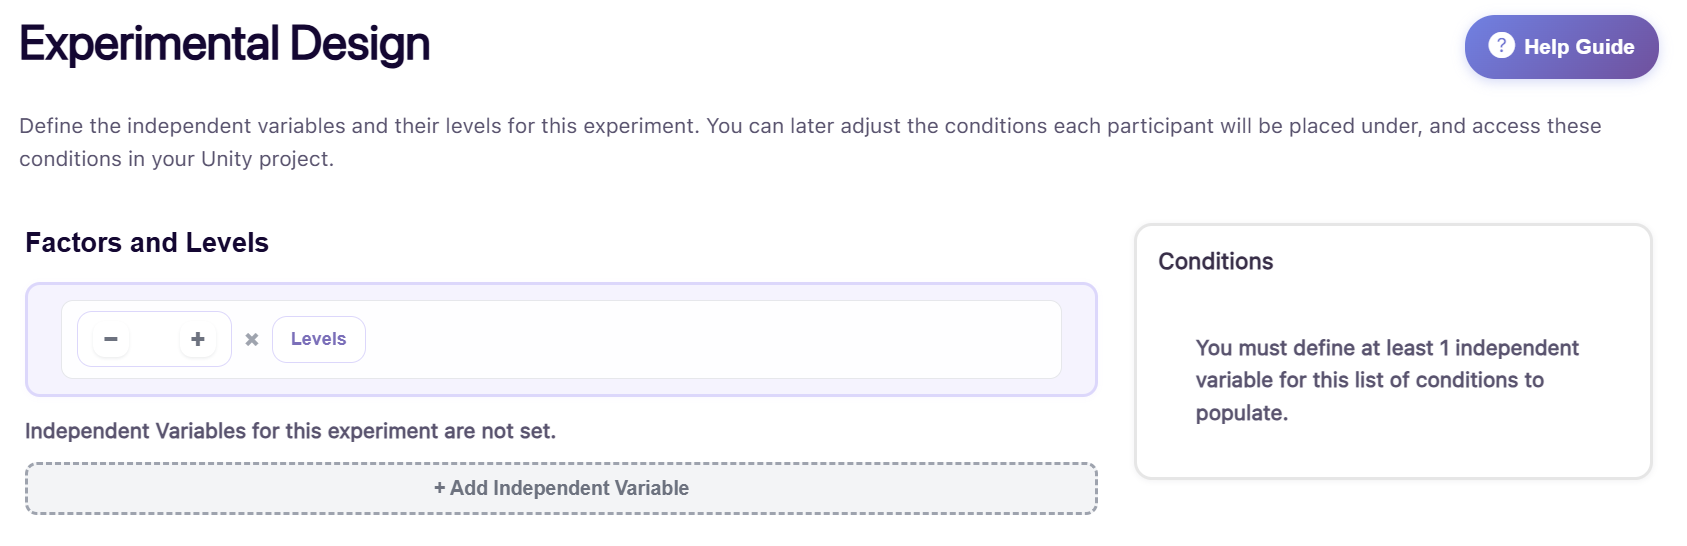
Click the Experimental Design card to expand the independent variable and condition management section.
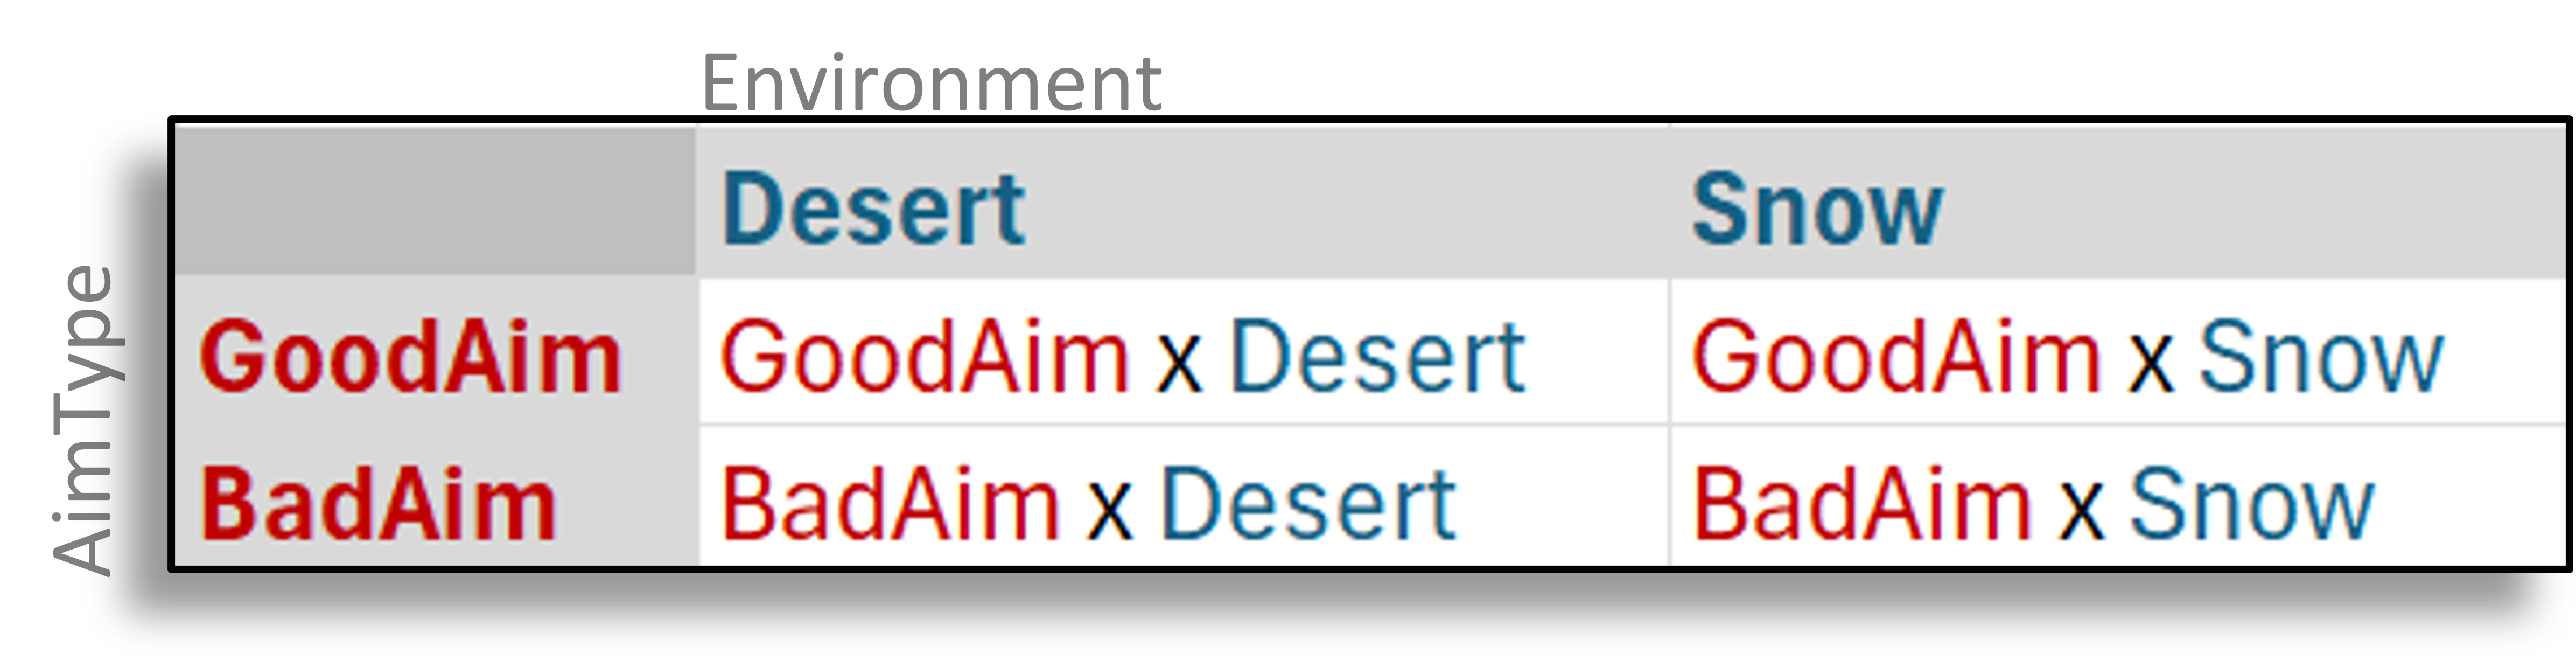
As a reminder, the VERA Sandbox demo has two independent variables: Environment (with two levels: “Snow” and “Desert”), and AimType (with two levels: “GoodAim” and “BadAim”). This results in a total of 4 experimental conditions, as shown in the table below:
To set up these conditions on the web interface, use the Factors and Levels steppers to create a 2 × 2 design, then name each independent variable and define every level (Environment: Snow / Desert; AimType: GoodAim / BadAim). In the end, your setup should look something like this:
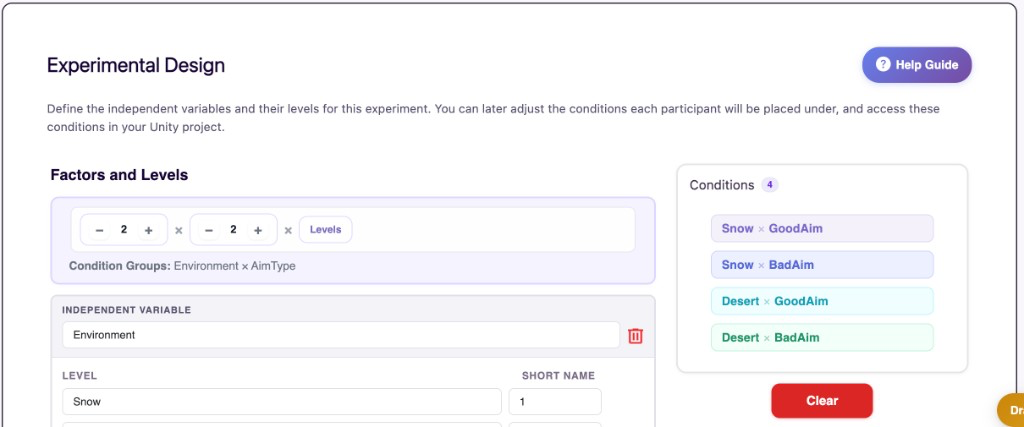
By defining your independent variables and their levels on the web interface, VERA will provide you with tools to easily manage your experimental conditions.
Sandbox Cheat-Sheet: managing conditions with VERA
Each independent variable you define on the web interface has its own auto-generated VERA C# class in Unity.
These classes are named exactly the same as your variables on the web portal, prefixed with “VERAIV_”. For example, “VERAIV_Environment” and “VERAIV_AimType”.
Using this class, you can:
// Get the current selected level of the "Environment" independent variable
VERAIV_Environment.IVValue currentValue = VERAIV_Environment.GetSelectedValue();
// Set the current selected level of the "Environment" independent variable
VERAIV_Environment.SetSelectedValue(VERAIV_Environment.IVValue.V_Snow);
Any data you log with VERA will automatically be associated with the experimental conditions the participant is currently under.
Note
It is important that you enter the independent variables and their levels exactly as they are defined above; in the next section, we will show you how to set up your Unity project to utilize the experimental conditions above, and the Unity scripts will be looking for the exact variable and level names shown above to function properly.
Setting up data logging
Next, click the Files & Data Recording card to expand the file type and data recording section.
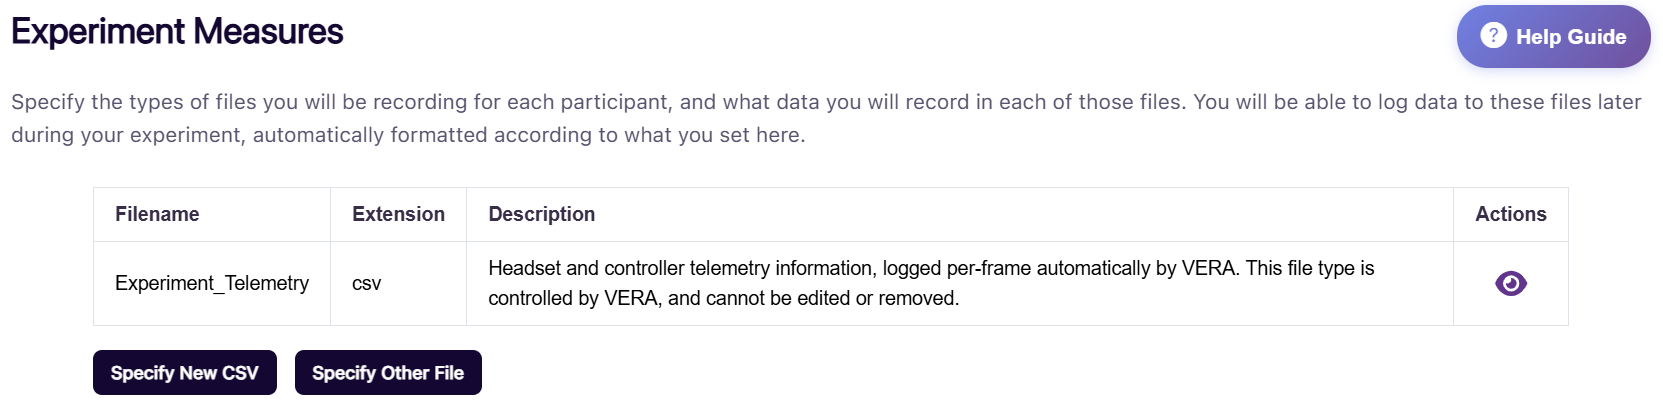
As a reminder, the VERA Sandbox demo will log to two CSV files, a LaserLogs.csv file (which logs whether each laser shot hit or missed), and a RoundSummaries.csv file (which logs the participant’s accuracy each round).
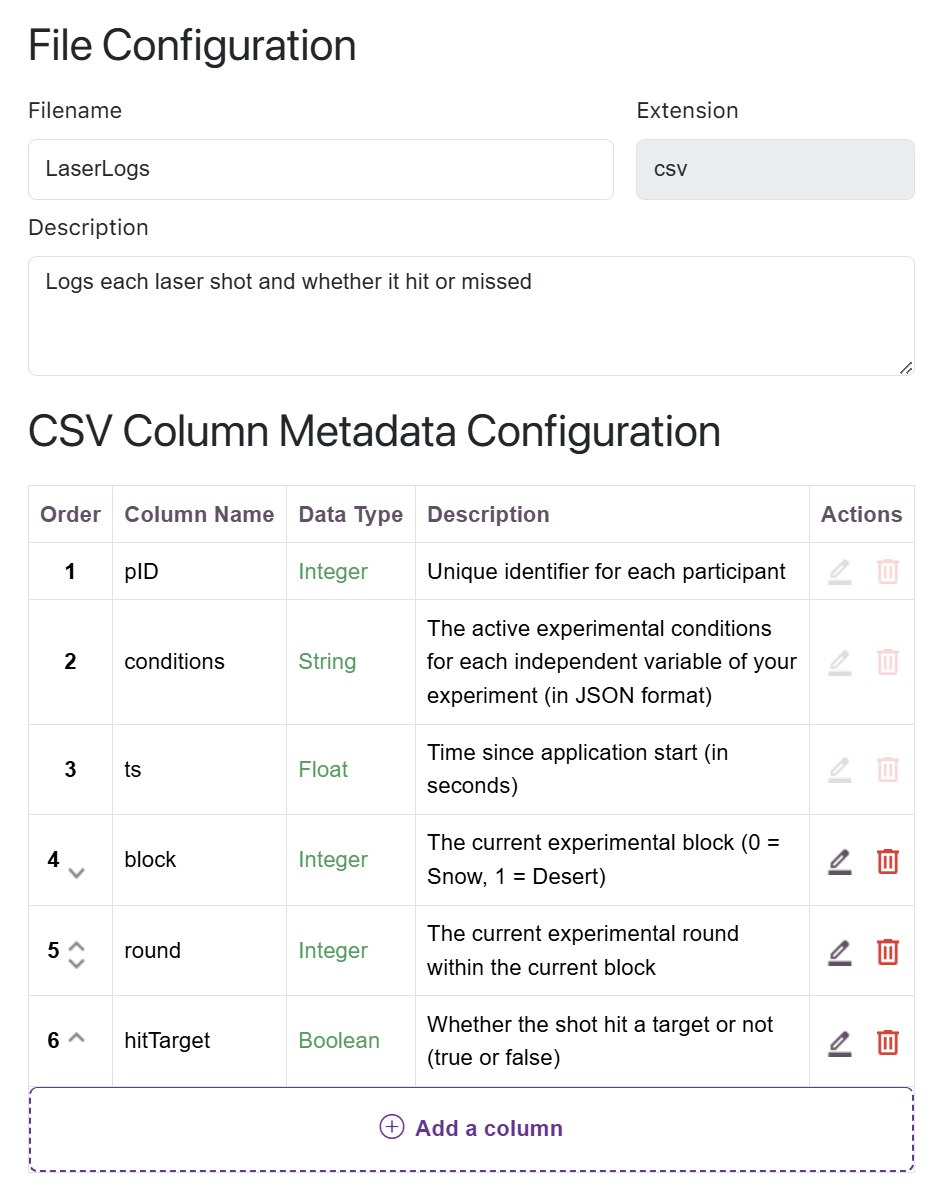
More specifically, the LaserLogs.csv file will have the following columns:
pID (integer): The participant’s unique ID number, handled automatically by VERA.
conditions (string): The experimental conditions the participant was under at time of data log, handled automatically by VERA.
ts (float): The timestamp of the data log (seconds since application start), handled automatically by VERA.
block (integer): Current experimental block (block 0 is the three rounds in the Snow environment, block 1 is the three rounds in the Desert environment).
round (integer): Current round within the current block (rounds are numbered 0 through 2 within each block).
hitTarget (boolean): Whether the laser shot hit the target (true or false).
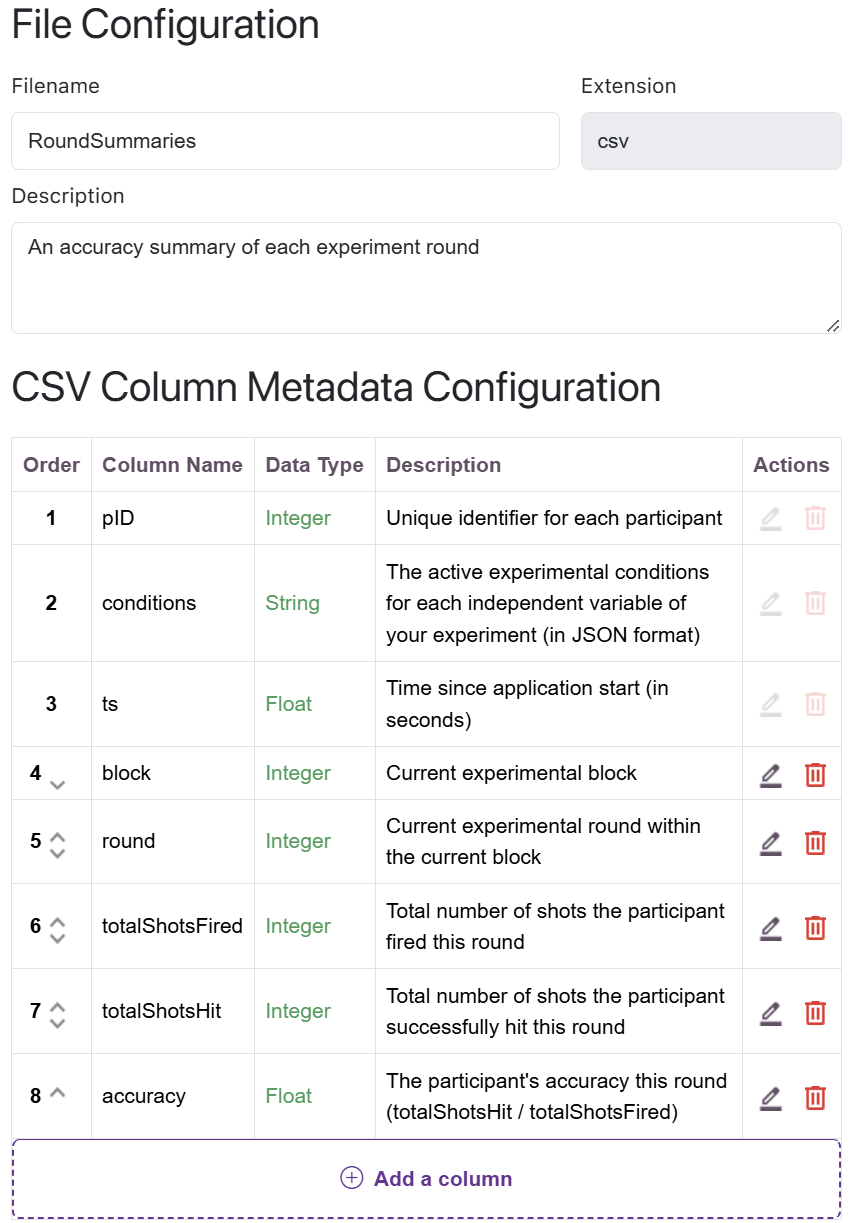
And the RoundSummaries.csv file will have the following columns:
pID (integer): The participant’s unique ID number, handled automatically by VERA.
conditions (string): The experimental conditions the participant was under at time of data log, handled automatically by VERA.
block (integer): Current experimental block (block 0 is the three rounds in the Snow environment, block 1 is the three rounds in the Desert environment).
round (integer): Current round within the current block (rounds are numbered 0 through 2 within each block).
totalShotsFired (integer): The total number of laser shots fired by the participant for the round.
totalShotsHit (integer): The total number of laser shots that hit their target for the round.
accuracy (float): The participant’s accuracy for the round, calculated as the number of laser shots that hit their target divided by the total number of laser shots for the round.
These files and their associated columns are shown below:


To set up this data logging on the web interface, click Specify New CSV; we will add a new CSV file for each of the two files we want to log.
This will open the file configuration dialog. VERA already includes the automatic columns (pID, conditions, and ts):
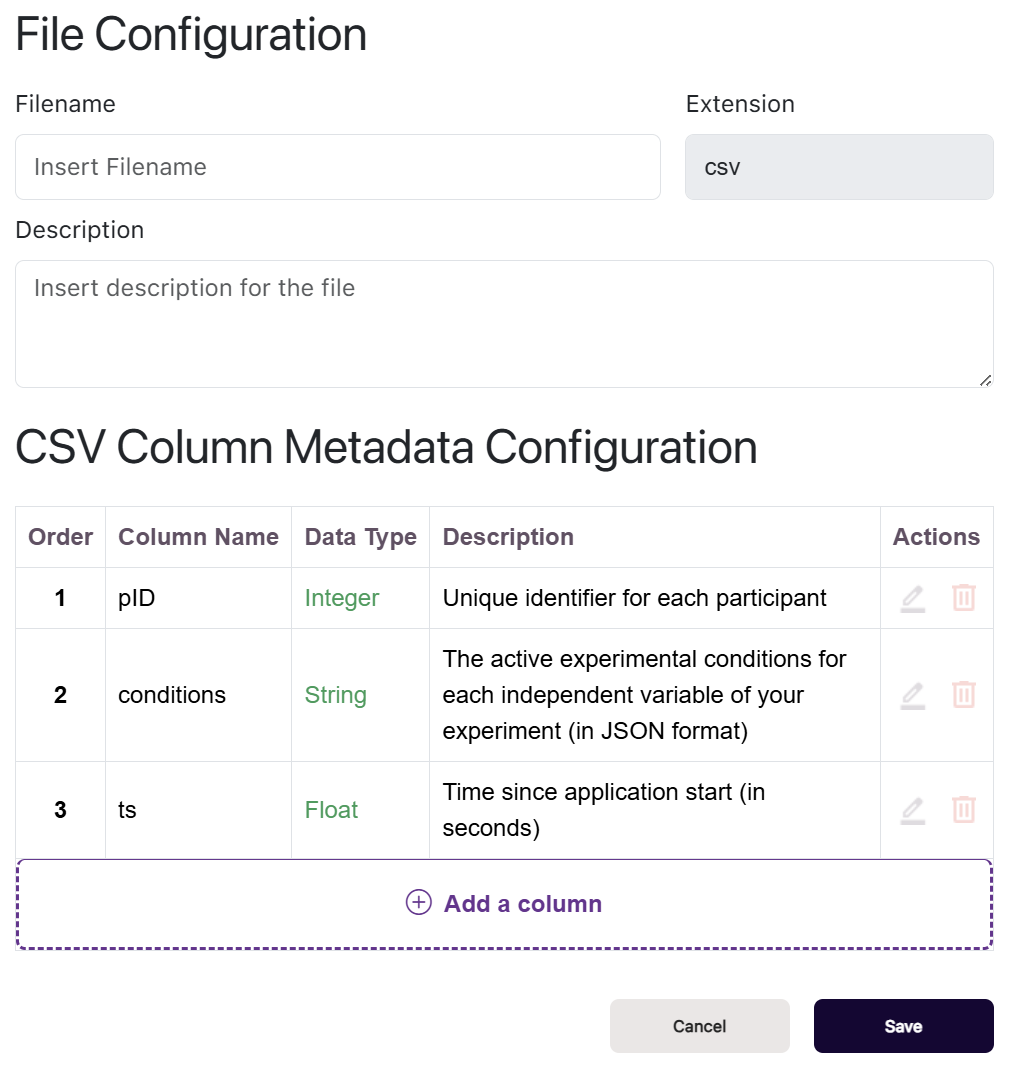
For the first file, LaserLogs.csv, fill out the form:
Set the Filename to “LaserLogs” (the “.csv” extension will be added automatically by VERA).
Set the Description to something like “Logs each laser shot and whether it hit or missed”.
Click the + Add a column button to add the columns described above, making sure to set the correct data type for each column. As a reminder, the columns you’ll need to add for this file are block (integer), round (integer), and hitTarget (boolean). The other columns (pID, conditions, and ts) will be automatically added by VERA, so you do not need to add those manually.
Click Save to save the CSV file information. Your completed file should look something like this:
Repeat this process to add the second CSV file, RoundSummaries.csv, with the columns described above. You’ll need to add columns for block (integer), round (integer), totalShotsFired (integer), totalShotsHit (integer), and accuracy (float). The other columns (pID, conditions, and ts) will be automatically added by VERA, so you do not need to add those manually.
Once completed, click Save; your second file should look something like this:
After you’ve defined both of these files, you should be able to see them listed on the data logging page, as shown below:
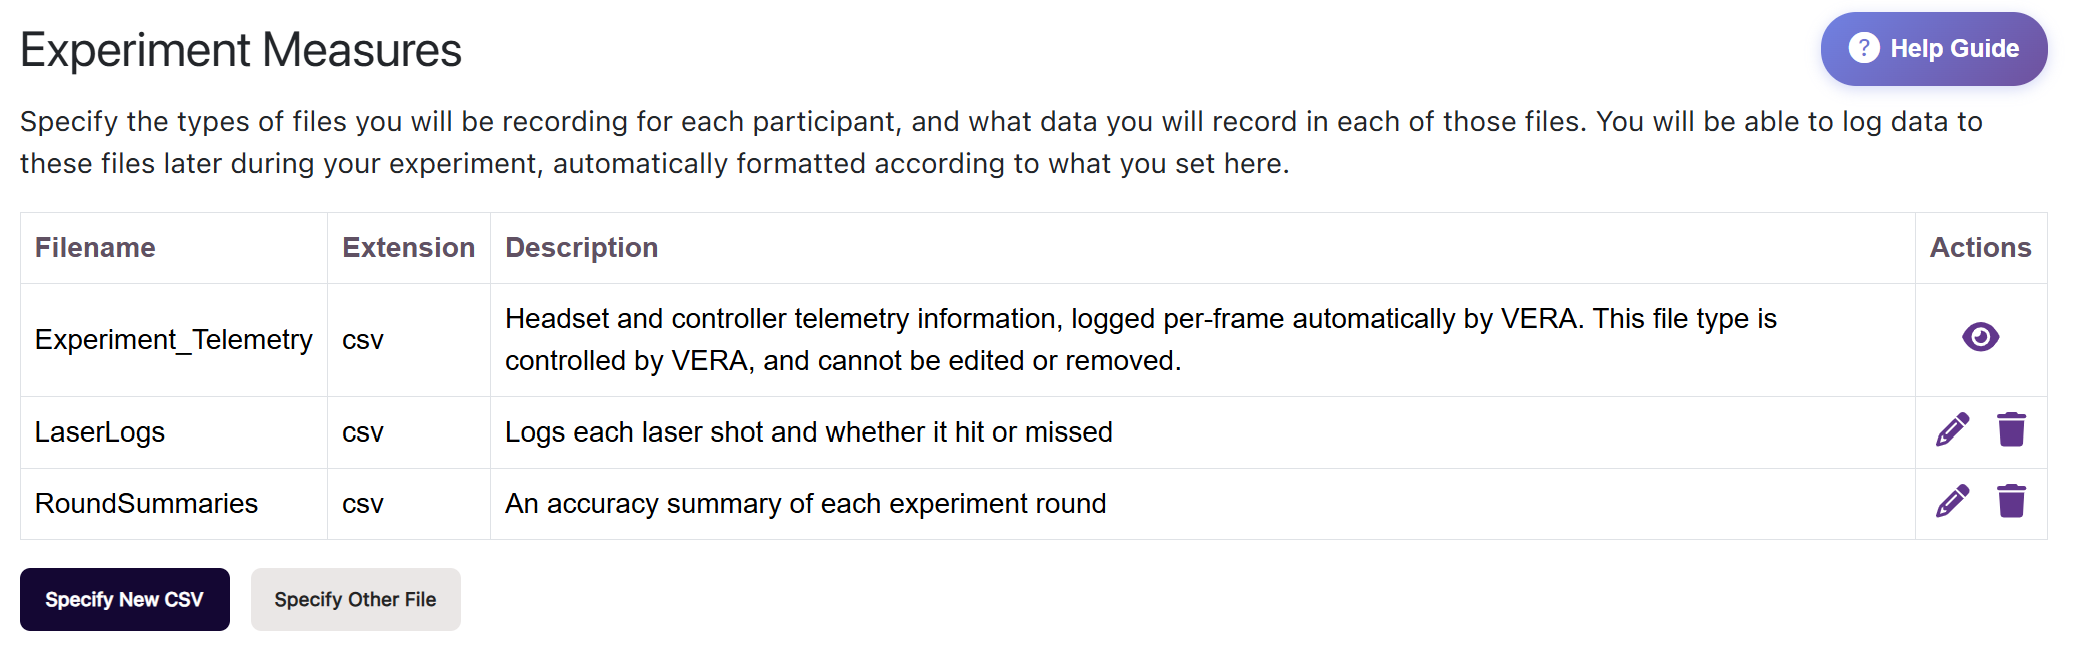
You will also see Experiment_Telemetry listed by default. This CSV is recorded automatically by VERA for every participant and cannot be edited or removed; feel free to ignore it for this demo.
By defining the format of the data you’ll be collecting on the web interface, VERA will provide you with tools to easily log your experimental data.
Sandbox Cheat-Sheet: logging data with VERA
Each file type you define on the web interface has its own auto-generated VERA C# class in Unity.
These classes are named exactly the same as your file types on the web portal, prefixed with “VERAFile_”. For example, “VERAFile_LaserLogs” and “VERAFile_RoundSummaries”.
Using this class, you can:
// Create a new CSV log entry for the LaserLogs.csv file type
VERAFile_LaserLogs.CreateCsvEntry(currentEnvironmentalBlock, currentRound, hitTarget);
Any data you log with VERA will automatically sync to the VERA web client in real-time.
All data will also be recorded locally as a backup (Assets/VERA/data).
Results can be found on the VERA web client.
Note
It is important that you enter the file types and and their columns exactly as they are defined above; in the next section, we will show you how to set up your Unity project to utilize the file types above, and the Unity scripts will be looking for the exact files and columns shown above to function properly.
Setting up questionnaires
Next, click the Questionnaires card to expand the Surveys & Questionnaires section.
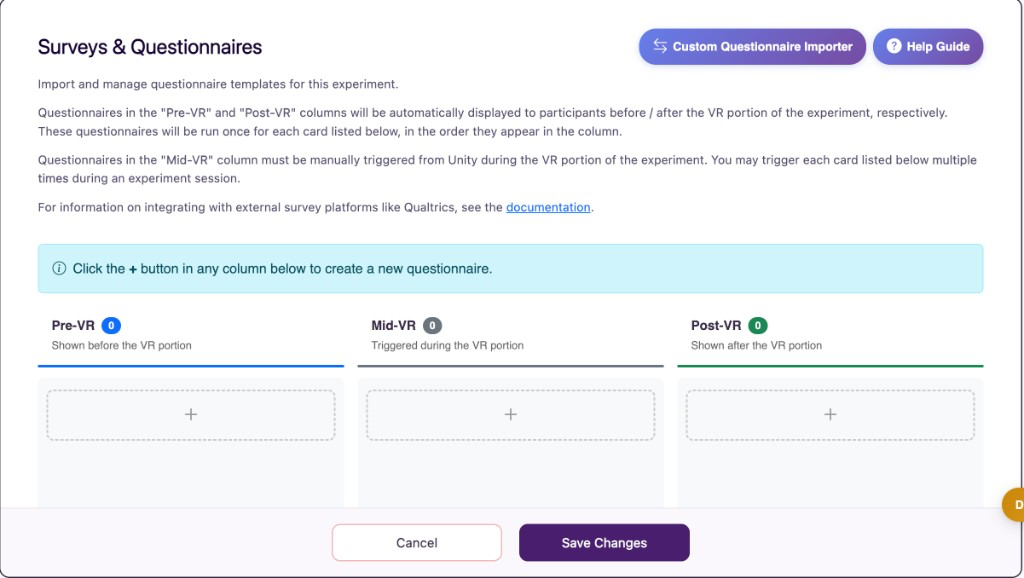
Questionnaires are organized into Pre-VR, Mid-VR, and Post-VR columns, depending on when participants should see them. Pre-VR and Post-VR questionnaires are shown automatically; Mid-VR questionnaires are triggered from Unity during the VR portion of the study.
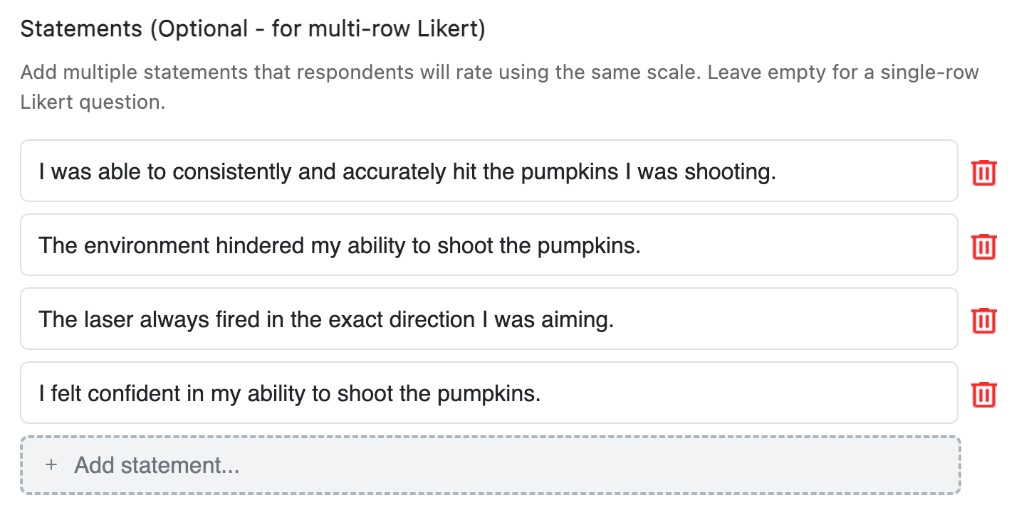
As a reminder, the VERA Sandbox demo makes use of a single questionnaire, a “Confidence Rating Questionnaire”, which prompts participants to rate their confidence in their ability to hit the targets with their lasers. This questionnaire is administered at the end of each block (after the three rounds in each environment), and has the following questions:
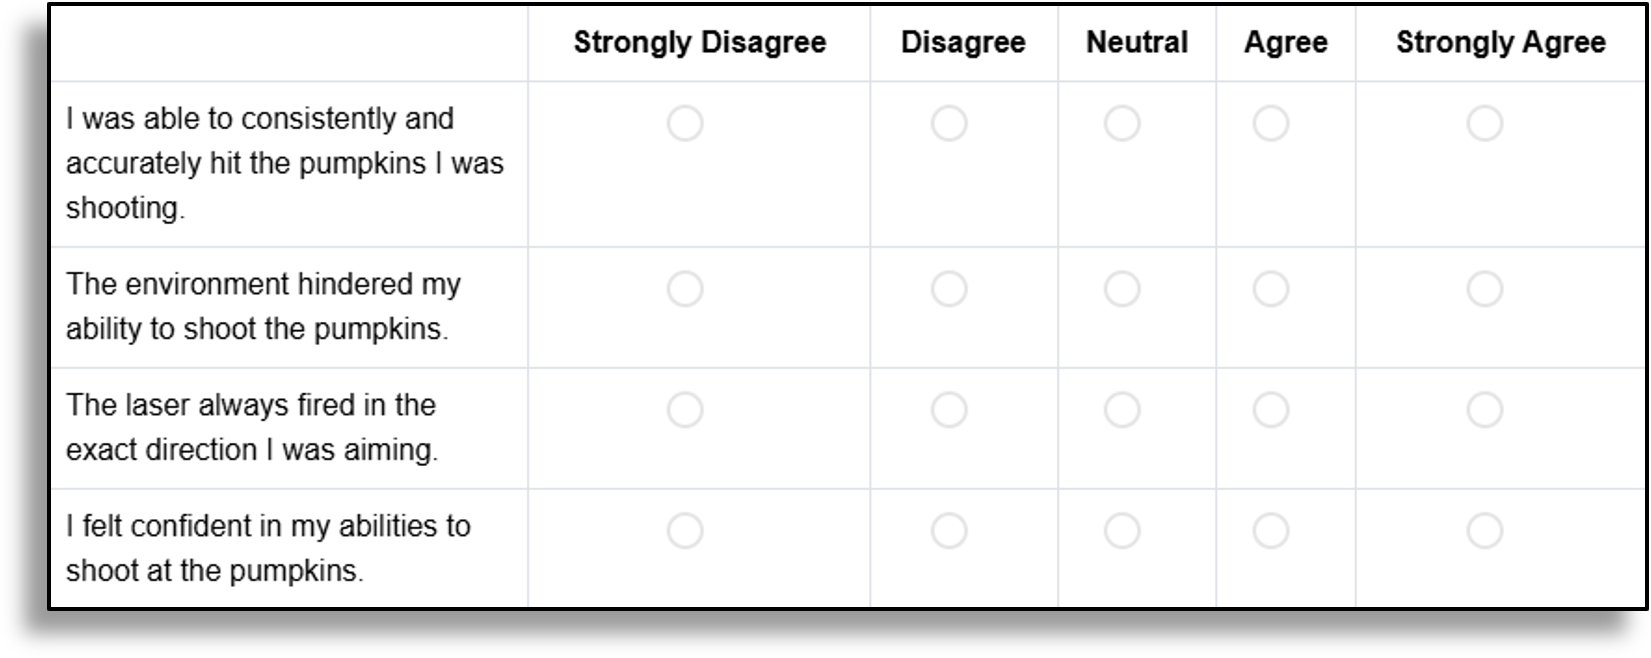
To set up this questionnaire on the web interface, click the + button in the Mid-VR column to add a new questionnaire. This will open the questionnaire builder.
Fill out the questionnaire title, Confidence Rating Questionnaire, and description, something like “In this questionnaire, you will rate how confident you were in your ability to consistently and accurately shoot pumpkins.”. Note that this title and description will be displayed to the participant on the VR headset when they take the questionnaire.
Next, click the Add a Question button to add a new question to the questionnaire. There are different ways we could handle a four-question questionnaire like this, but for the demo, we will set up the questionnaire as a single multi-statement 5-scale Likert question.
To accomplish this, select “Likert Scale” from the Question Type dropdown. Select 5-Point Scale, and set the Question Text to “Rate how strongly you agree or disagree with the following statements:”. Leave the labels ranging from “Strongly Disagree” to “Strongly Agree”.
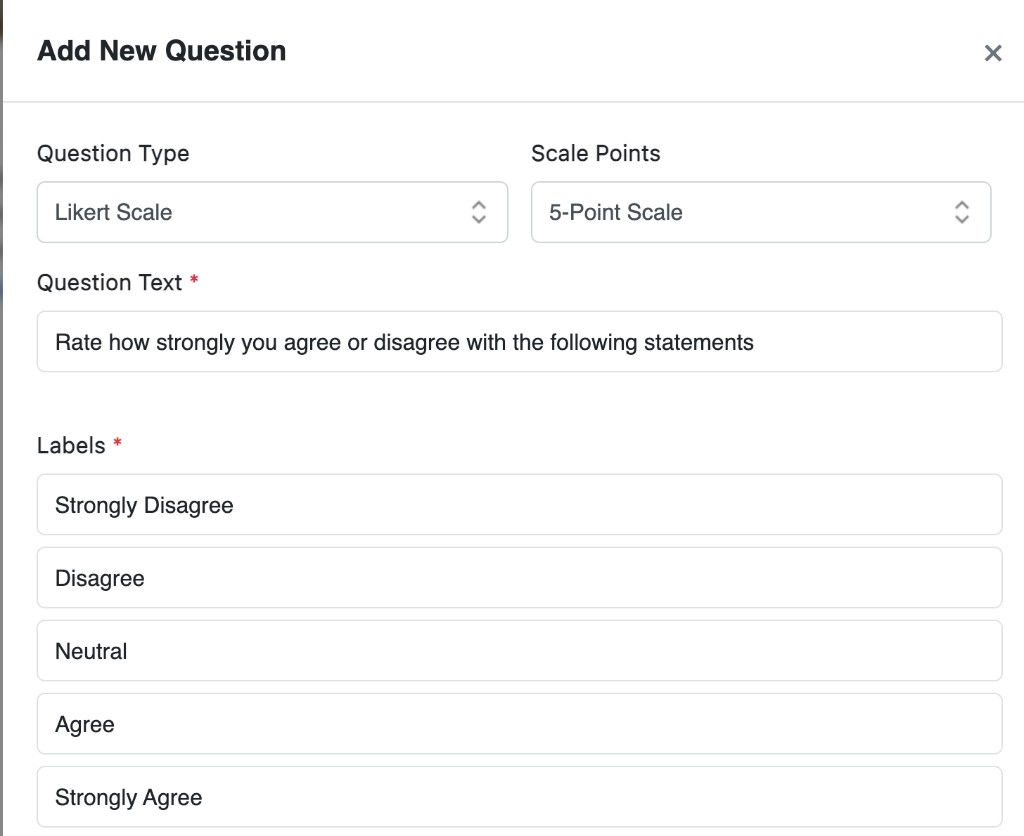
Then, add the four statements as sub-questions:
The preview should look something like this:
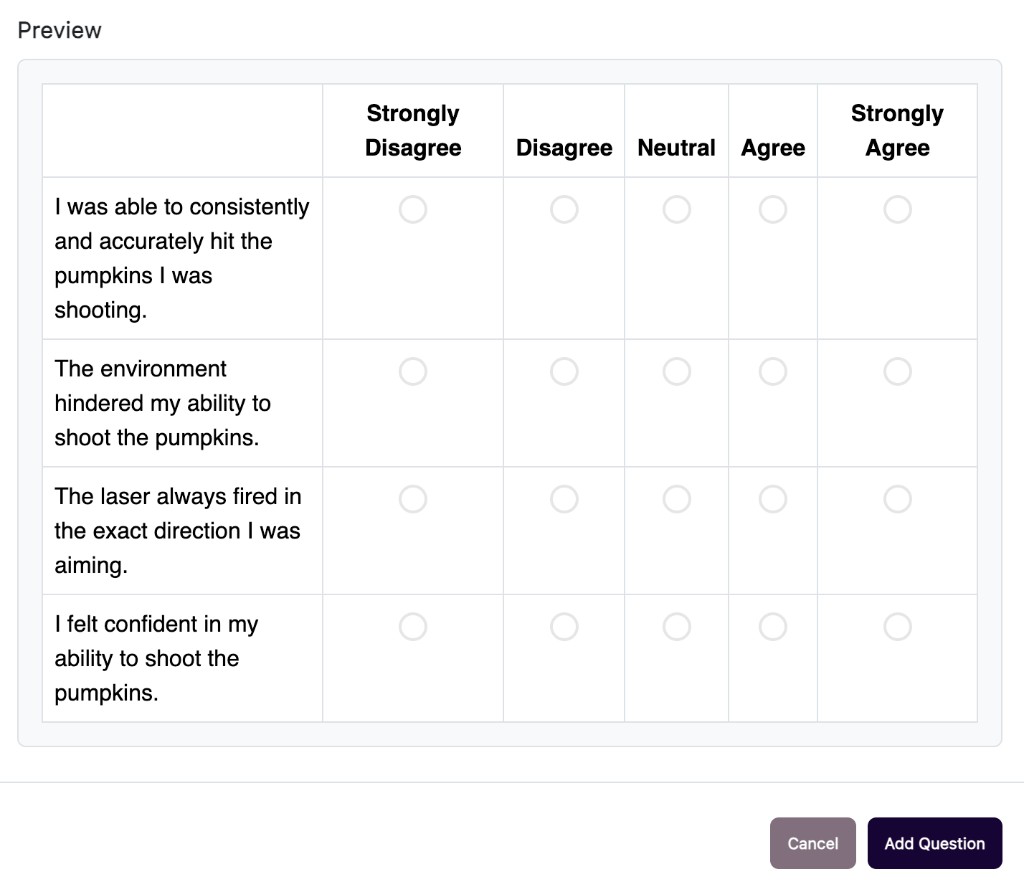
Click Add Question (or Save Changes if you are editing), and then Save Questionnaire for the questionnaire. Your completed questionnaire should show up under the Mid-VR column.
By defining your questionnaires on the web interface, VERA will provide you with tools to easily run questionnaires in VR and record responses.
Sandbox Cheat-Sheet: managing questionnaires with VERA
Each questionnaire you define on the web interface will be accessible from the VERASurveyHelper Unity C# class.
- There will always be a single VERASurveyReference in this class, named exactly the same as your questionnaire is named
on the VERA web client, prefixed with an “S_”. For example, “S_ConfidenceRatingQuestionnaire”.
Using the VERASurveyHelper, you can start any questionnaire via its VERASurveyReference:
// Display the "Confidence Rating Questionnaire" survey to the participant
VERASurveyHelper.StartSurvey(VERASurveyHelper.VERASurveyReference.S_ConfidenceRatingQuestionnaire);
VERA will automatically handle the display, UI interaction, and response recording.
Provide a variety of optional parameters to control the display of the questionnaire.
Use the onSurveyComplete optional UnityEvent parameter to run code automatically once the questionnaire is completed.
Questionnaire results can be found on the VERA web client.
Note
It is important that you enter the questionnaire name exactly as defined above; in the next section, we will show you how to set up your Unity project to utilize the questionnaire above, and the Unity scripts will be looking for the exact questionnaire name shown above to function properly.
Setting up consent and experiment flow
Click the Experiment Flow card to expand the participant flow section. Here you can review how participants move through distribution, consent, questionnaires, and the VR portion of the experiment.
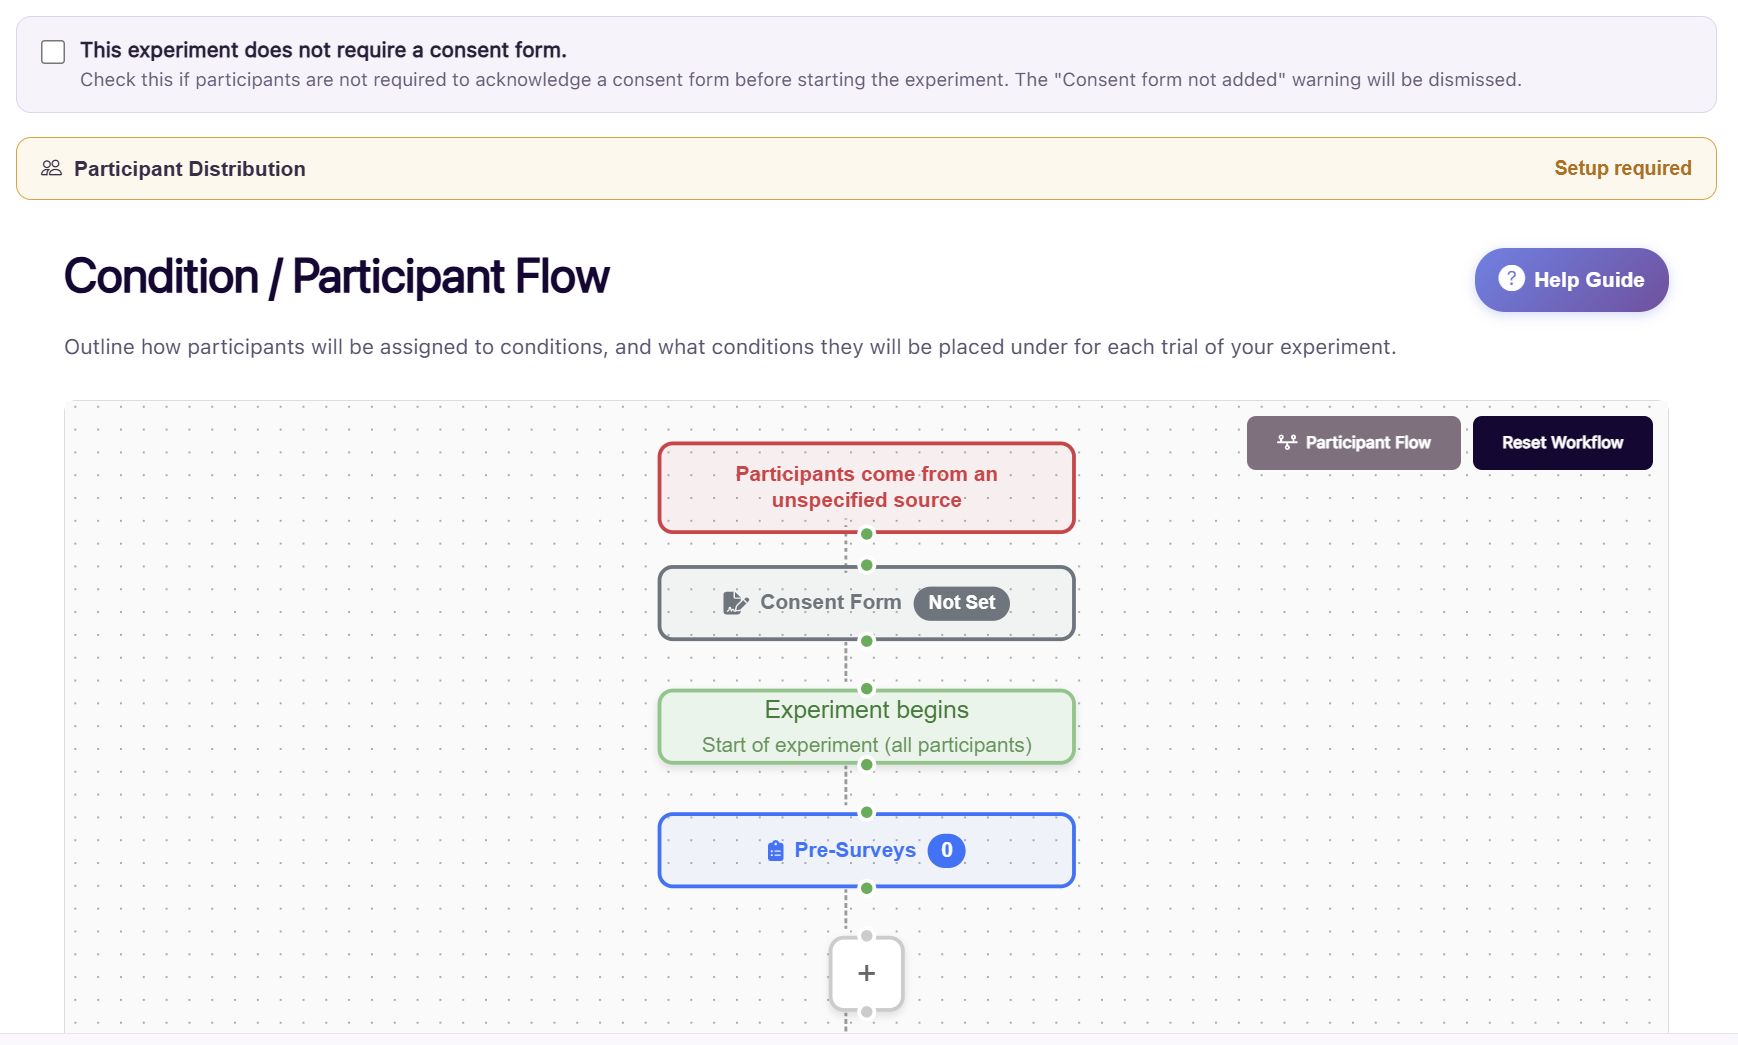
For consent, you have two options:
Mark that no consent form is required (recommended for this demo): check “This experiment does not require a consent form.” This dismisses the “Consent form not added” warning so you can continue the walkthrough without uploading a form.
Add a consent form: click the Consent Form step in the participant flow. You can type or paste consent text, or upload a consent PDF. Save your changes when you are done. For this demo, if you choose this path, you may input whatever placeholder text you’d like.
We’ll return to Participant Distribution later in this demonstration. For now, you can leave distribution unset, or select Custom Remote Distribution if you prefer — more details will be provided later.
Finishing up & next steps
That’s it - your sandbox experiment has been set up on the VERA web interface!
Your experiment remains in Draft until you start collection. At any point, you can return to the Experiment Setup page to edit these cards.
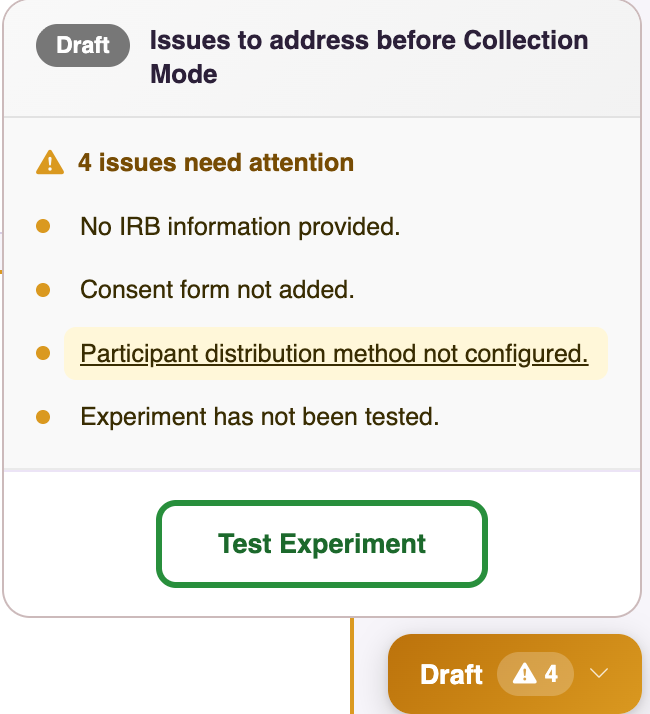
In the bottom-right corner of the page, a Draft indicator shows how many setup items still need attention before you can start collection. Click it to see the list (for this demo, you may still see items such as IRB, consent, distribution, and testing - that is expected while you follow along).
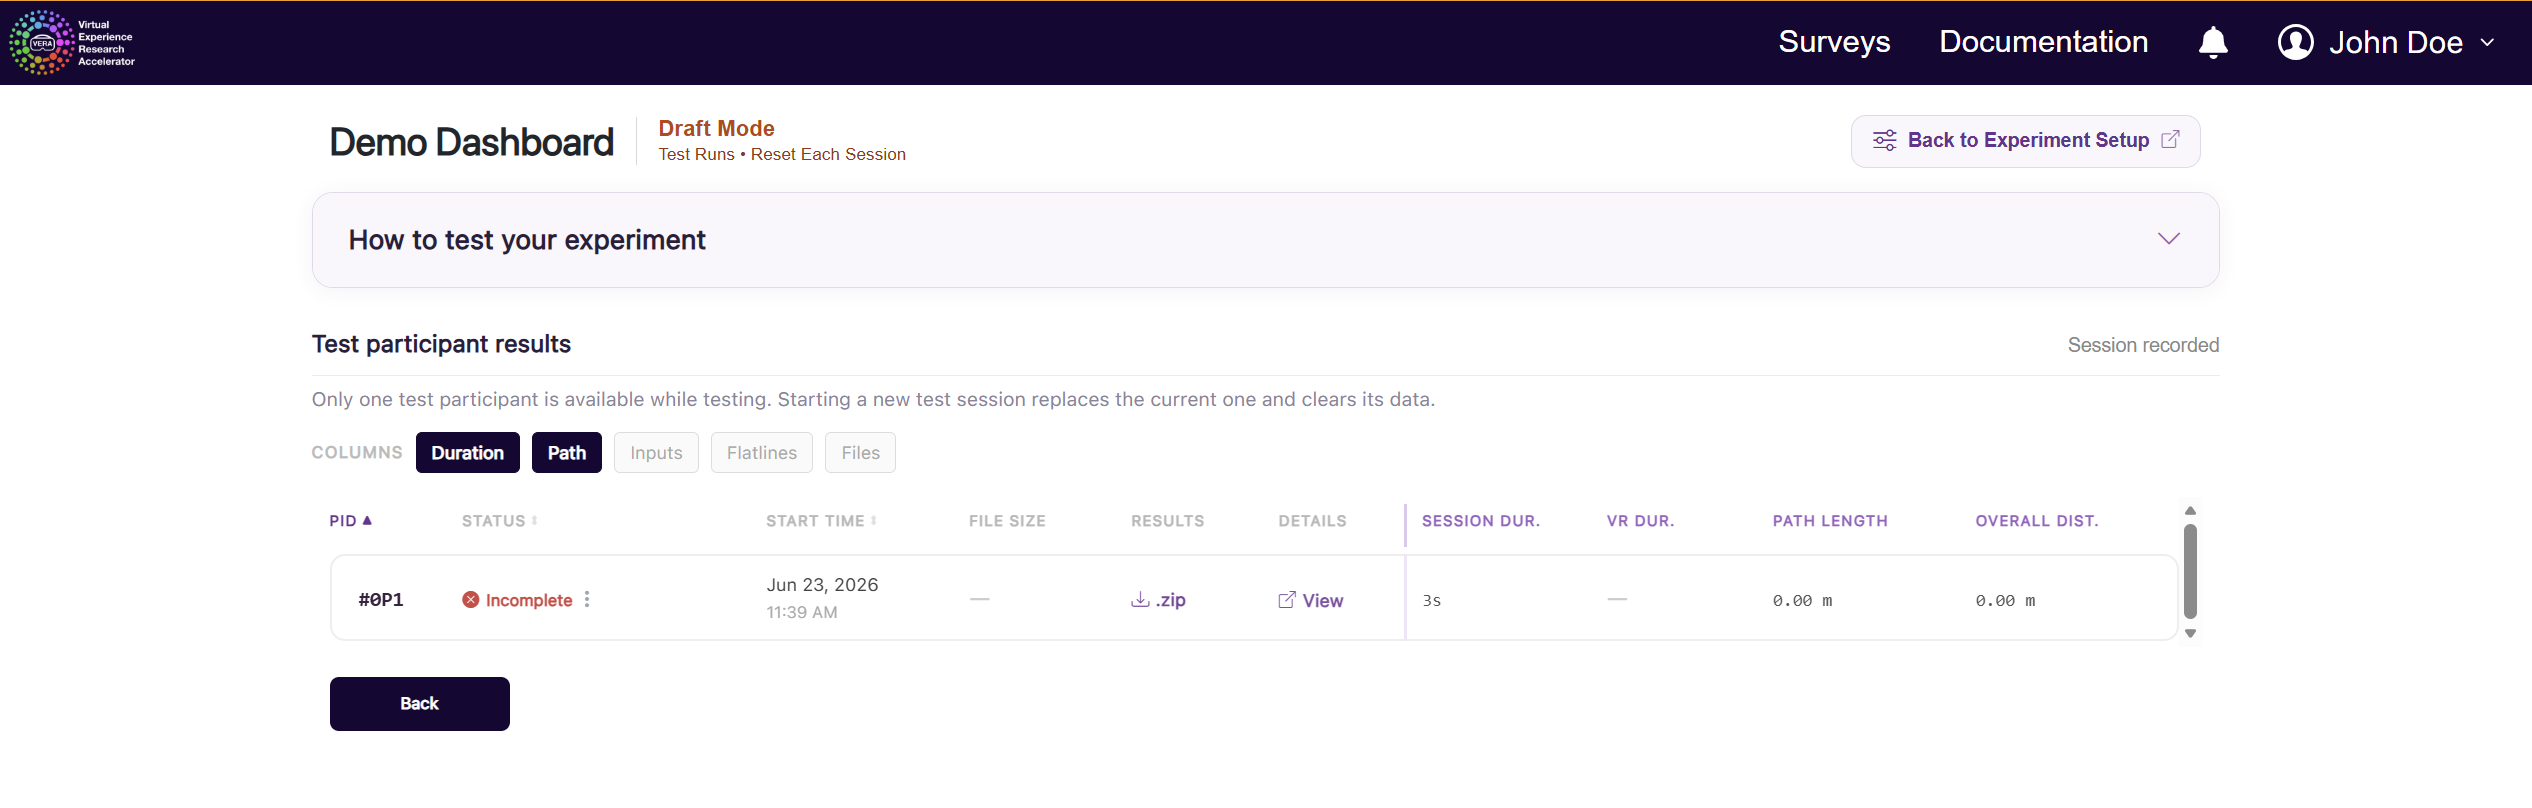
When you are ready to test, click the Test Experiment button. This opens the test results page. We’ll return there later once we’ve recorded some data.
In the next section, we will walk through the process of creating your experiment in Unity. VERA Sandbox Demo: Unity Setup
For a “cheat-sheet” quick-reference guide to the VERA Sandbox Demo, see VERA Sandbox Demo: “Cheat-Sheet” Quick Reference Guide.