
VERA Sandbox Demo: Unity Setup
The VERA Sandbox Demo is a sample “mock experiment” designed to demonstrate the core features of VERA. This page walks you through the process of creating your experiment in Unity using the VERA Unity package.
If you have not yet already done so, read through the intro to the VERA Sandbox Demo, VERA Sandbox Demo: Intro, and create your experiment on the web interface as outlined in the VERA Sandbox Demo: Web Setup section.
For a “cheat-sheet” quick-reference guide to the VERA Sandbox Demo, see VERA Sandbox Demo: “Cheat-Sheet” Quick Reference Guide.
What’s in this section
Link your VERA experiment to your Unity project.
Manage experimental conditions in Unity.
Log participant data from Unity.
Run questionnaires in VR and record responses.
Installing the VERA package
Before you continue, make sure you are on the main branch of the VERA Sandbox Demo repository. This branch represents the Unity project without the VERA package installed, so you can follow along with the installation process. If you never swapped branches, you should be on the main branch by default.
If you are not on the main branch, you can switch to it by running the following command in your terminal from the root of the repository:
git checkout main
Once you’re on the main branch, open up the VERA Sandbox Unity project you set up in the VERA Sandbox Demo: Intro section. We’ll now walk through the process of installing the VERA package into the project.
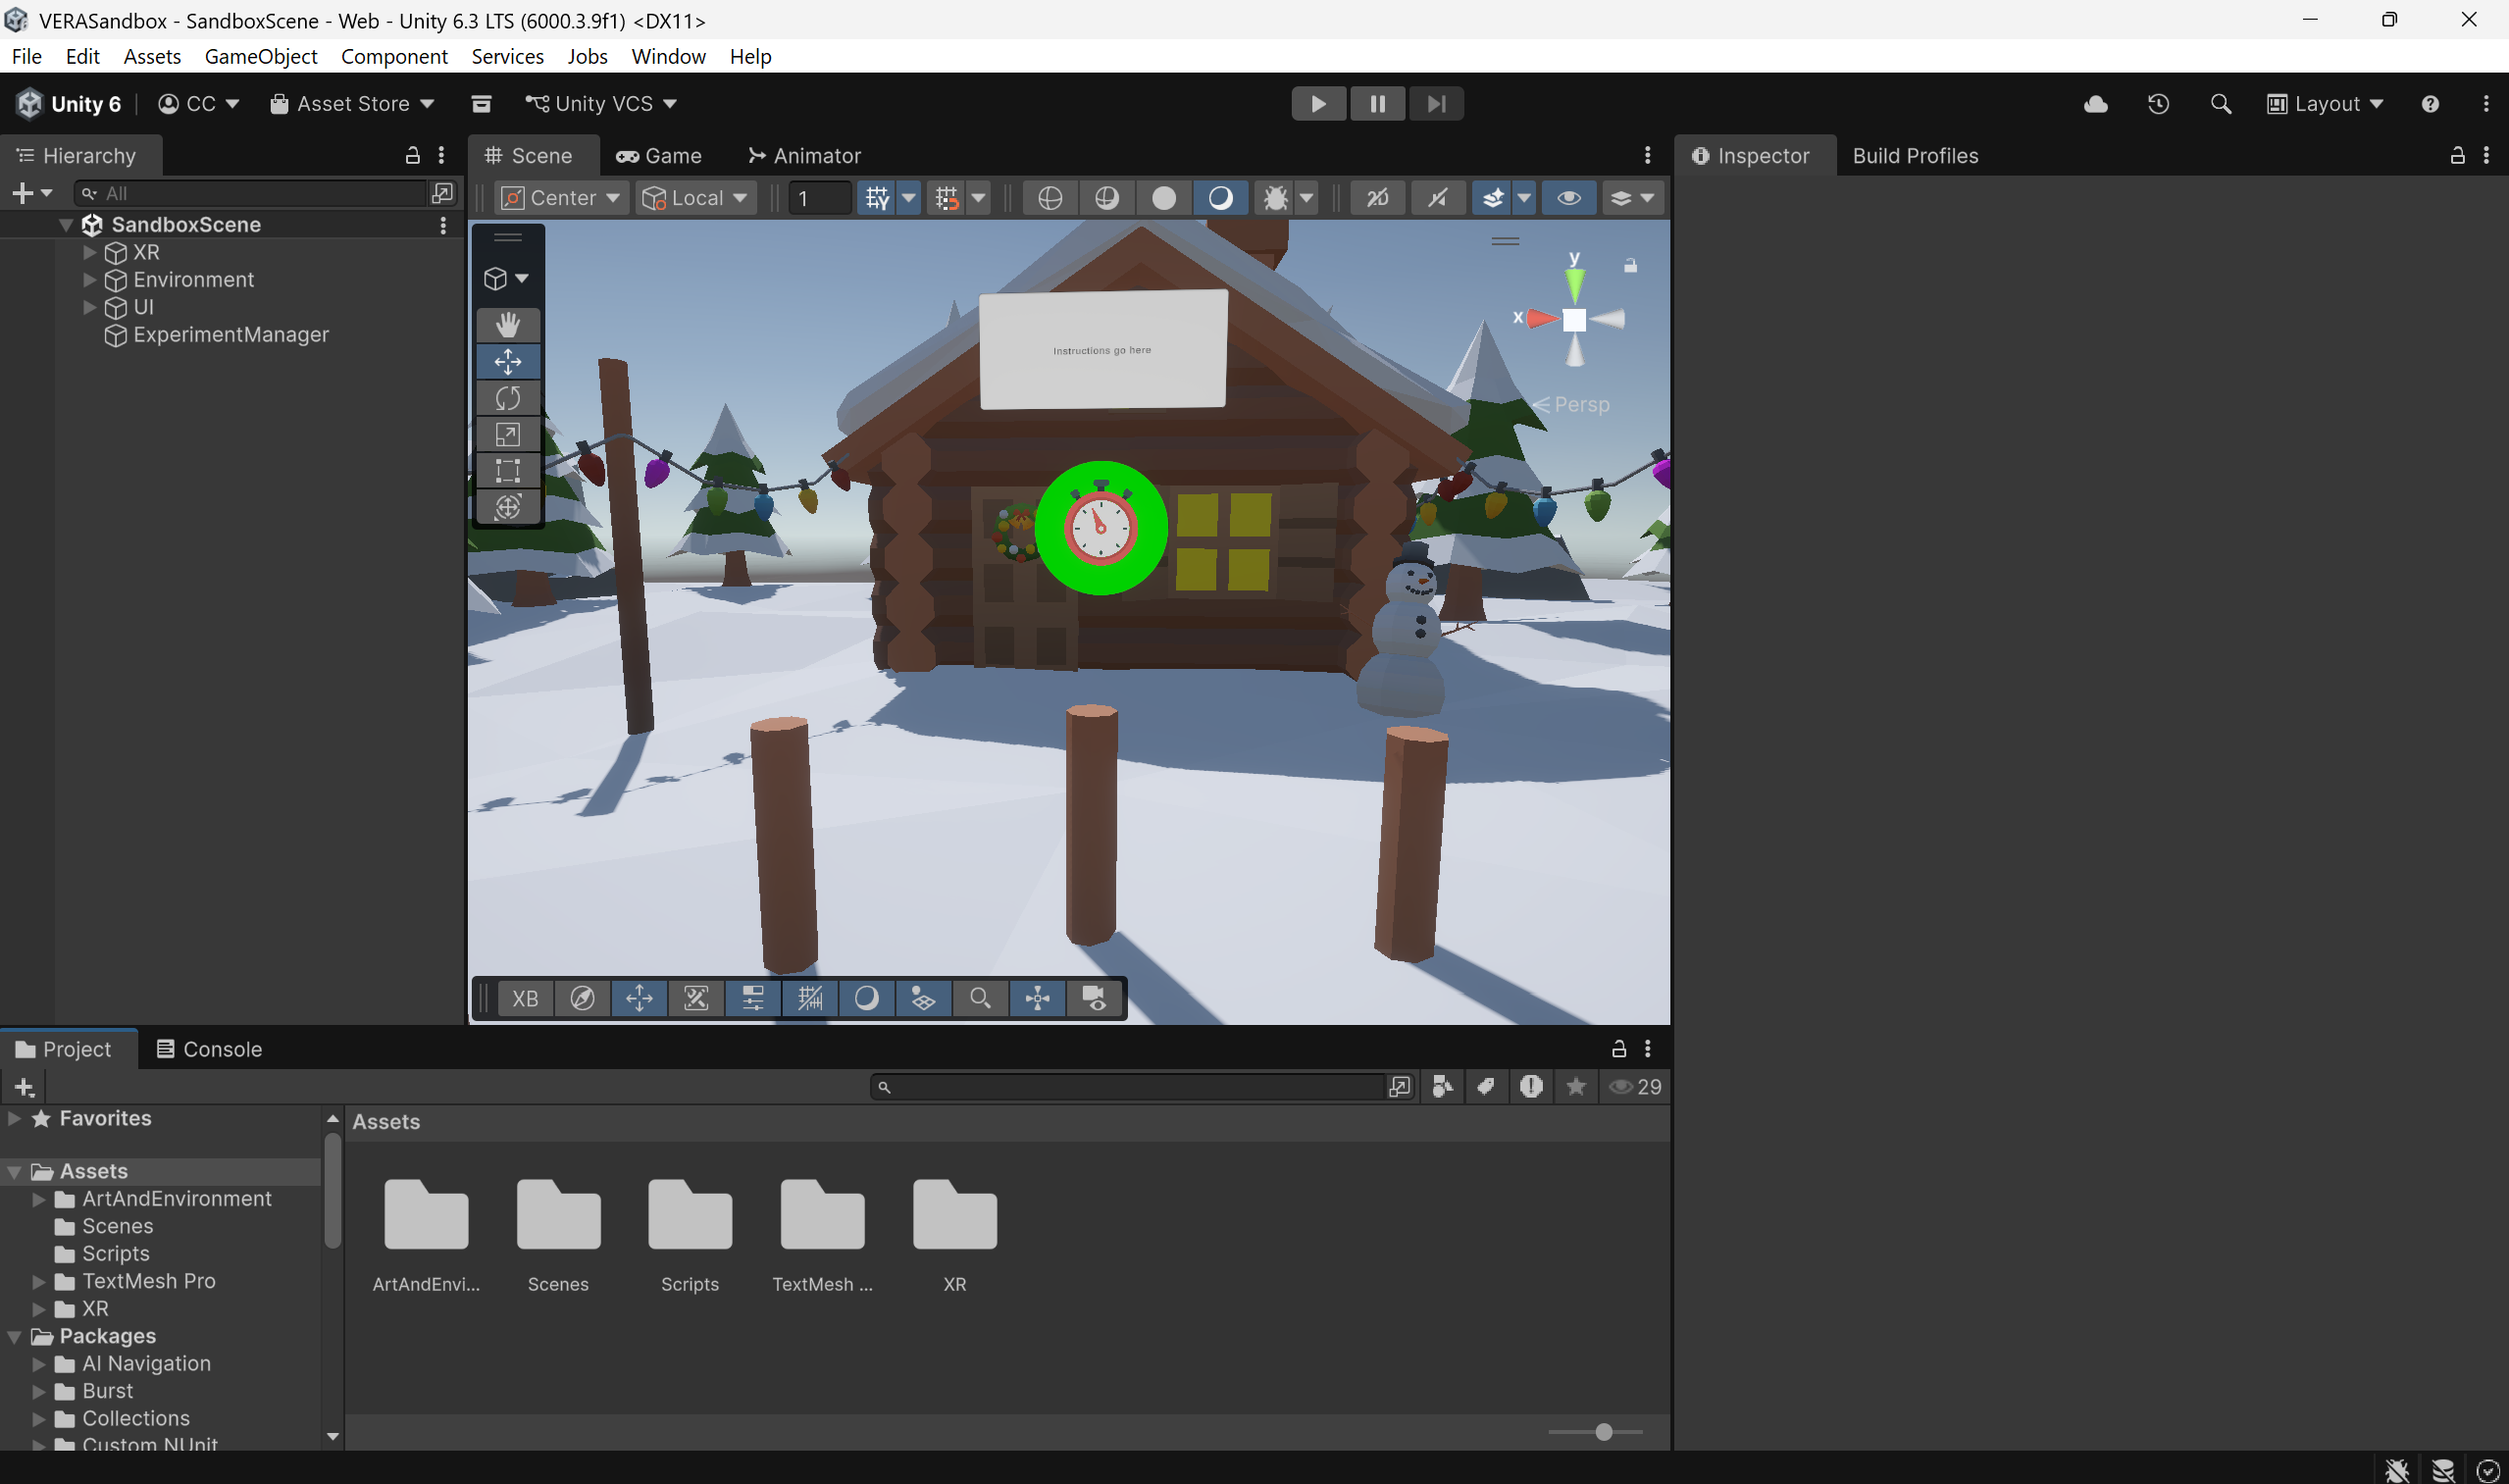
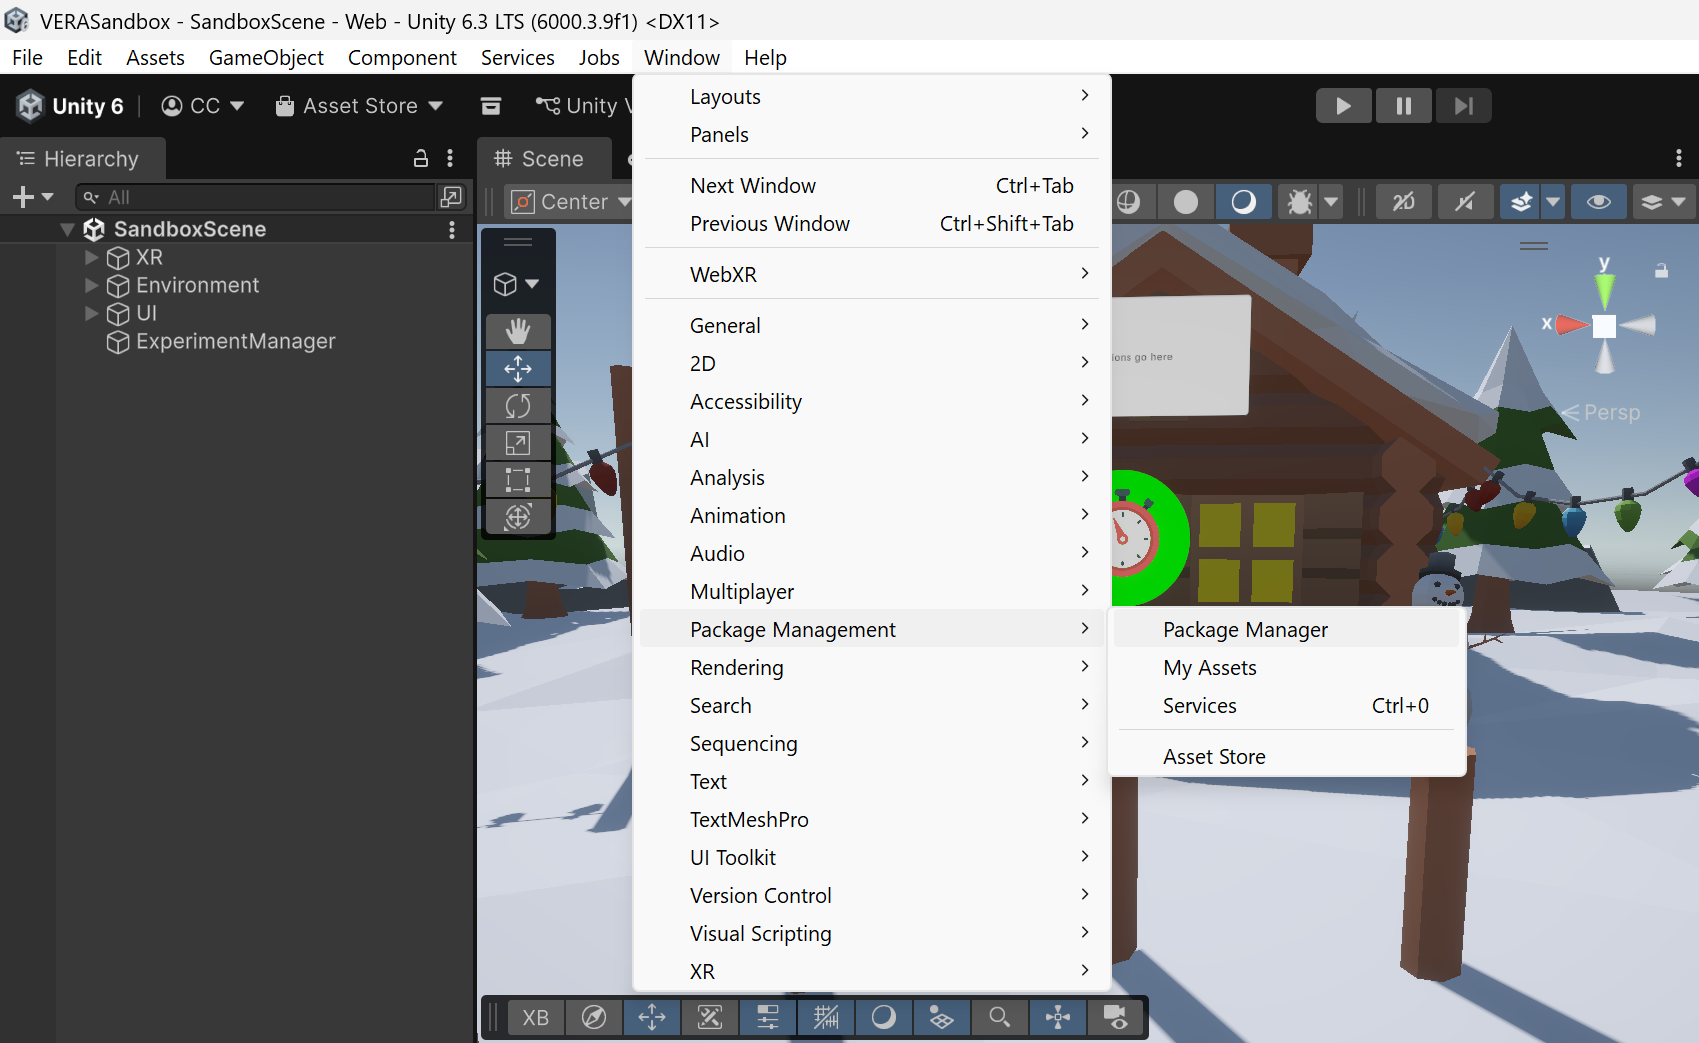
From the top menu bar, select Window > Package Manager. In the Package Manager window, click the “+” button in the top left corner, and select “Add package from git URL…”.
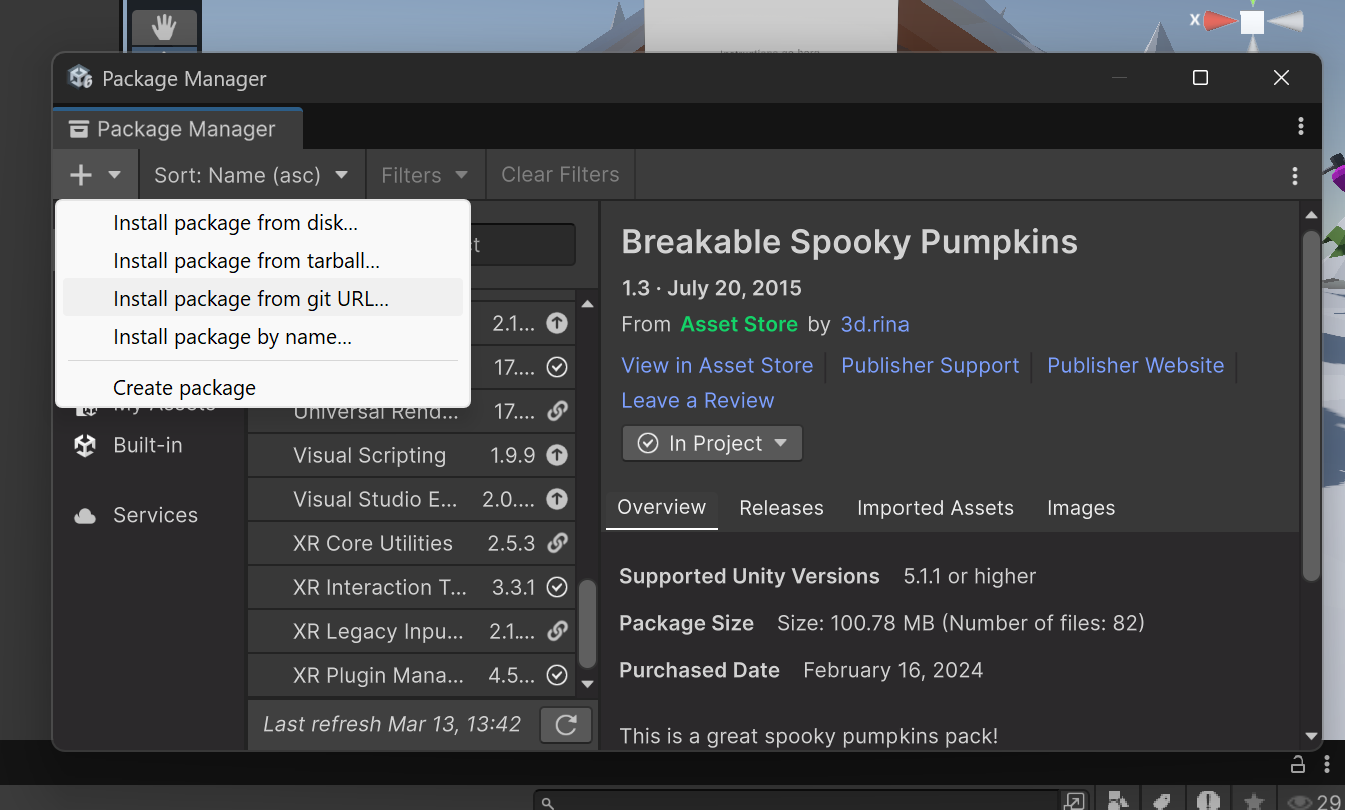
Enter the following URL, and click “Install”:
VERA Package URL
After installation, VERA should show up in your list of packages, as shown below:
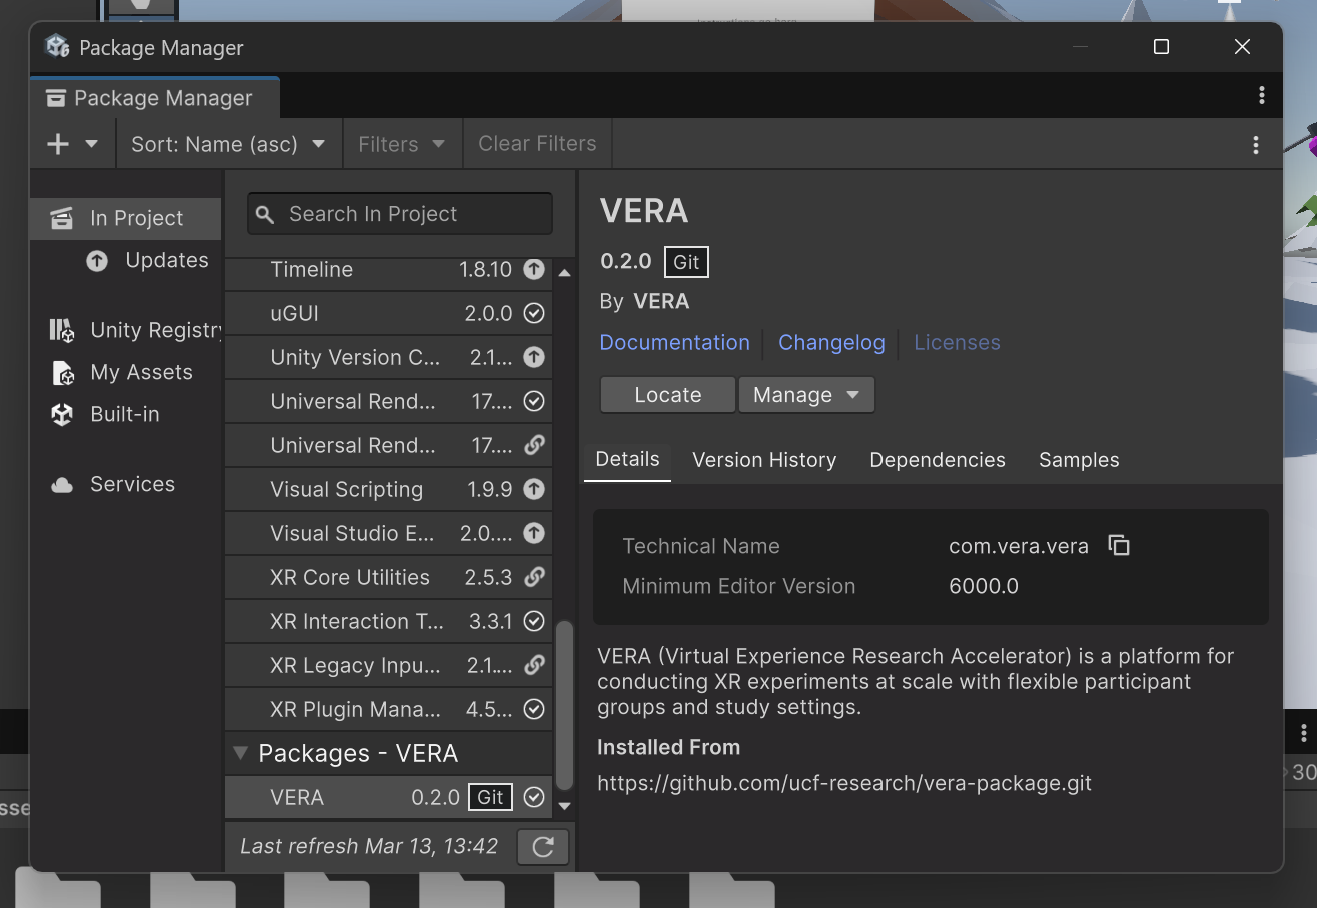
If you have any issues installing the package, please refer to the Installation and setup section.
Linking your VERA experiment with Unity
Now that VERA is installed, we need to link your Unity project to your VERA experiment you created on the web interface in the previous section. If you have not yet created your experiment on the web interface, please do so now by following the instructions in the VERA Sandbox Demo: Web Setup section.
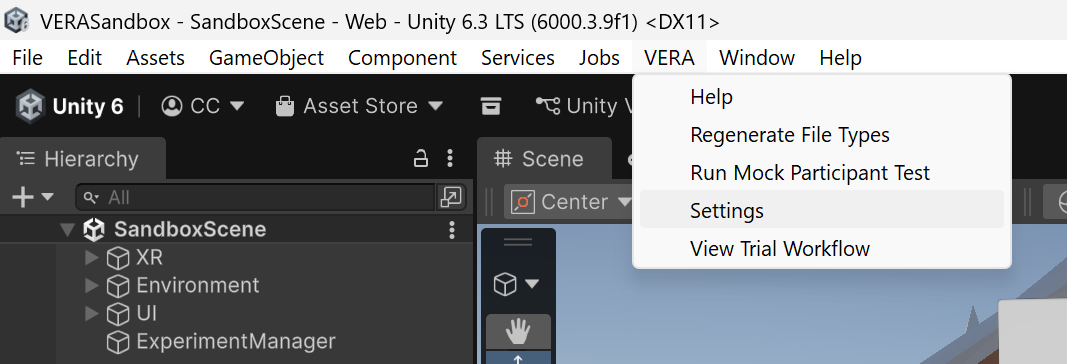
To authenticate your Unity session with your VERA account, open up the VERA Settings menu by selecting VERA > Settings from the top menu bar.
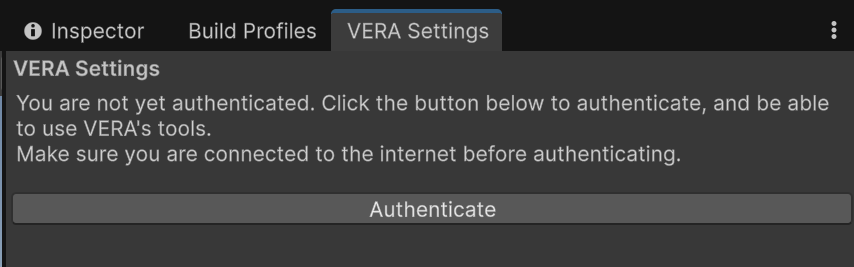
In the VERA Settings window, click the “Authenticate” button. This will open a web browser, which will link your Unity project to your VERA account and experiments.
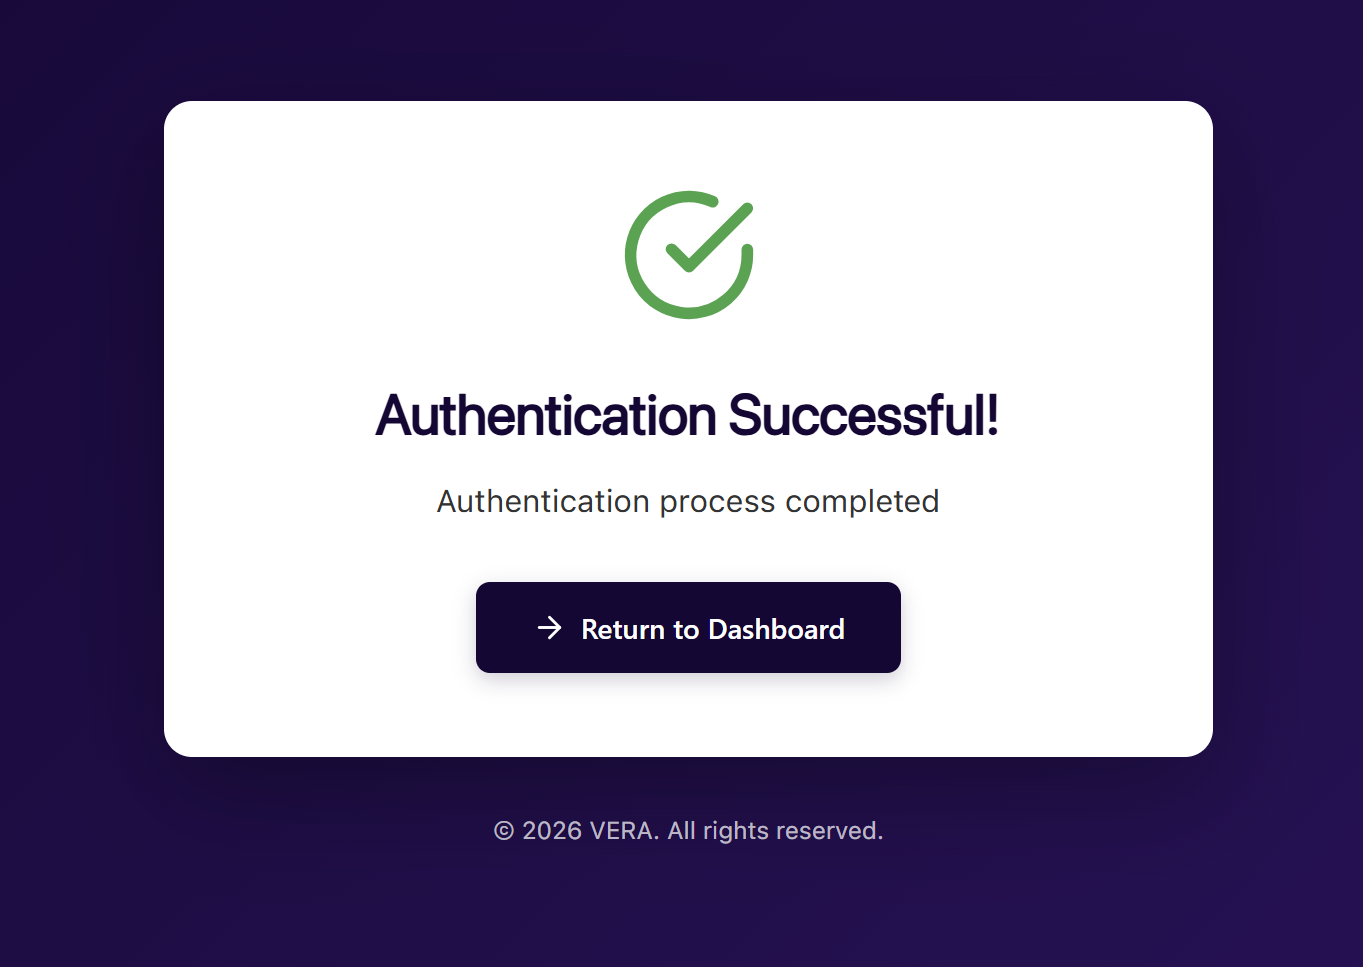
When you return to Unity, you should see your account information displayed in the VERA Settings window, as shown below:
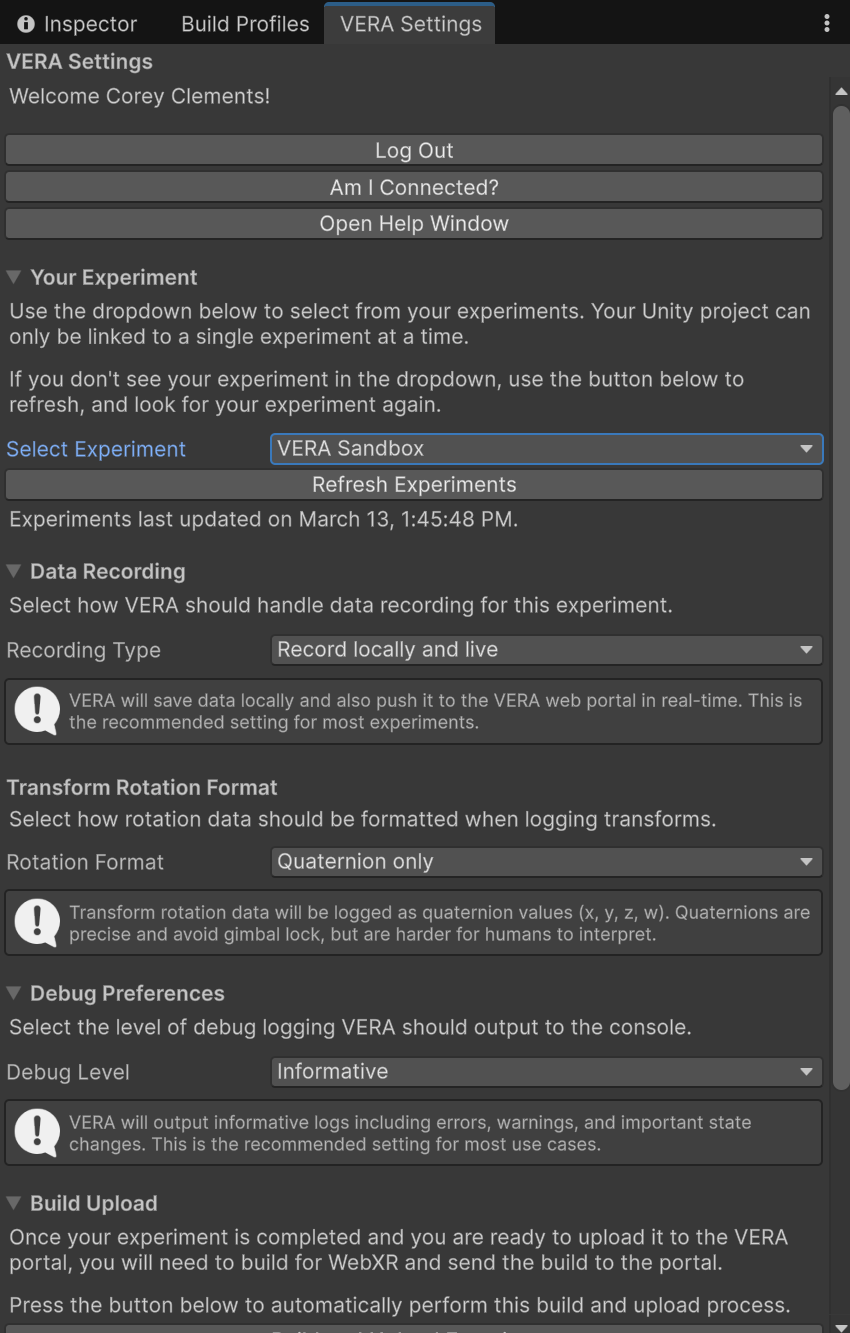
From this VERA settings window, you can manage your connection to the VERA web interface, as well as adjust high-level settings for your Unity project.
Next, we want to select the active experiment for this Unity project. Under the “Your Experiment” section, click the Select Experiment dropdown, and select the sandbox demo experiment you created on the web interface in the previous section.
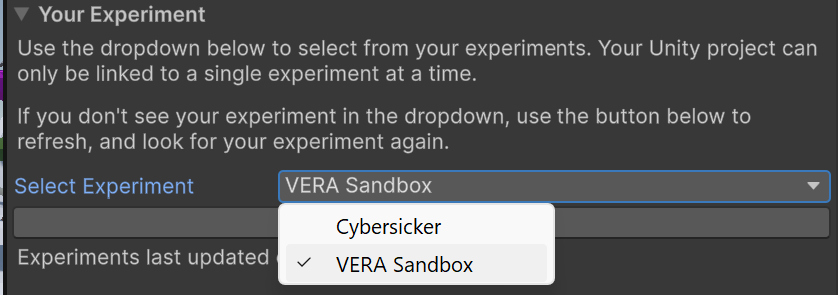
Now, any data recorded will be under this experiment, and you can use the tools provided by VERA to manage experimental conditions, log data, and run questionnaires for this experiment.
Retrofitting the ExperimentManager.cs script
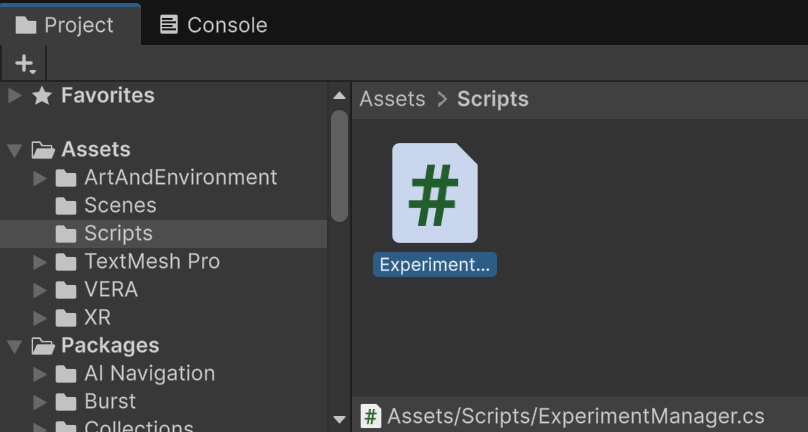
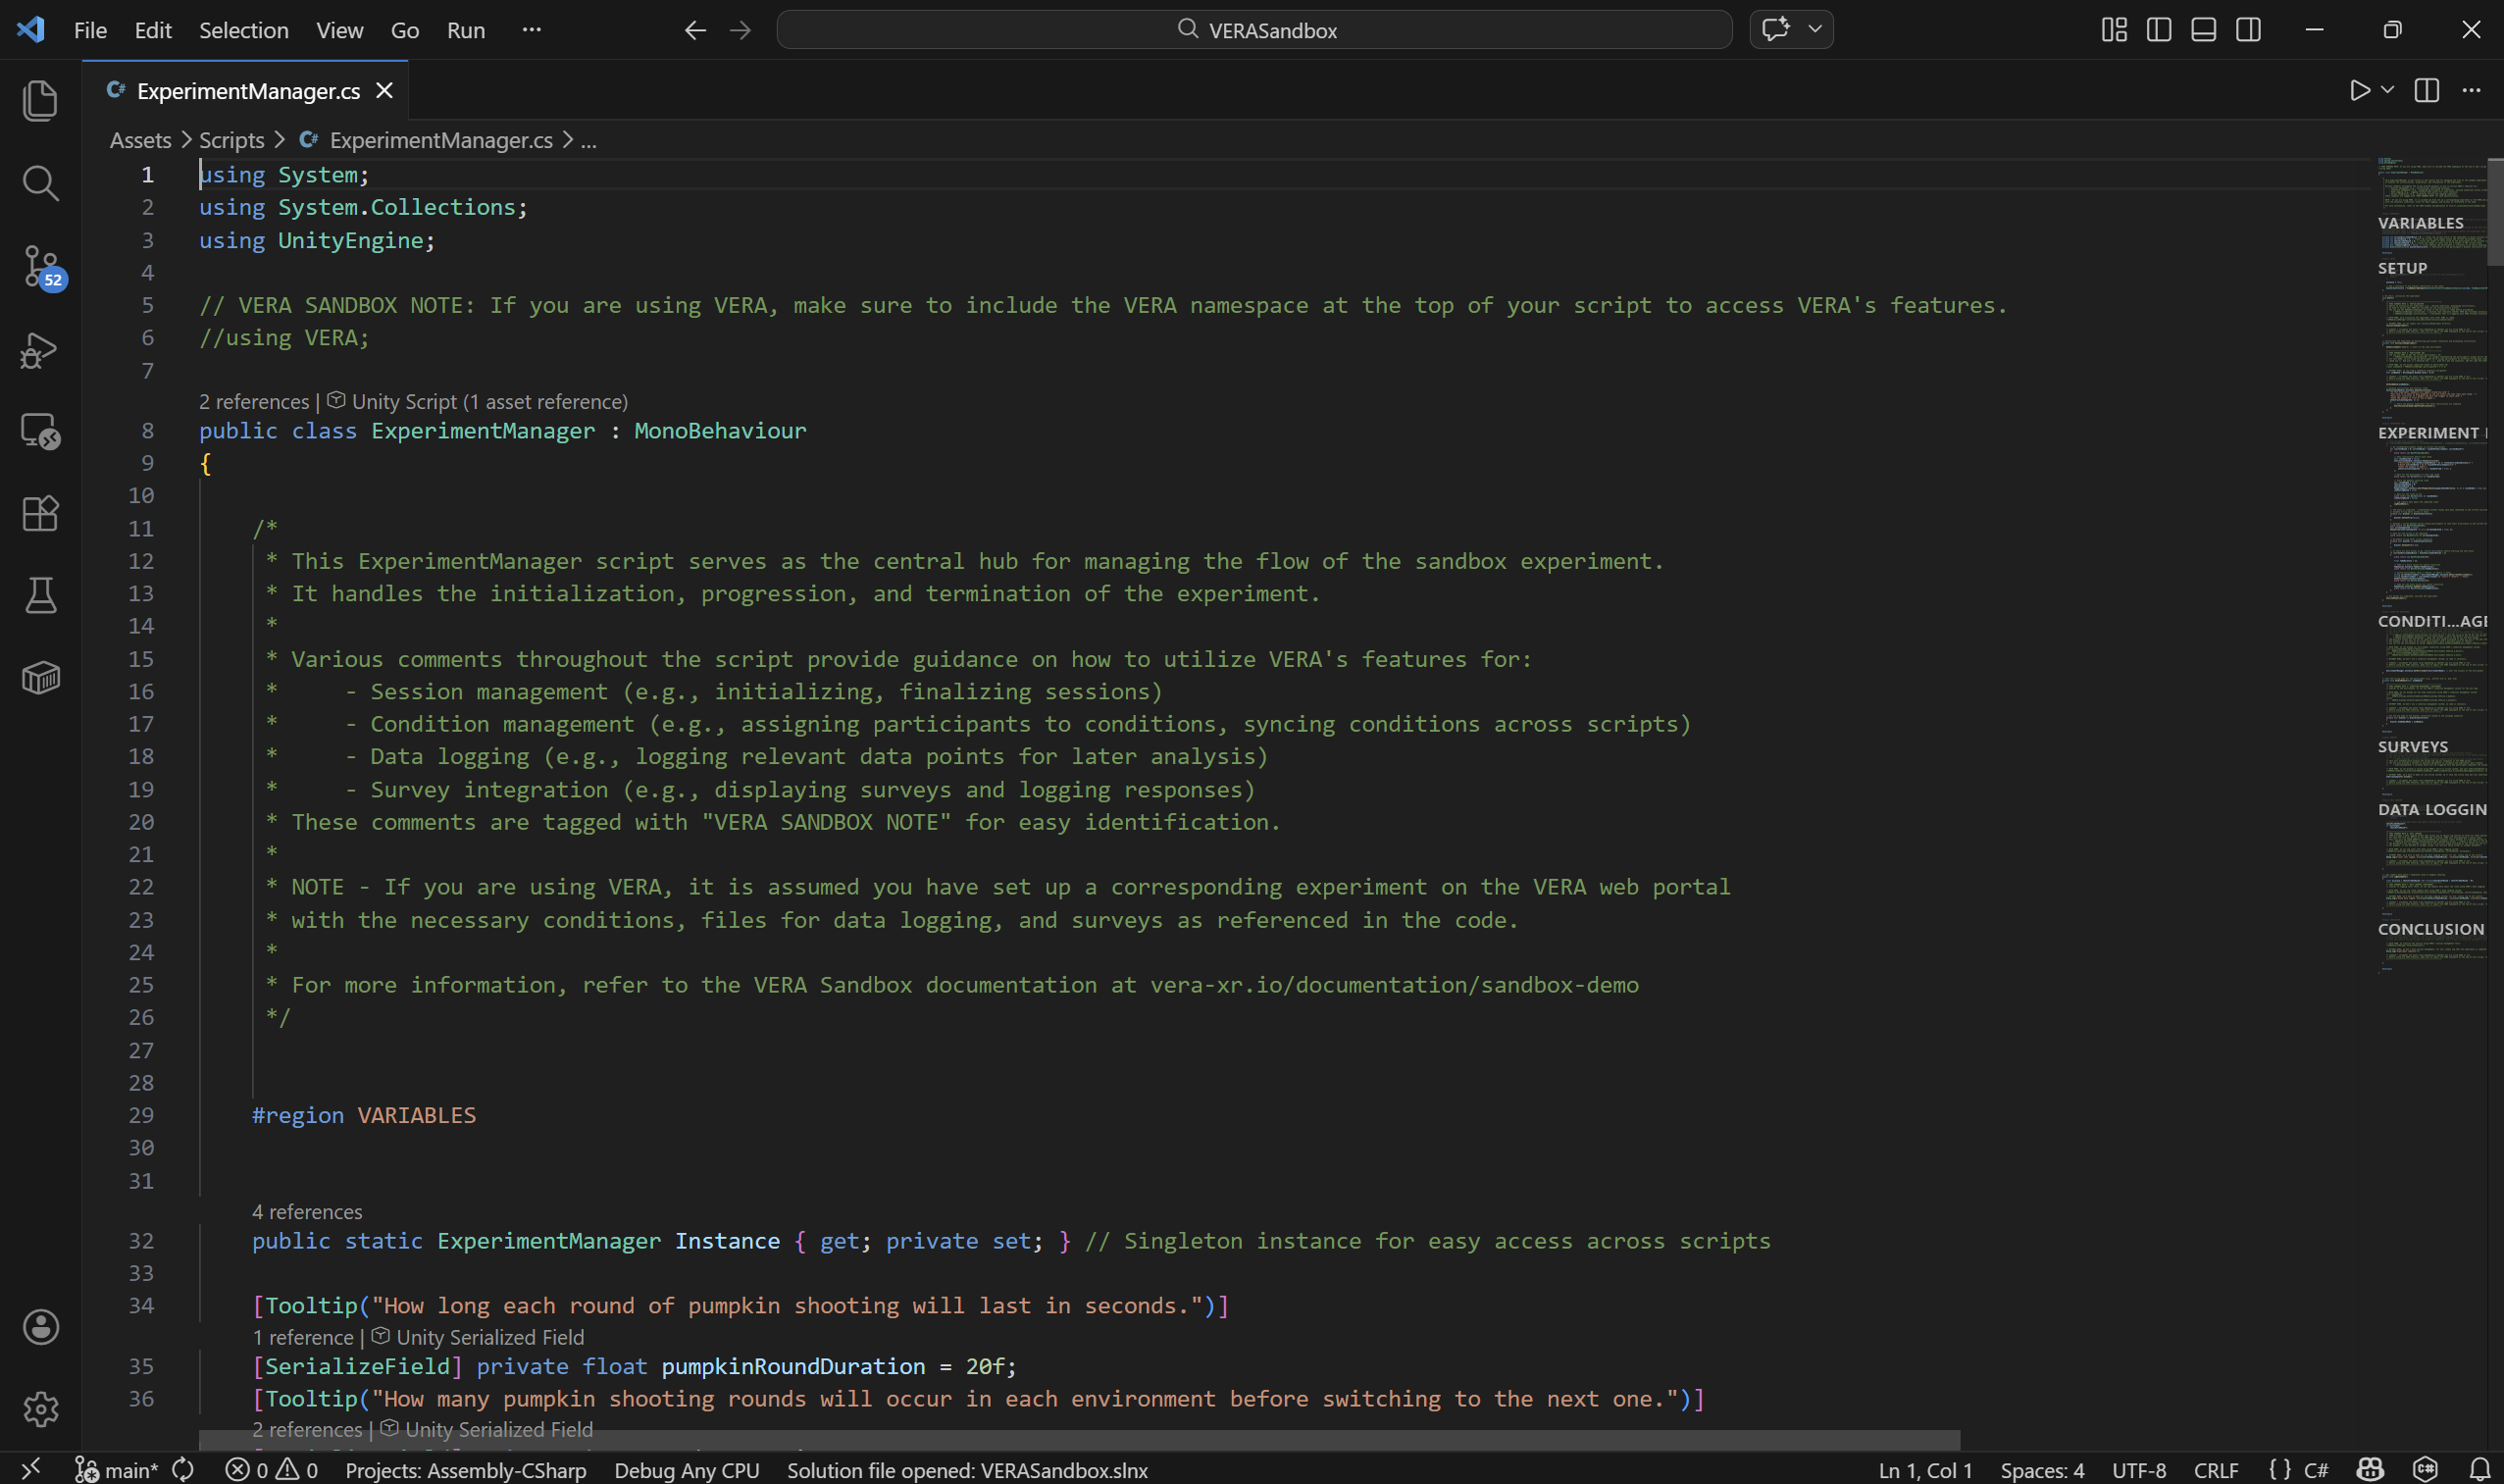
This demo project does not have VERA integrated yet. So, the experiment is not yet managing experimental conditions, logging data, or running questionnaires with VERA. To add VERA functionality to the project, we will retrofit the existing ExperimentManager.cs script, which is located in the Assets/SandboxDemo/Scripts folder. Open up the script, and follow along with the instructions below to add VERA functionality to the script.
The notable sections will be marked as a VERA SANDBOX NOTE in the script, and will be referenced in the instructions below. For each note, there will be comments listing how the code would work WITH VERA, and WITHOUT VERA. The code WITH VERA will be commented out, and the code WITHOUT VERA will be active. Our task will be to uncomment the code WITH VERA, and comment out the code WITHOUT VERA, to retrofit this script with VERA functionality.
Pre-Steps: Import VERA
Before we can add VERA functionality to this script, we need to import the VERA namespace. At the top of the script, you should see a VERA SANDBOX NOTE relating to the namespace (lines 5-6).
Uncomment the “using VERA;” line, to ensure we can access VERA functionality in this script.

Step 1: Initialization
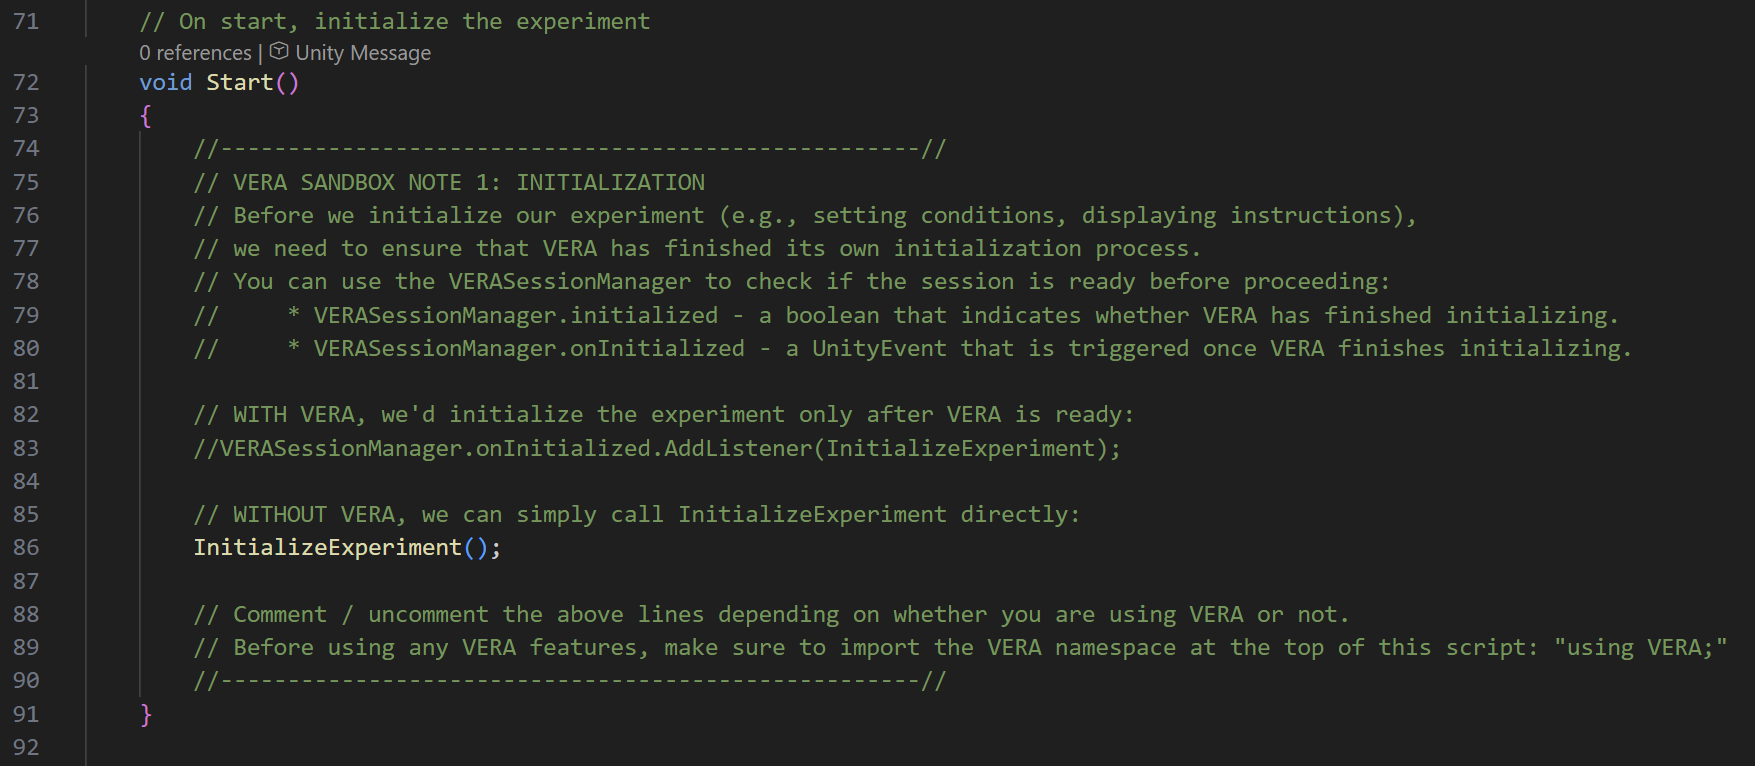
Find VERA SANDBOX NOTE 1: INITIALIZATION (line 75). This is where we will handle experiment initialization with VERA.
VERA takes some time to initialize in Unity; so, any functionality which relies on VERA being set up (experimental conditions, data logging, questionnaires, etc.) should be gated behind a check to ensure VERA is initialized before proceeding.
In order to do so, we can use the VERASessionManager.cs script. This script contains various session-related utilities for managing the VERA participant session. Included in this functionality is information on the initialization process.
You can use the VERASessionManager.initialized property to check whether VERA is initialized. Alternatively, you can use the VERASessionManager.onInitialized UnityEvent to trigger any initialization code after VERA is initialized.
In this demo, we have an “InitializeExperiment()” function in the ExperimentManager script, which initializes various aspects of the experiment, such as setting up the initial experimental conditions. This functionality will likely rely on VERA being initialized, so we want to ensure this function is only called after VERA initialization completes.
We’ll use the following line of code to call InitializeExperiment() only after VERA initialization completes:
VERASessionManager.onInitialized.AddListener(InitializeExperiment);
Comment out line 86 (where InitializeExperiment is being called directly), and uncomment the above line on line 83, to ensure that InitializeExperiment is only called after VERA is initialized.
Step 2: Participant IDs
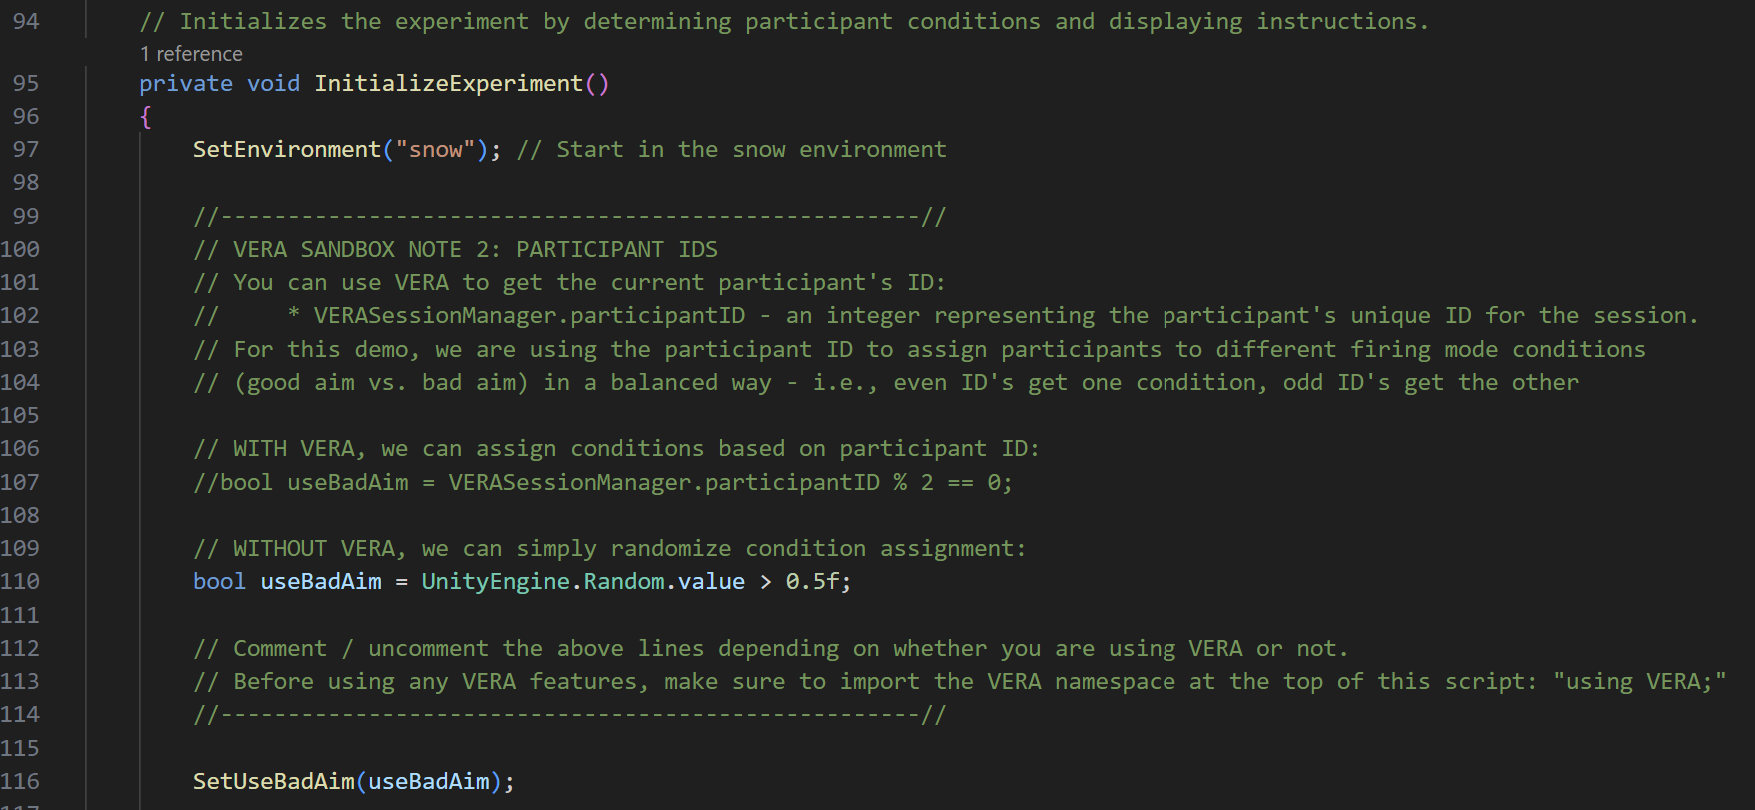
Find VERA SANDBOX NOTE 2: PARTICIPANT IDS (line 100). In this section, we will assign experimental conditions based on the VERA participant ID.
In VERA, each participant session has its own unique participant identifier, a number which starts at 1 for the first participant, then 2, then 3, etc. Almost everything in VERA is tagged or organized around this participant ID.
To access the participant ID in VERA, we can use the VERASessionManager.participantID property. This will return the participant ID for the current session as an integer.
For this demo, we want to differentiate whether the participant should use good aim or bad aim based on whether their participant ID is odd or even. This will result in an effective 50/50 split of participants in good vs bad aim conditions - matching our experimental design.
In order to achieve this behavior, we can use a modulo operation on the participant ID to determine whether it’s odd or even, and assign conditions accordingly:
bool useBadAim = VERASessionManager.participantID % 2 == 0;
Comment out line 110 (where we are setting useBadAim via random chance), and uncomment the above line on line 107, to ensure that the participant’s aim condition is determined by their VERA participant ID, rather than random chance.
Step 3: Condition Management 1
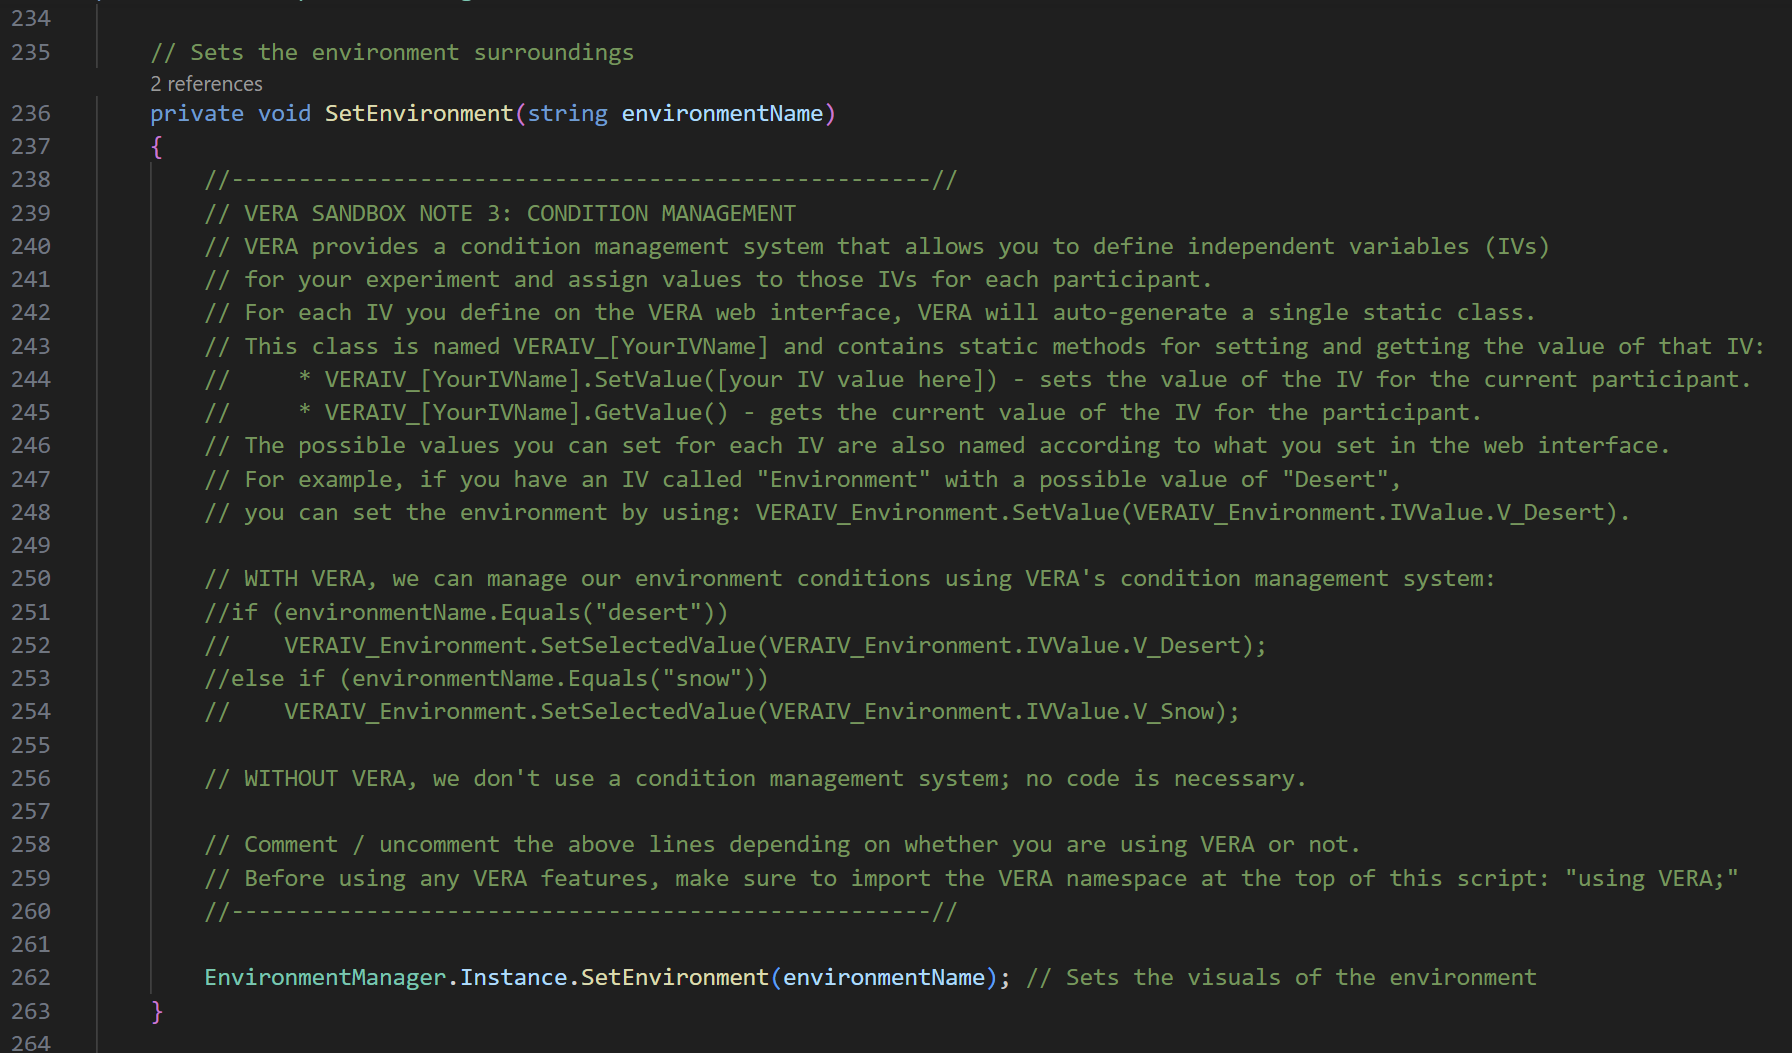
Find VERA SANDBOX NOTE 3: CONDITION MANAGEMENT (line 239). In this section, we will manage experimental conditions.
Previously on the web portal, we defined various independent variables and their levels, defining what experimental conditions we have in our experiment. For each of these independent variables, a single C# class has automatically been generated by VERA with functions to get or set the current level for that variable in the current session.
The name of the generated C# class for an independent variable is named exactly the same as you named it in the web interface, with an extra prefix of VERAIV_. So, for our “Environment” independent variable, we have a generated C# class named VERAIV_Environment. For our “AimType” independent variable, we have a generated C# class named VERAIV_AimType.
For each of these C# classes, we can Get or Set the current level for that variable in the current session. For example, for the “Environment” independent variable, we can use the following code to set the current level:
VERAIV_Environment.SetSelectedValue(VERAIV_Environment.IVValue.V_Desert);
The above code will set the value of the “Environment” independent variable to “Desert” for the current participant session in VERA. Note that the VERAIV_Environment class has an automatically generated enum called IVValue, which contains all the levels for that independent variable as enum values, named exactly as they were on the web interface, but with a “V_” prefix.
For this demo, we want to handle this “SetEnvironment” function to push the current environment condition to VERA. This is beneficial because if we properly set the environment, all data logged by VERA will automatically be tagged with the current environment value; it is additionally useful because we can ensure the current environment condition is always accurate globally across the project, without needing to rely on any central state management or passing around environment information across scripts.
This function takes in a string for the name of the current environment. Thus, we’ll want to do a simple check - if the environment is “desert”, we’ll set the VERA independent variable to “Desert”, and if the environment is “snow”, we’ll set the VERA independent variable to “Snow”.
if (environmentName.Equals("desert"))
    VERAIV_Environment.SetSelectedValue(VERAIV_Environment.IVValue.V_Desert);
else if (environmentName.Equals("snow"))
    VERAIV_Environment.SetSelectedValue(VERAIV_Environment.IVValue.V_Snow);
In this section, there is no code to comment out. However, we’ll need to uncomment lines 251 through 254, where we set the environment condition in VERA.
Step 4: Condition Management 2
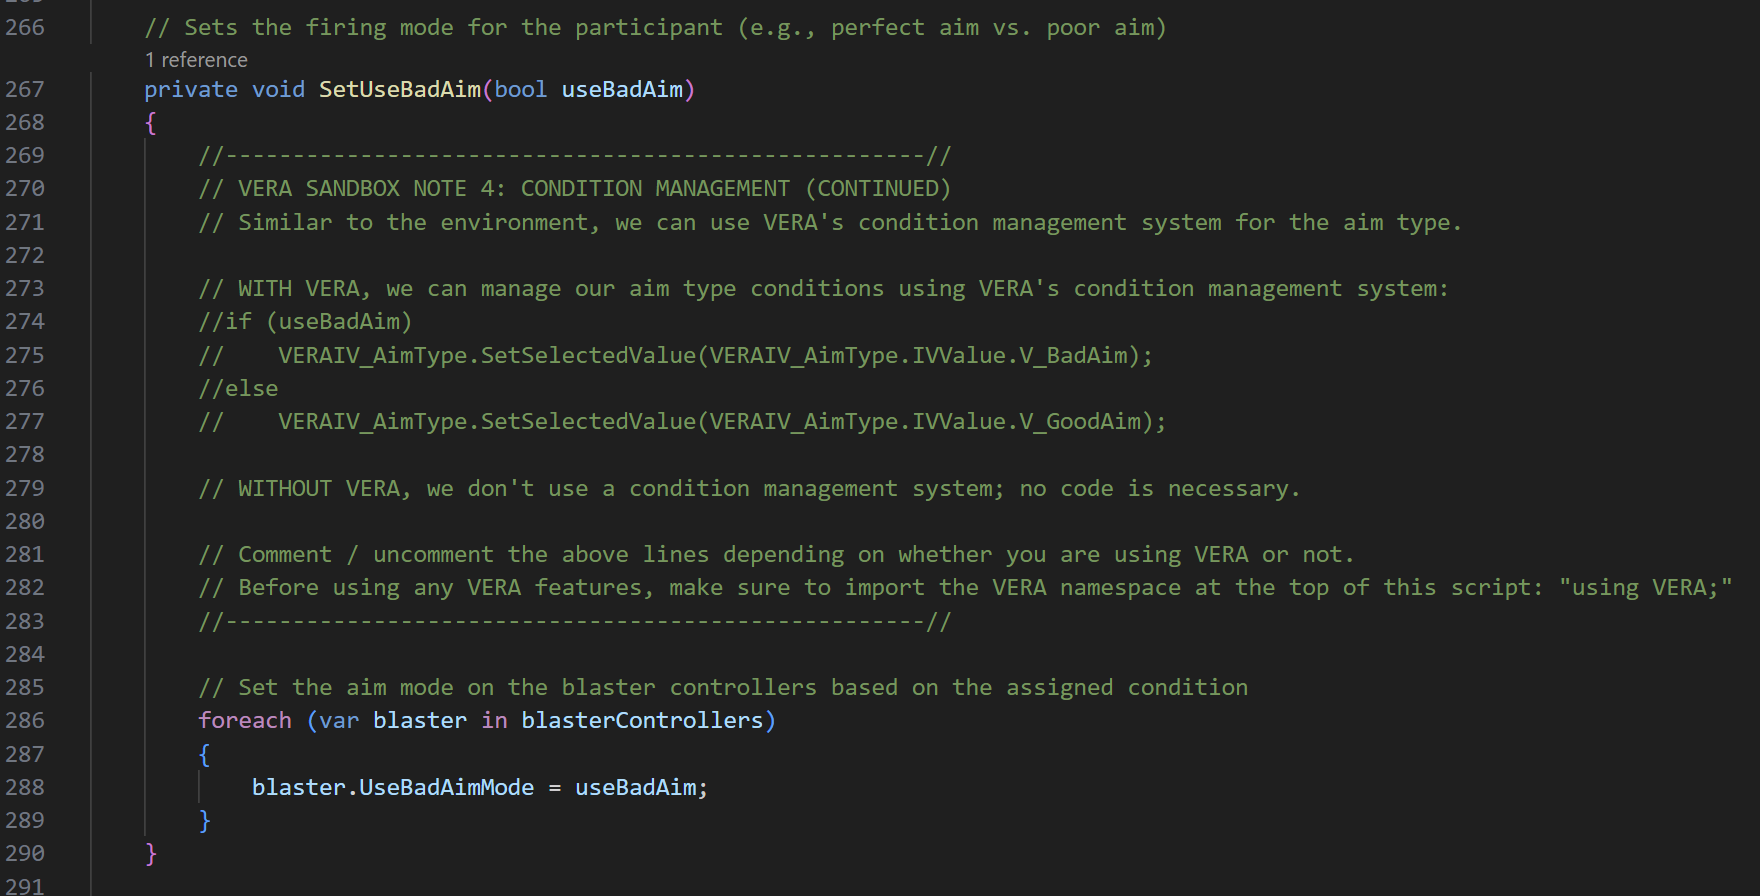
Find VERA SANDBOX NOTE 4: CONDITION MANAGEMENT (CONTINUED) (line 270). In this section, we will set up the management of the second independent variable, “AimType”.
Nearly identical to the previous step, we will use the generated C# class for the “AimType” independent variable, VERAIV_AimType, to set the current aim type condition for this participant session in VERA.
This function takes in a boolean for whether to use bad aim or not. Thus, we’ll want to check if useBadAim is true - if so, we’ll set the VERA independent variable to “BadAim”, and if not, we’ll set it to “GoodAim”.
if (useBadAim)
    VERAIV_AimType.SetSelectedValue(VERAIV_AimType.IVValue.V_BadAim);
else
    VERAIV_AimType.SetSelectedValue(VERAIV_AimType.IVValue.V_GoodAim);
In this section, there is no code to comment out. However, we’ll need to uncomment lines 274 through 277, where we set the aim type condition in VERA.
Step 5: Questionnaire
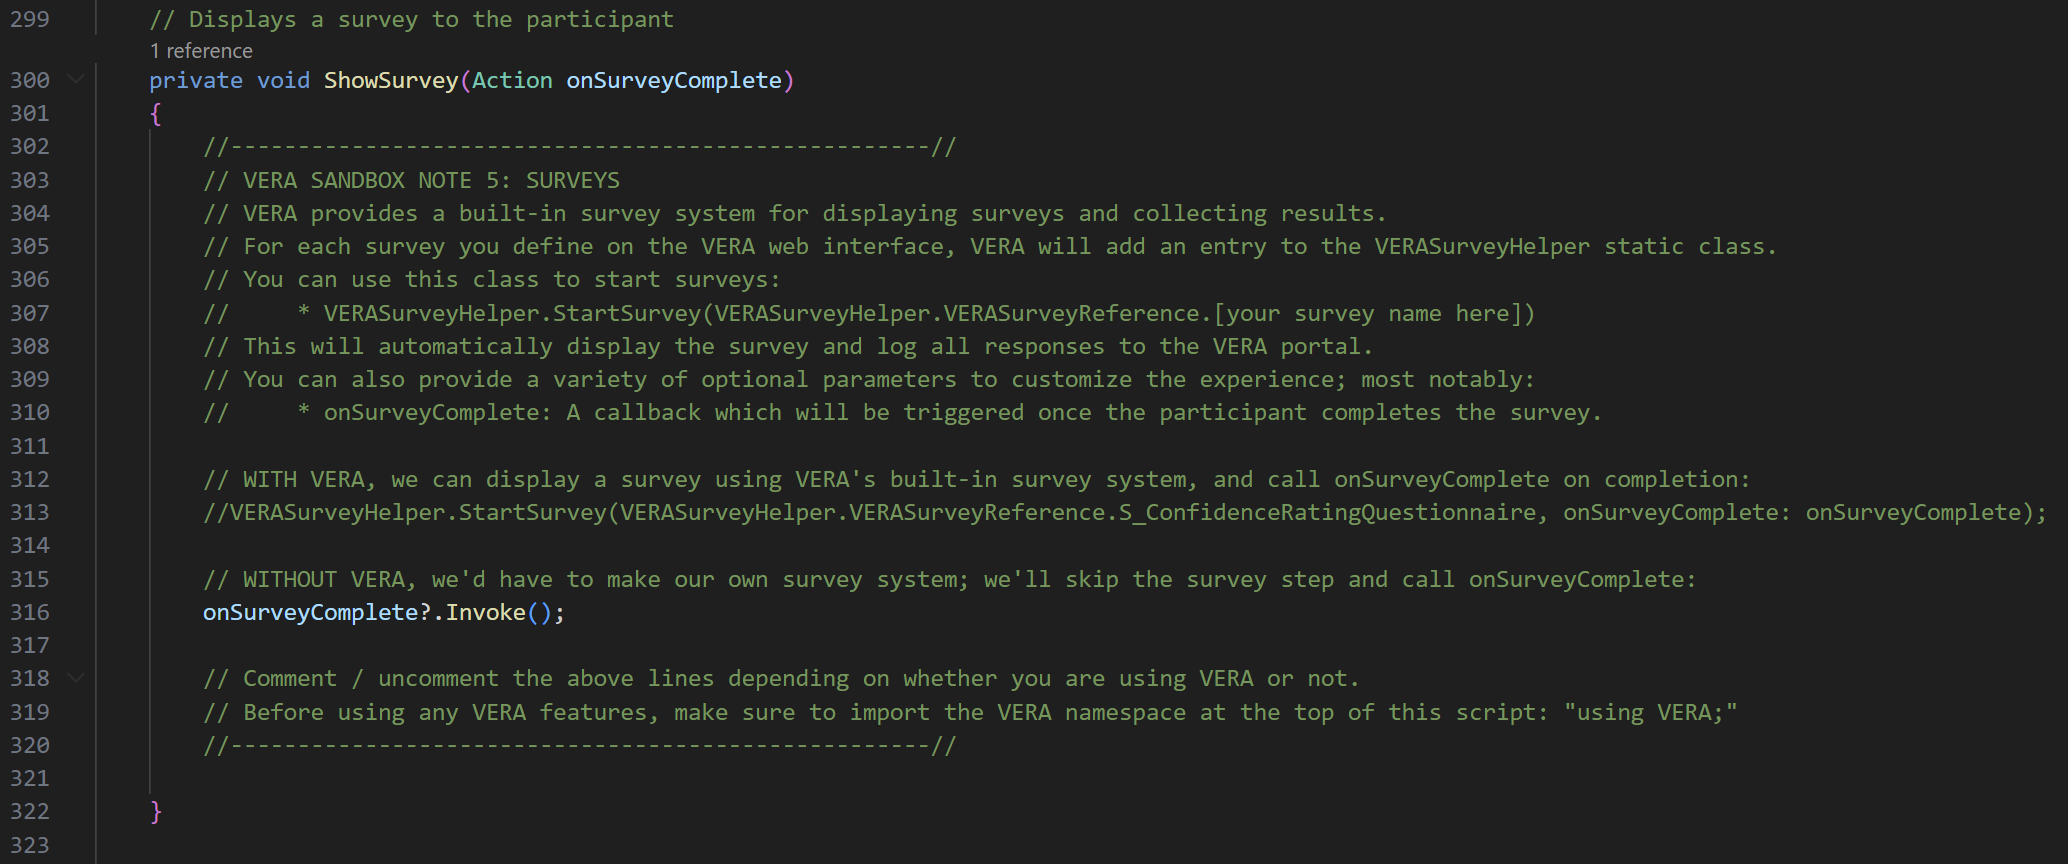
Find VERA SANDBOX NOTE 5: SURVEYS (line 303). In this section, we will set up the functionality to run a questionnaire in VR using VERA.
VERA has built-in functionality to run questionnaires in VR, and record participant responses. Any questionnaires you create on the web interface will automatically be available in Unity as well.
VERA provides a static VERASurveyHelper.cs class which can be used to run questionnaires in VR. For every questionnaire you create on the web interface for the current experiment, a new VERASurveyReference enum value will be added to the VERASurveyHelper.VERASurveyReference enum, with the exact same name as the questionnaire you created on the web interface, prefixed with S_. For example, for our “Confidence Rating Questionnaire” questionnaire, there will be a corresponding VERASurveyHelper.VERASurveyReference enum value named S_ConfidenceRatingQuestionnaire.
To run a questionnaire in VR, you can use the VERASurveyHelper.StartSurvey function, passing in the VERASurveyReference value for the questionnaire you want to run. For example, to run the “Confidence Rating Questionnaire” questionnaire, you can use the following line of code:
VERASurveyHelper.StartSurvey(VERASurveyHelper.VERASurveyReference.S_ConfidenceRatingQuestionnaire);
This will automatically launch the questionnaire in VR, and record participant responses in VERA. All data will be synced automatically with the web portal upon questionnaire completion.
This function additionally accepts optional parameters to control the display of the questionnaire, such as whether to dim the environment while the questionnaire is active, or where to position the questionnaire relative to the participant. Most notably, you can provide an onSurveyComplete callback function, which will be triggered when the participant completes the questionnaire in VR. This is useful for gating certain functionality until after the questionnaire is completed.
VERASurveyHelper.StartSurvey(
    VERASurveyHelper.VERASurveyReference.S_ConfidenceRatingQuestionnaire,
    onSurveyComplete: () => {
        // Code here will be triggered after the survey is completed
        Debug.Log("Survey completed!");
    }
);
For this demo, we’re working within a ShowSurvey function. When this function is called, we want to display the Confidence Rating Questionnaire, and then call onSurveyComplete when the questionnaire is completed. Thus, we’ll want to use the above code structure to set up this functionality.
Comment out line 316 (which was previously bypassing the display functionality and directly calling onSurveyComplete), and uncomment the code on line 313, to ensure that the questionnaire is properly displayed in VR, and that onSurveyComplete is called after the questionnaire is completed.
Step 6: Data logging 1
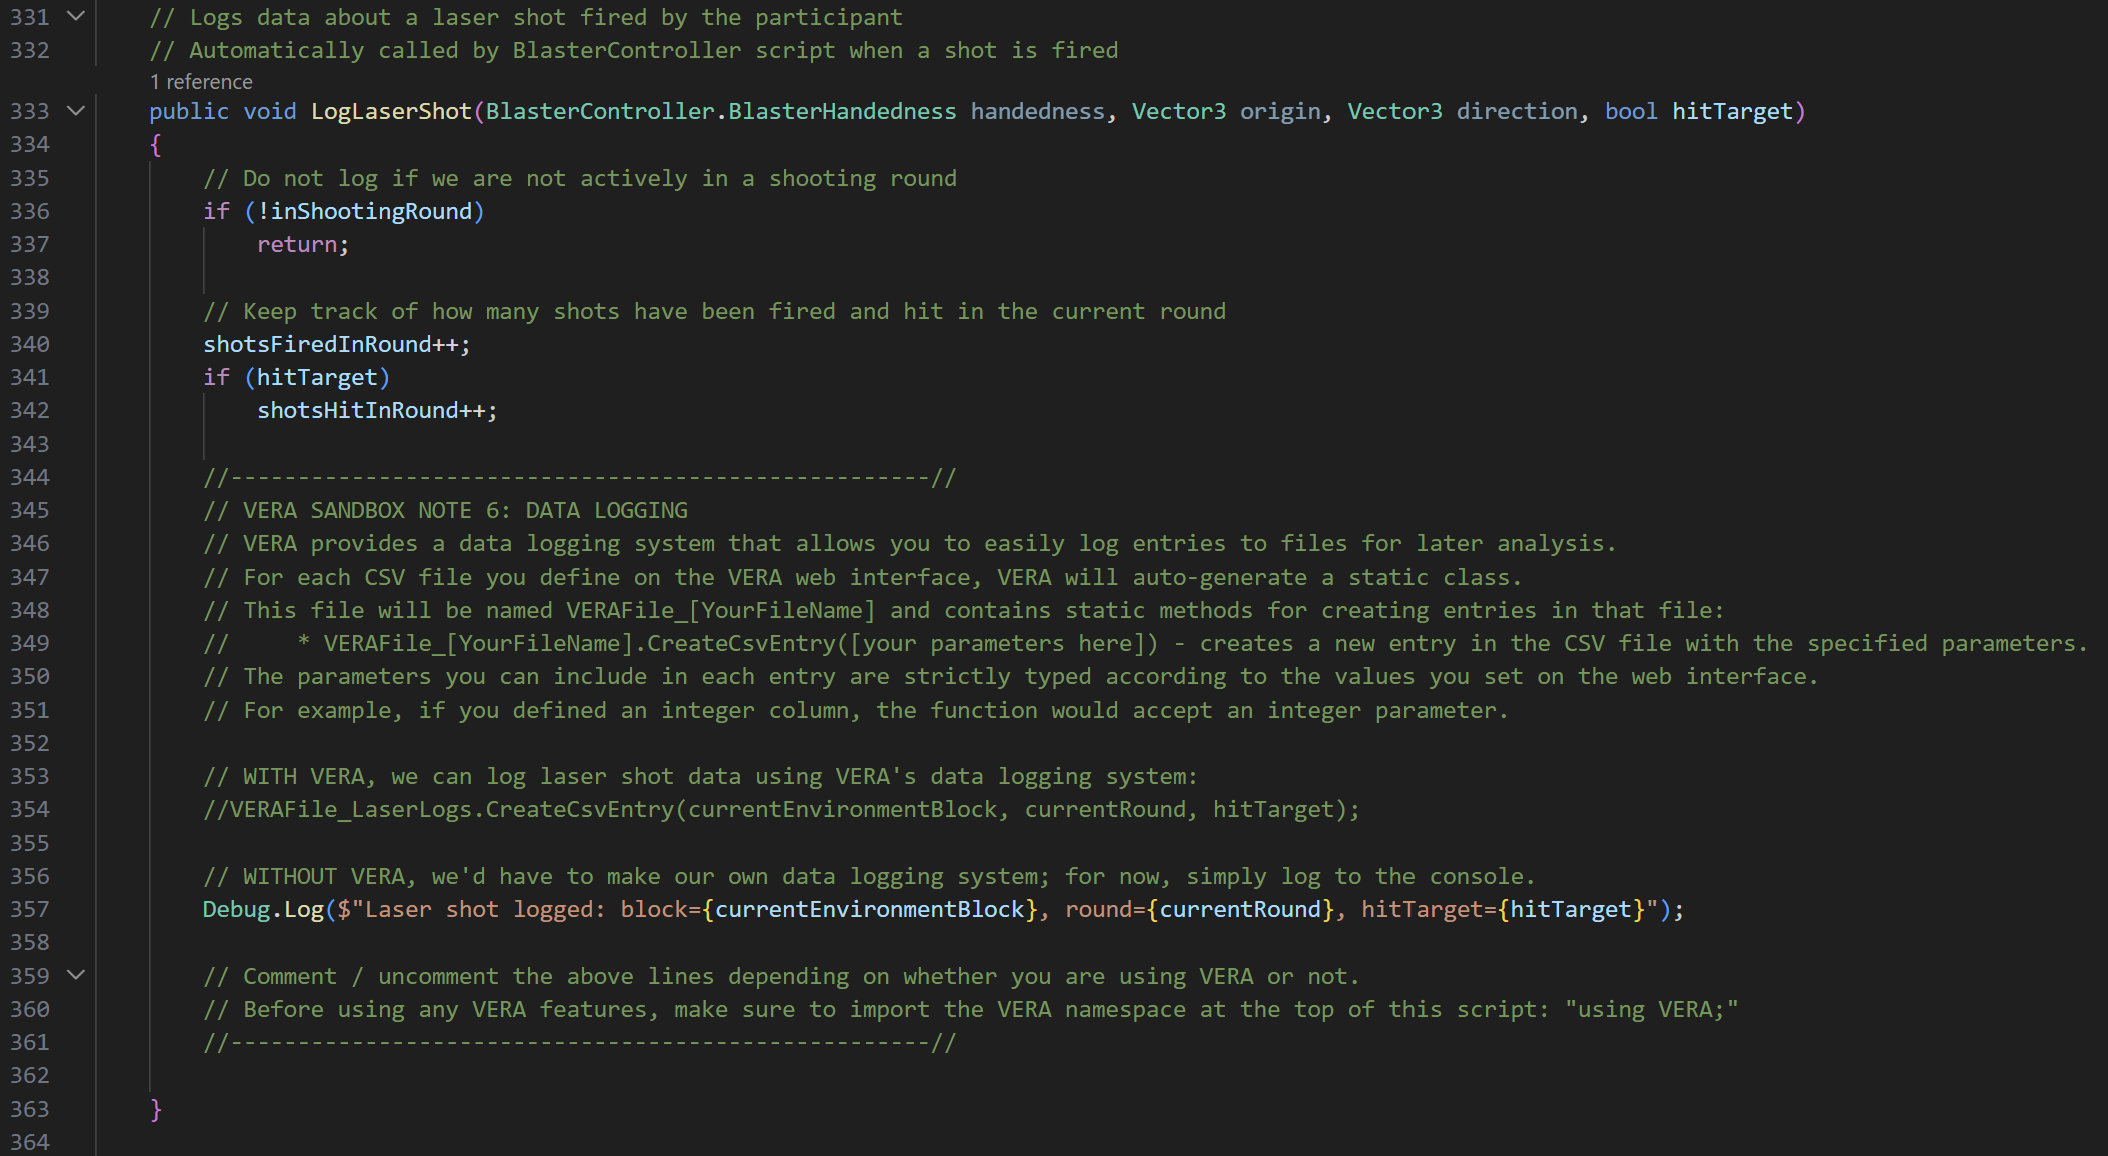
Find VERA SANDBOX NOTE 6: DATA LOGGING (line 345). In this section, we will set up the functionality to log data to VERA from Unity.
Similar to independent variables, for every file type you define on the web interface, a corresponding C# class will be automatically generated in Unity with the prefix VERAFile_. For example, for our “LaserLogs” file type, there is a generated C# class named VERAFile_LaserLogs.
To log data to a file for the current participant session in VERA, you can use the CreateCsvEntry function on the corresponding VERAFile_ class. This function takes in parameters strictly according to the column setup you defined on the web interface for that file type. For example, for our “LaserLogs” file type, we defined columns for “block” (integer), “round” (integer), and “hitTarget” (boolean); thus, the CreateCsvEntry function for the VERAFile_LaserLogs class takes in parameters for block, round, and hitTarget, in that order.
// Example of logging a laser shot for the current participant session in VERA
VERAFile_LaserLogs.CreateCsvEntry(currentEnvironmentBlock, currentRound, hitTarget);
All data logged will automatically have the “pID” (participant ID), “conditions” (experimental conditions at time of log), and “ts” (timestamp of log) columns filled out by VERA, so you don’t need to worry about those - just fill out the columns specific to your data, and VERA will handle the rest.
All logged data will automatically sync to the web portal; additionally, a local backup will be stored in Assets/VERA/data.
For this demo, we want to log laser shot data to VERA whenever a laser is shot in the experiment. This “LogLaserShot” function is already called internally every time a laser shot is fired, and we already have access to the currentEnvironmentBlock, currentRound, and whether the participant hitTarget, so all we have to do is fill out the line which logs an entry to VERA.
Comment out line 357 (which was previously simply logging the laser shot to the console), and uncomment the above line on line 354, to ensure that laser shot data is properly logged to VERA.
Step 7: Data logging 2
Find VERA SANDBOX NOTE 7: DATA LOGGING (CONTINUED) (line 371). In this section, we will set up the data logging of the second CSV file, “RoundSummaries”.
Nearly identical to the previous step, we will use the generated VERAFile_RoundSummaries class to log summary data for each round to VERA. As a reminder, this file type takes in columns for the “block” (integer), “round” (integer), “totalShotsFired” (integer), “totalShotsHit” (integer), and “accuracy” (float). We already have access to all these parameters (currentEnvironmentBlock, currentRound, shotsFiredInRound, shotsHitInRound, and accuracy, respectively), and this function is already called internally at the end of each round, so all we have to do is fill out the line which logs an entry to VERA.
Comment out line 378 (which was previously simply logging the round summary to the console), and uncomment the above line on line 375, to ensure that round summary data is properly logged to VERA.
Step 8: Session finalization
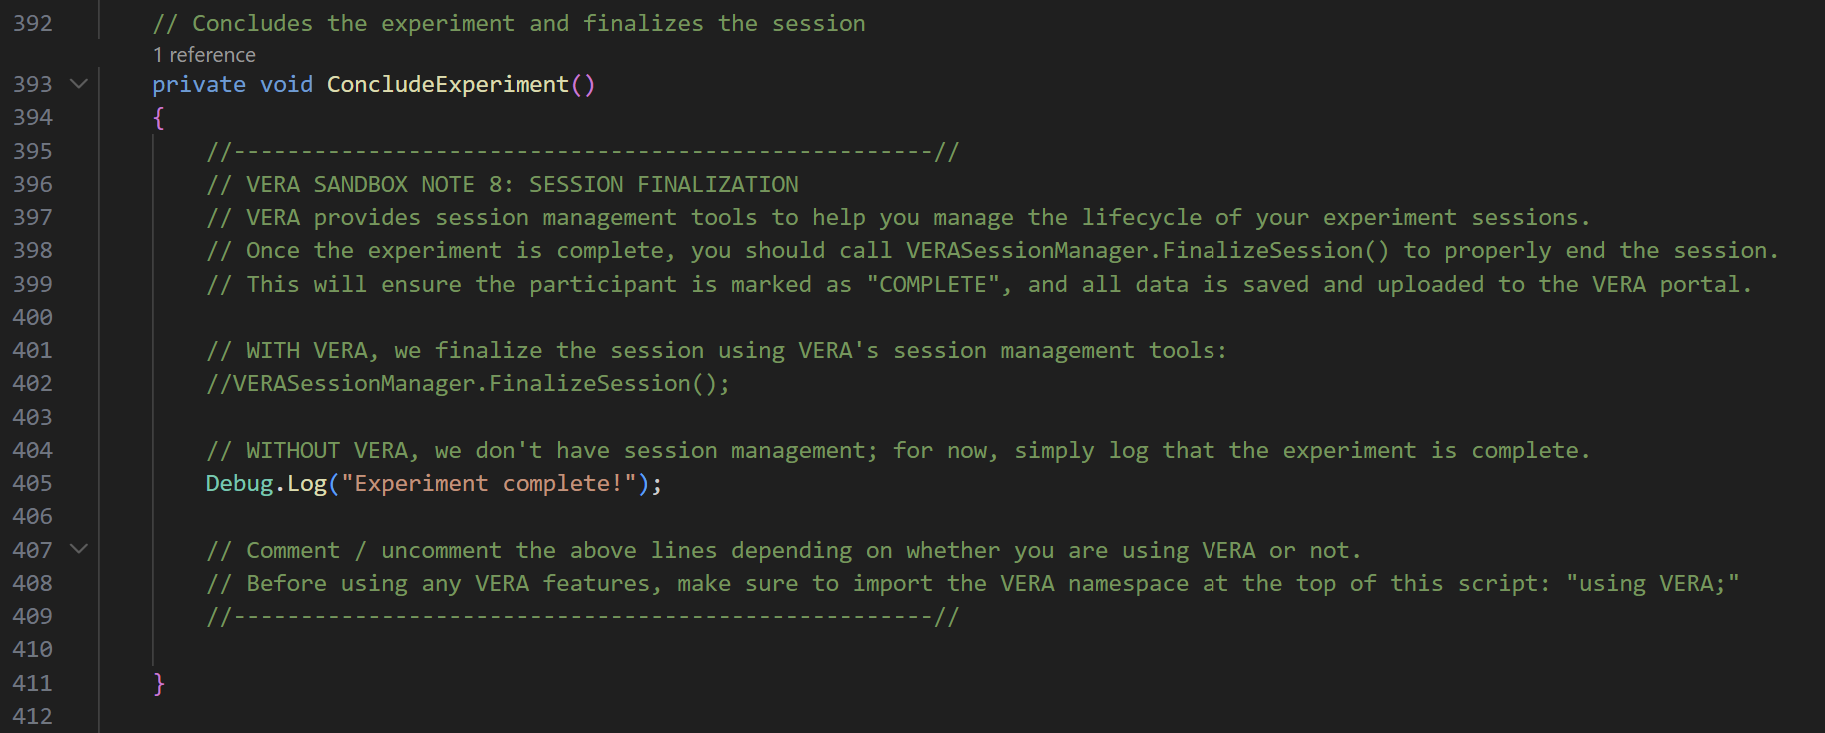
Find VERA SANDBOX NOTE 8: SESSION FINALIZATION (line 396). In this section, we will finalize the participant session in VERA when the experiment is completed.
When a participant finishes the experiment, we want to ensure that their session is properly finalized in VERA. This will ensure that all data is properly synced to the web portal, and that their session is marked as completed.
To do so, we can use the VERASessionManager.FinalizeSession() function, which will finalize the current participant session in VERA.
VERASessionManager.FinalizeSession();
For this demo, this ConcludeExperiment function we find ourselves in is already called internally when the experiment is completed, so all we have to do is fill out the line which finalizes the session in VERA.
Comment out line 405 (which previously simply logged the conclusion to the console), and uncomment the above line on line 402, to ensure that the participant session is properly finalized in VERA when the experiment is completed.
Conclusion and next steps
That’s it - your experiment is now fully set up to manage experimental conditions, log data, and run questionnaires using VERA!
To test out the experiment, you can run the scene in Unity by clicking the play button. If you have a headset plugged in to your computer, you can then interact with the experiment in the Game view as the participant would, and see how data is logged to VERA. You should see your results on the web portal in real time as you interact with the experiment in Unity!
In the following section, we’ll learn how to distribute the experiment remotely, and how to view results in the VERA web portal. VERA Sandbox Demo: Results
For a “cheat-sheet” quick-reference guide to the VERA Sandbox Demo, see VERA Sandbox Demo: “Cheat-Sheet” Quick Reference Guide.